Introduction
Video Mode is the project resolution, aspect ratio, frame rate, and color space. It is important to set this as you desire at the beginning of your project. If you try to change it later Shotcut will try to retain the timing of edits, but some users have reported problems, and it is risky. Also, at this time Shotcut will not automatically adjust anything for you related to size and positioning of elements like text and picture-in-picture when changing resolution. You can think of this like the page size in a word processor or the canvas size in a drawing program.
Broadcast vs. Non-Broadcast
Shotcut includes a number of video modes that are compatible with broadcast standards and thus the Blackmagic Design SDI/HDMI integration if you have that. These are also simply the most popular choices as well:
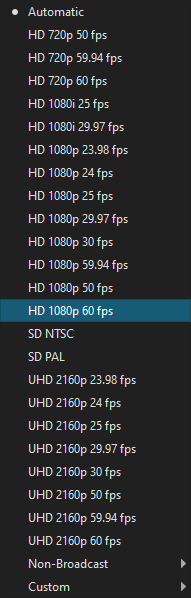
How to read these:
- HD = high definition (resolution)
- SD = standard (low) definition
- UHD = ultra-high definition (UHD 2160 is the 4K variant of UHD)
- the first number is the vertical resolution (number of lines or rows)
- the second number is the number of frames-per-second (fps)
-
pafter the first number means progressive scan -
iafter the first number means interlaced
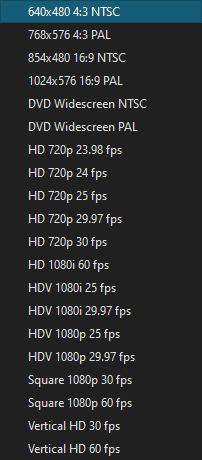
If you go to the Non-Broadcast sub-menu, there are a number of useful alternatives including trendy square and vertical resolutions:
Custom
In the bottom Custom sub-menu, you can Add… your own:
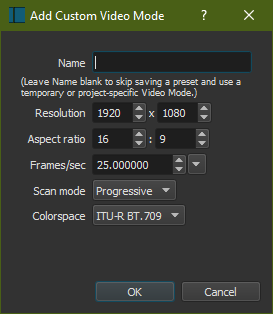
If you give your mode a name, it will be saved in the Custom sub-menu. Otherwise, you can defined something for the current project only.
The maximum resolution is 8192 x 8192. Only even numbers are accepted because most video codecs only support even values.
Click the down arrow at the end of Frames/sec to pick from some popular frame rates. Due to some weird legacy video stuff, most often something that is called 30 or 60 fps is actually slightly less. The exact numbers are achieved through fractions 3000/1001 and 60000/1001. In order to express those in Shotcut, it is important to use enough decimal digits. 29.97 or 59.94 is not considered precise enough because there are some devices and tools that use these exact values instead of the fraction values. Then, this imprecision affects Shotcut’s Automatic video mode and export. Some people do not want their source video frame rate uncontrollably altered at export. Thus, Shotcut only really uses 30000/1001 when you use 29.970030 and 60000/1001 when you use 59.940060. These special values are conveniently available in this drop-drown menu.
There are many colorspace standards for video, but at this time Shotcut only supports ITU-R BT.601, which is typical for SD, and ITU-R BT.709 for just about everywhere else except HDR.
Of course, after adding a custom video mode, you can use Settings > Video Mode > Custom > Remove… to remove it:
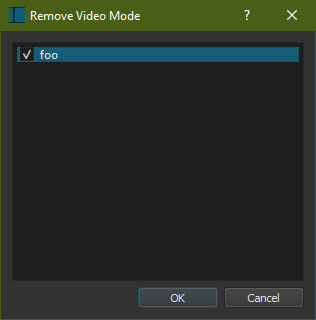
Simply click the checkbox next to the name or double-click the row until you see the check appear and click OK.
Automatic
Automatic means the resolution and frame rate will be based on the first file you add to your project. If the first file is not a video clip (for example, image or audio), then the video mode will be 1920x1080p 25 fps This is not necessarily the first clip currently in the Playlist or Timeline. Again, it is the first file you open and then add to the playlist or timeline. Therefore, it almost always recommended to wisely choose a video clip first when you use Automatic. If you are making an image slide show, you may find the default 1080p25 adequate. If not, then set your video mode! If you are only doing audio editing, then it does not matter much except higher frame rate gives you greater precision in edits.
Project vs. Settings
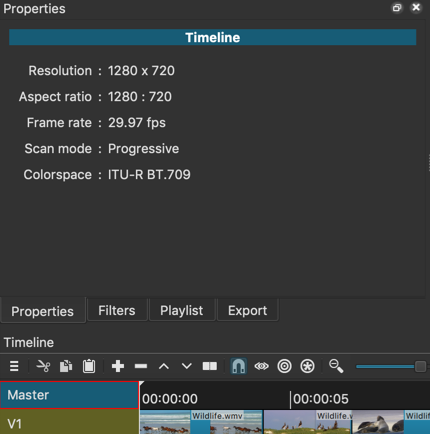
Once you start a project, the current Video Mode is adopted (not Automatic) or determined (Automatic). Then, when you load a project, the Video Mode in the Settings will be checked if it matches your project. Otherwise, if a match is not found Automatic is checked. (Versions before 20.06 did NOT change its checkmark to indicate the project’s mode.) You can also see the video attributes of a currently opened project - assuming it is using the Timeline - click Output (this was named “Master” in versions before 20.06) in the top left corner and view Properties.
You can change the project video properties by choosing a Video Mode in the Settings menu; However, as mentioned above, be careful with this because Shotcut will not automatically adjust anything for you related to size and positioning of elements.