The Time Remap filter is the first filter that allows altering the timing of the underlying source clip. It maps clip time to output time.
See also
Limitations
- It can only be added onto clips with NO B-frames. If you try to add it to such a clip, it shows the Convert to Edit-friendly dialog.
- A proxy clip can mask the above check for B-frames and then export may be very slow or give bad results. However, it may also be a very convenient workaround for the check and dialog mentioned above if you are patient and confident to troubleshoot and fix problem areas upon export.
- This filter cannot be disabled.
- This filter does not support simple keyframes or filter trimming.
- This filter can not be applied to tracks or the timeline output.
- The audio waveform does not reflect any of the changes.
Usage
TL;DR
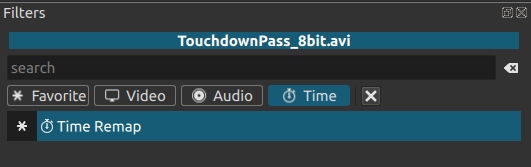
Filters > Time > Time Remap > Keyframes
Hold Ctrl to drag a keyframe vertical only or Alt to drag horizontal only except on macOS these are ⌘ to drag vertical only or ⌥ to drag horizontal only.
More detail
The default setting for the Time Remap filter sets the output time equal to the clip time which results in no change to the clip.

The user can interact with the keyframes to change the time mapping. When the slope of the line is up, time is moving forward. When the line is flat, time is frozen (freeze frame). When the slope of the line is down, time is moving backwards (reverse). A steeper slope moves time faster.
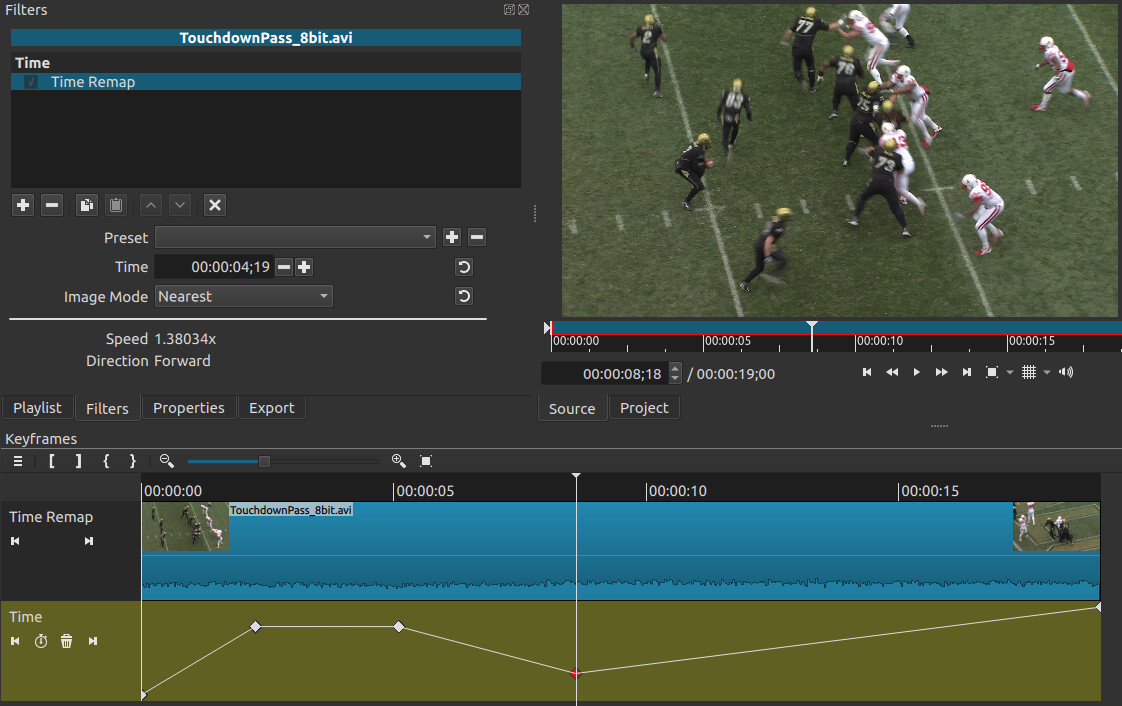
When the speed is faster than 1.0, multiple clip frames can map to the same output time.
What the keyframes mean
When a video clip is added to the timeline, there is always a mapping between the clip frames and the timeline frames. Under normal circumstances, this mapping is created internally by Shotcut, it is invisible, and it is outside of the user’s control. This is how Shotcut is able to add video clips with many different frame rates to the timeline without having to preprocess all clips to a standardized rate.
Consider what happens when 48fps GoPro footage is added to a 30fps timeline:
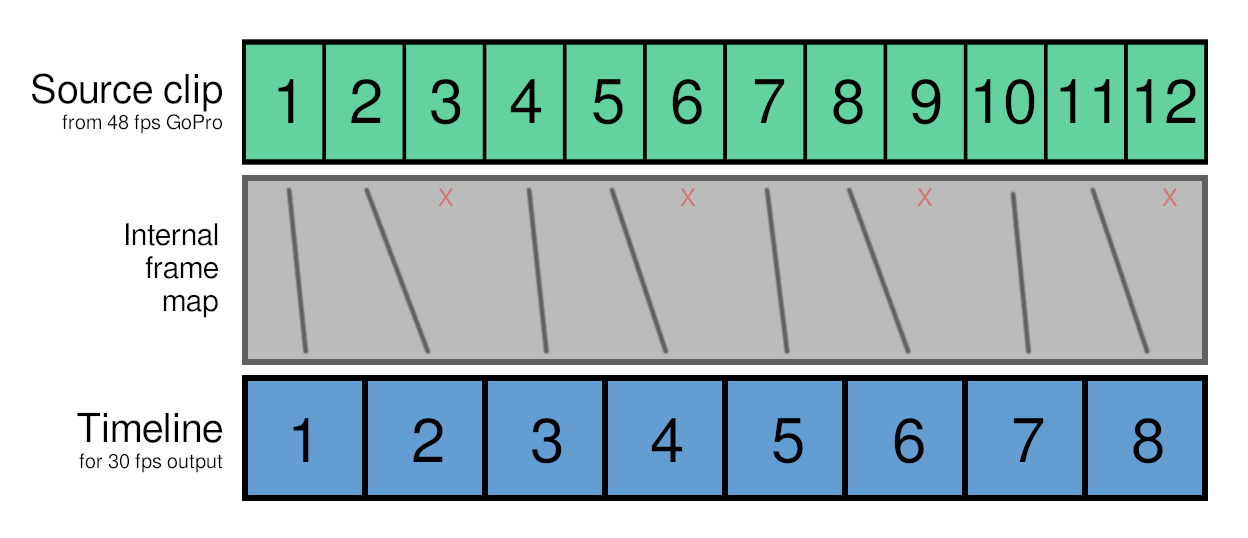
The gray area in the above image represents the frame mapping that Shotcut automatically applies so that “one second” of GoPro time equates to “one second” of 30fps timeline time. In this example, it means skipping over approximately every third frame of the GoPro footage.
The key takeaway is that a process always exists to connect input frames to output frames. The Time Remap filter allows the user to take manual control of that process and override the frame mapping.
To visualize how this works, imagine that the source clip is now on the vertical axis rather than being horizontal on the timeline. Here is an example, where the gray area represents the keyframes in the Time Remap filter:
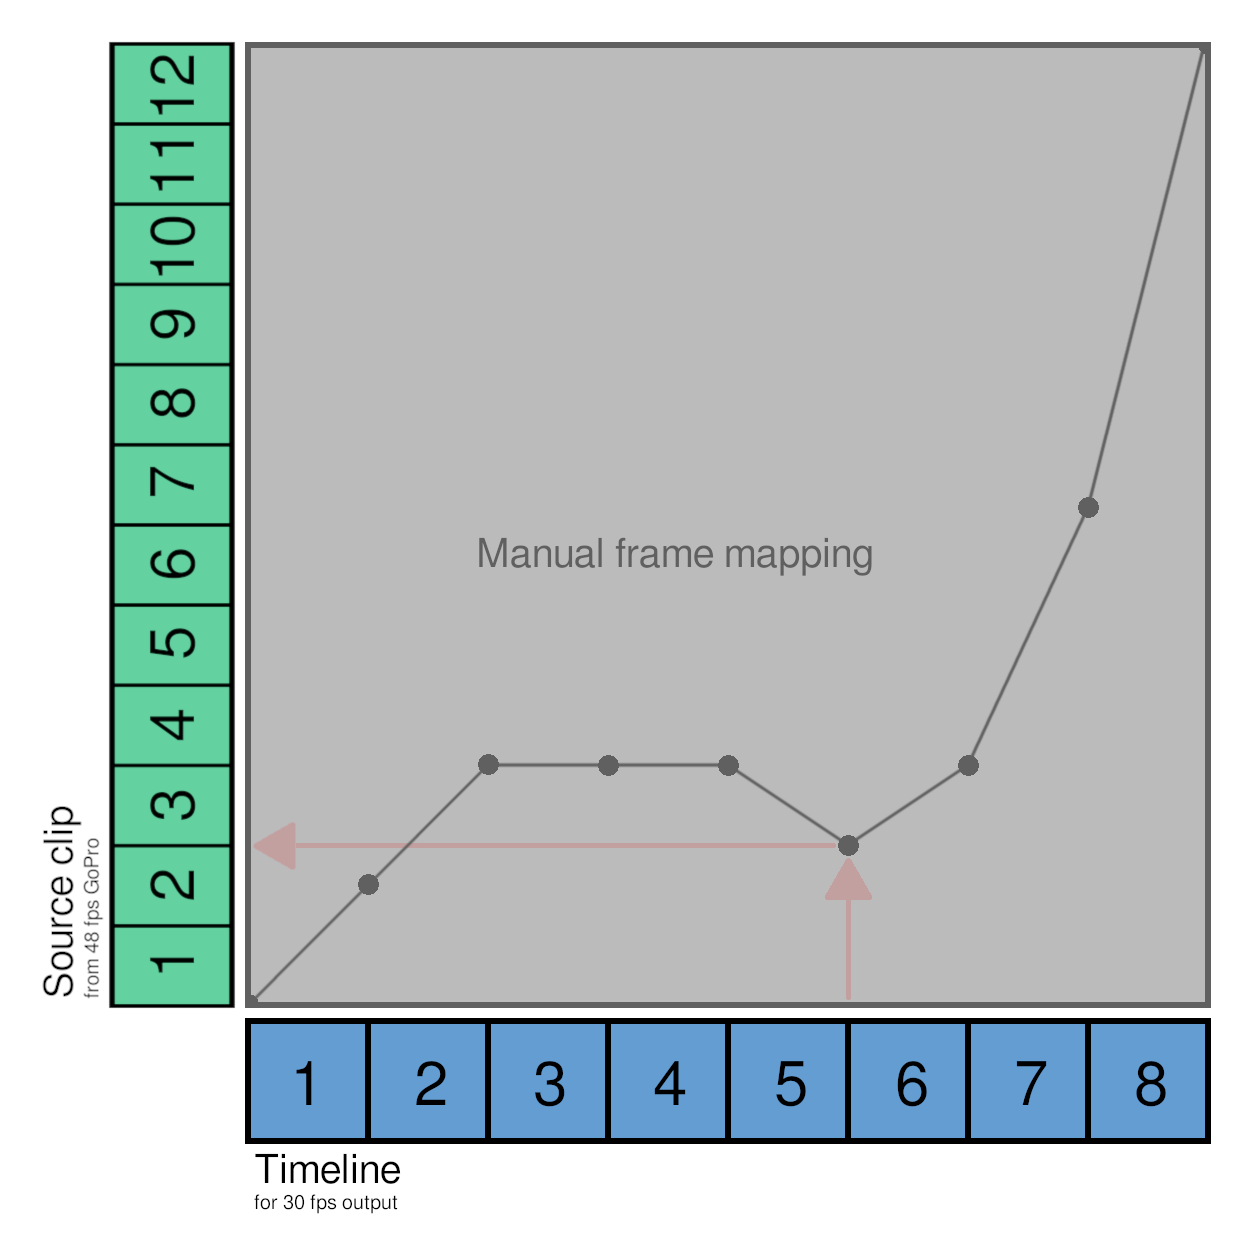
For each keyframe, imagine that you’re standing on top of that dot looking towards the source clip wall. Whatever source frame is directly in front of you is what you will see at that point in time on the timeline. In essence, the keyframes create a “lookup table” that allows any source frame to be referenced from any timeline frame, enabling time effects such as slow motion, freeze frame, and even reverse.
Since the source clip is on the “vertical axis”, the length of the source clip on the timeline is now arbitrary. The clip’s length does nothing but allocate time for the Time Remap filter to do its work. If a video is being slowed down, then the clip will probably need to have its Duration extended so that it’s long enough to accommodate the slower video. Similarly, if all that’s needed is a quick freeze frame, then the clip can be trimmed short.
To visualize how reverse works, consider the red arrows in the image. When exporting Frame 6, the export engine will look at the keyframes to determine which source frame should be selected. In this example, Frame 3 of the source is selected. Comparing timeline Frames 5-7, we get:
Timeline 5 -> Source 4
Timeline 6 -> Source 3
Timeline 7 -> Source 4
From the viewer’s point of view, the source clip went backwards from Frames 5 to 6 because the selected source frames went from 4 to 3. But when playing Frames 6 to 7, time will appear to move forward again because the selected source frames went from 3 to 4. And yes, creating a steep line (up or down) that skips over source frames will look as though the source clip is sped up.
Following this logic, we also see that source frame 4 is selected for timeline frames 3, 4, and 5. When the same source frame is selected for multiple timeline frames in a row like this, the visual effect is a freeze frame.
The Alt and Ctrl modifiers when dragging keyframes are extremely useful for scrubbing to find a specific source frame without modifying the keyframe’s placement on the timeline, or for preserving a specific source frame while changing its placement on the timeline.
Parameters
Time
This is the output time of the current frame.
- and + decrement or increment by one frame at a time. You can click and hold these to repeat.
< Sets the speed between the previous keyframe and the current frame by adding a keyframe at the current time position if needed.
> Sets the speed between the the current frame and the next keyframe by adding a keyframe at the current time position if needed.
Enable pitch compensation
Enable this if you want the audio pitch to remain close to the original and not affected by speed. The quality is degraded especially for speeds less than 0.5 or greater than 2.0.
Image mode
The Image Mode allows the user to choose between selecting the nearest frame, or blending frames frames.
If 30fps footage is sped up to 2x, it effectively becomes 60fps footage but with half the duration of the original. In this example, the sped-up clip is twice the frame rate of the timeline. This means two frames of source fit into the duration of one timeline frame. The export engine has to choose what to do:
- Choose a single source frame that is closest to the timestamp of the timeline (nearest mode).
- Blend multiple source frames into one mash-up frame with averaging (blend mode).

Quick tip: “Blend” mode could be useful for timelapse videos where the action needs to be sped up around 8x or more. Instead of seeing people or stars or whatever flickering between unpredictable positions on the screen, Blend mode would average their movements and create connective trails similar to extreme motion blur. This makes it much easier to track where people are moving and gives a much more relaxed and artsy vibe to the video. This also means not having to do a long-exposure photo sequence with your camera then stitch the photos into a video later to get the same effect… instead, it can be done as a single normal video, which can serve the dual purpose of extracting clips you care about in normal speed, but motion blurring the rest of it for a timelapse.
Here’s why it works:
Nearest mode is the same as the frame drop-or-dupe method that the timeline has used for years to handle frame rate mismatches. If someone puts 60fps video on a 30fps timeline, it drops every other frame of the 60fps video to scale it down to 30fps. It selected the “Nearest” frame to the 30fps cadence.
Extending that concept, if someone takes a 10-second clip and goes to Properties > Speed > 5x so that it becomes a 2-second clip, Shotcut accomplishes the speed-up by dropping (ignoring) four frames then displaying the fifth.
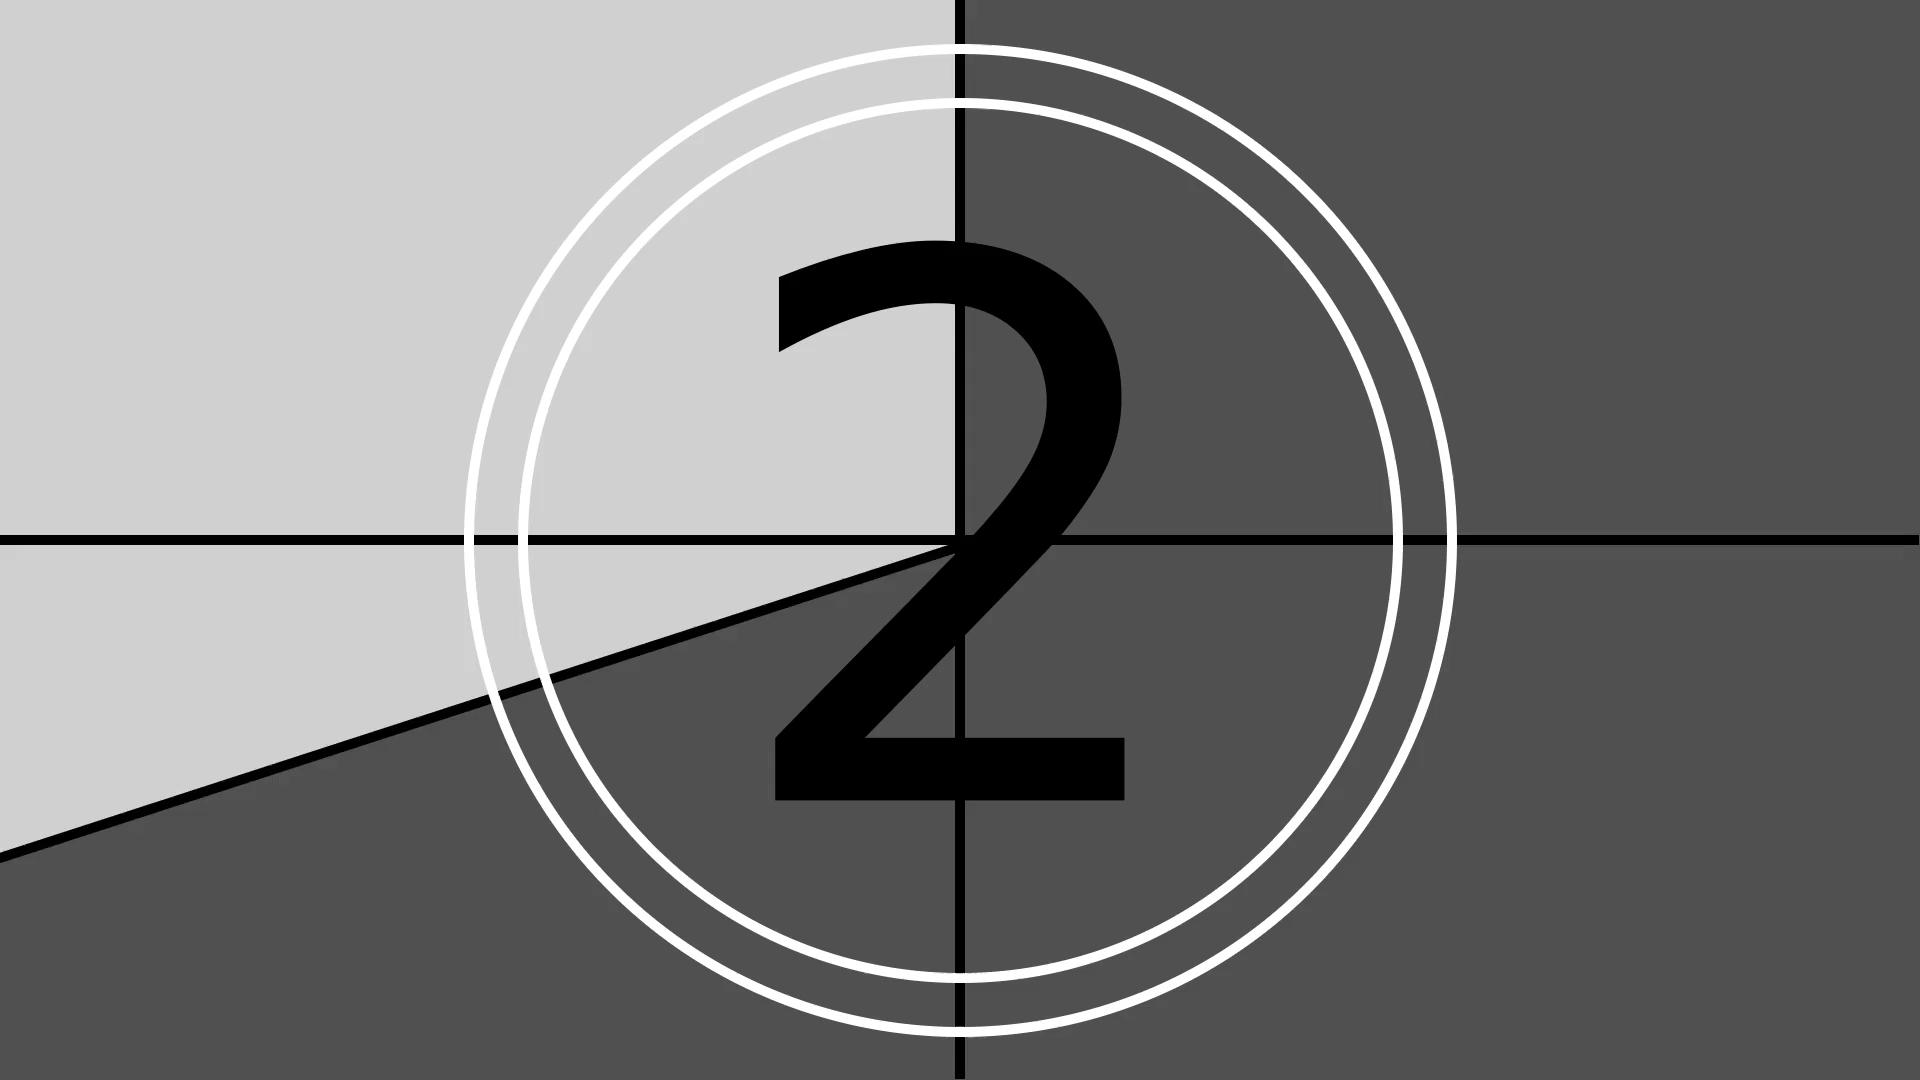
If the Time Remap filter is set to Nearest mode, then the usual dupe-or-drop method described above continues to be used. For the exported frame below, I took a 10-second countdown and did a Time Remap to 2 seconds in Nearest mode (same as Properties > Speed > 5x) then exported:
But here is (almost) the same frame when the Time Remap filter is set to Blend mode:
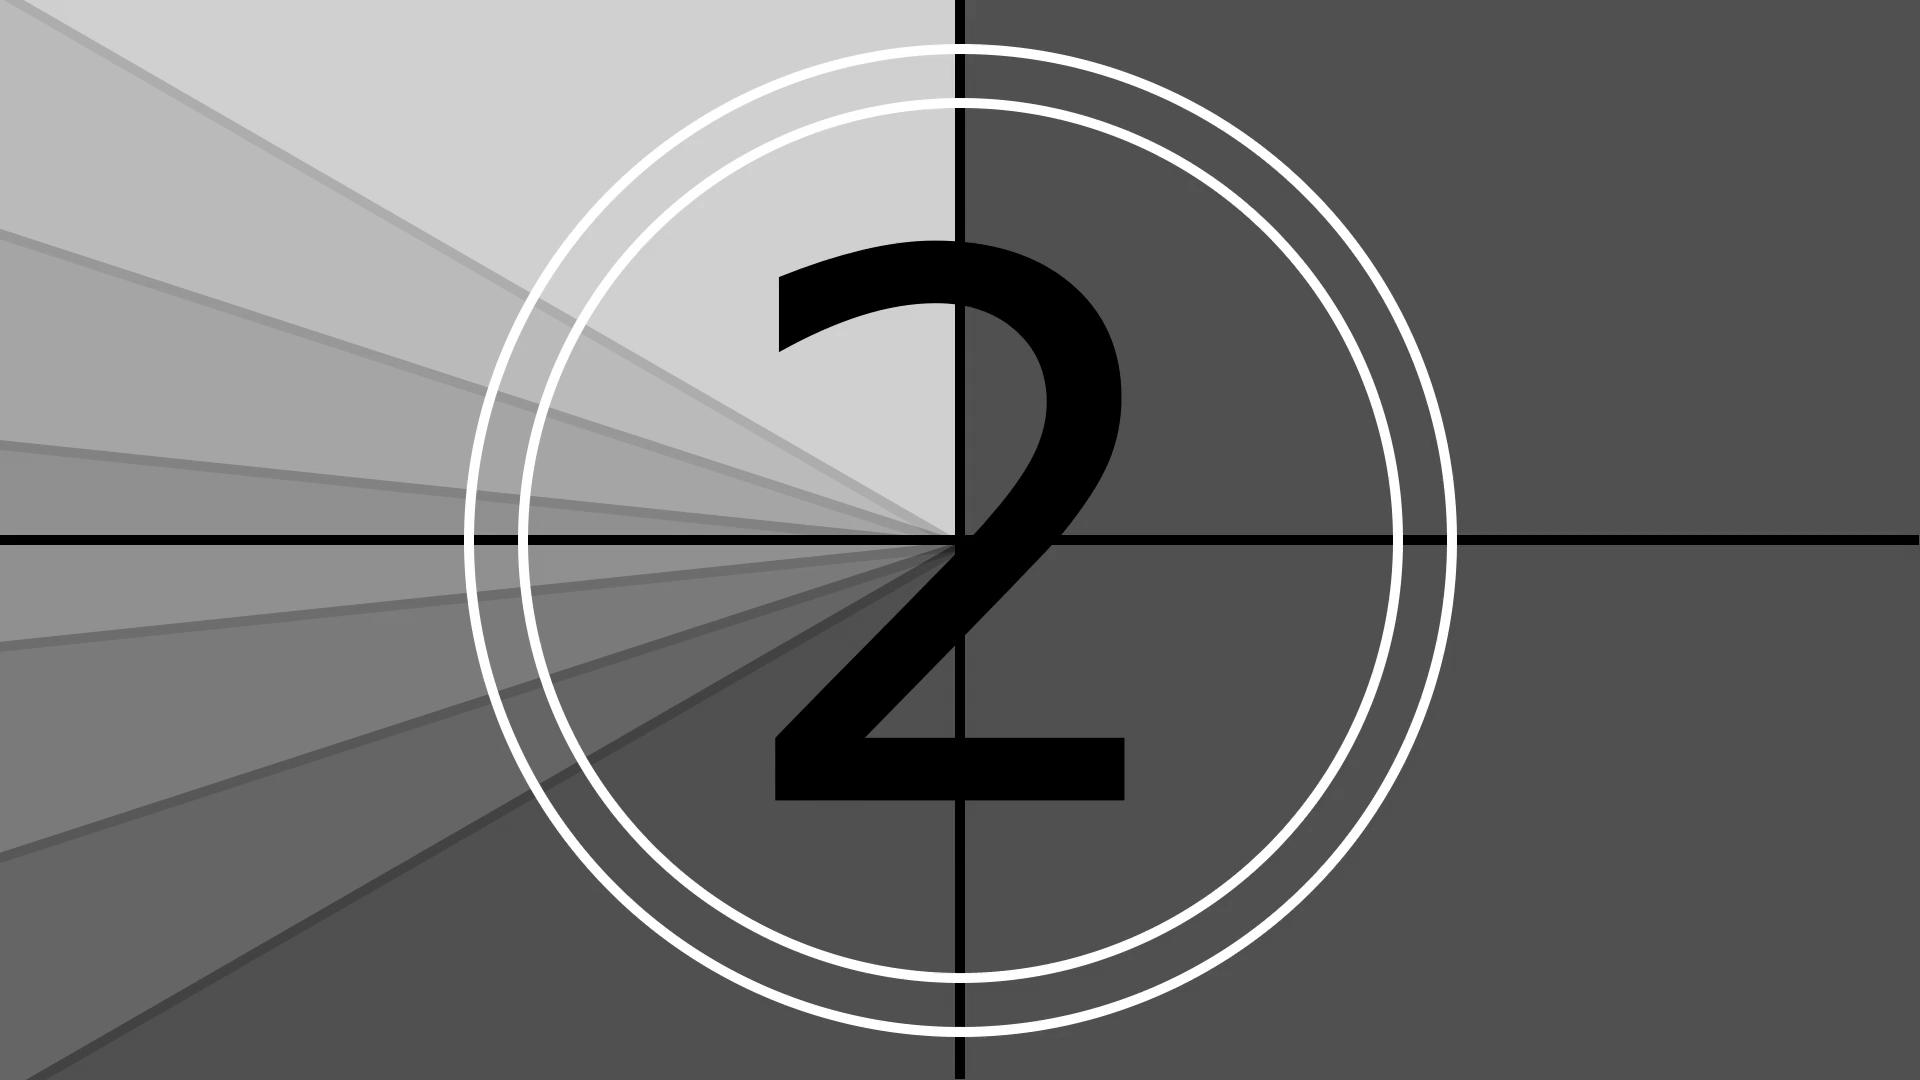
Instead of ignoring four frames and showing only the fifth, the five frames are now averaged together. This causes a gradient in the circular swipe pattern, because the dark bottom-left swipe was on the screen longer than the upper-left, therefore it went darker when averaged.
The faster the speed-up, the more frames that will be blended together.


