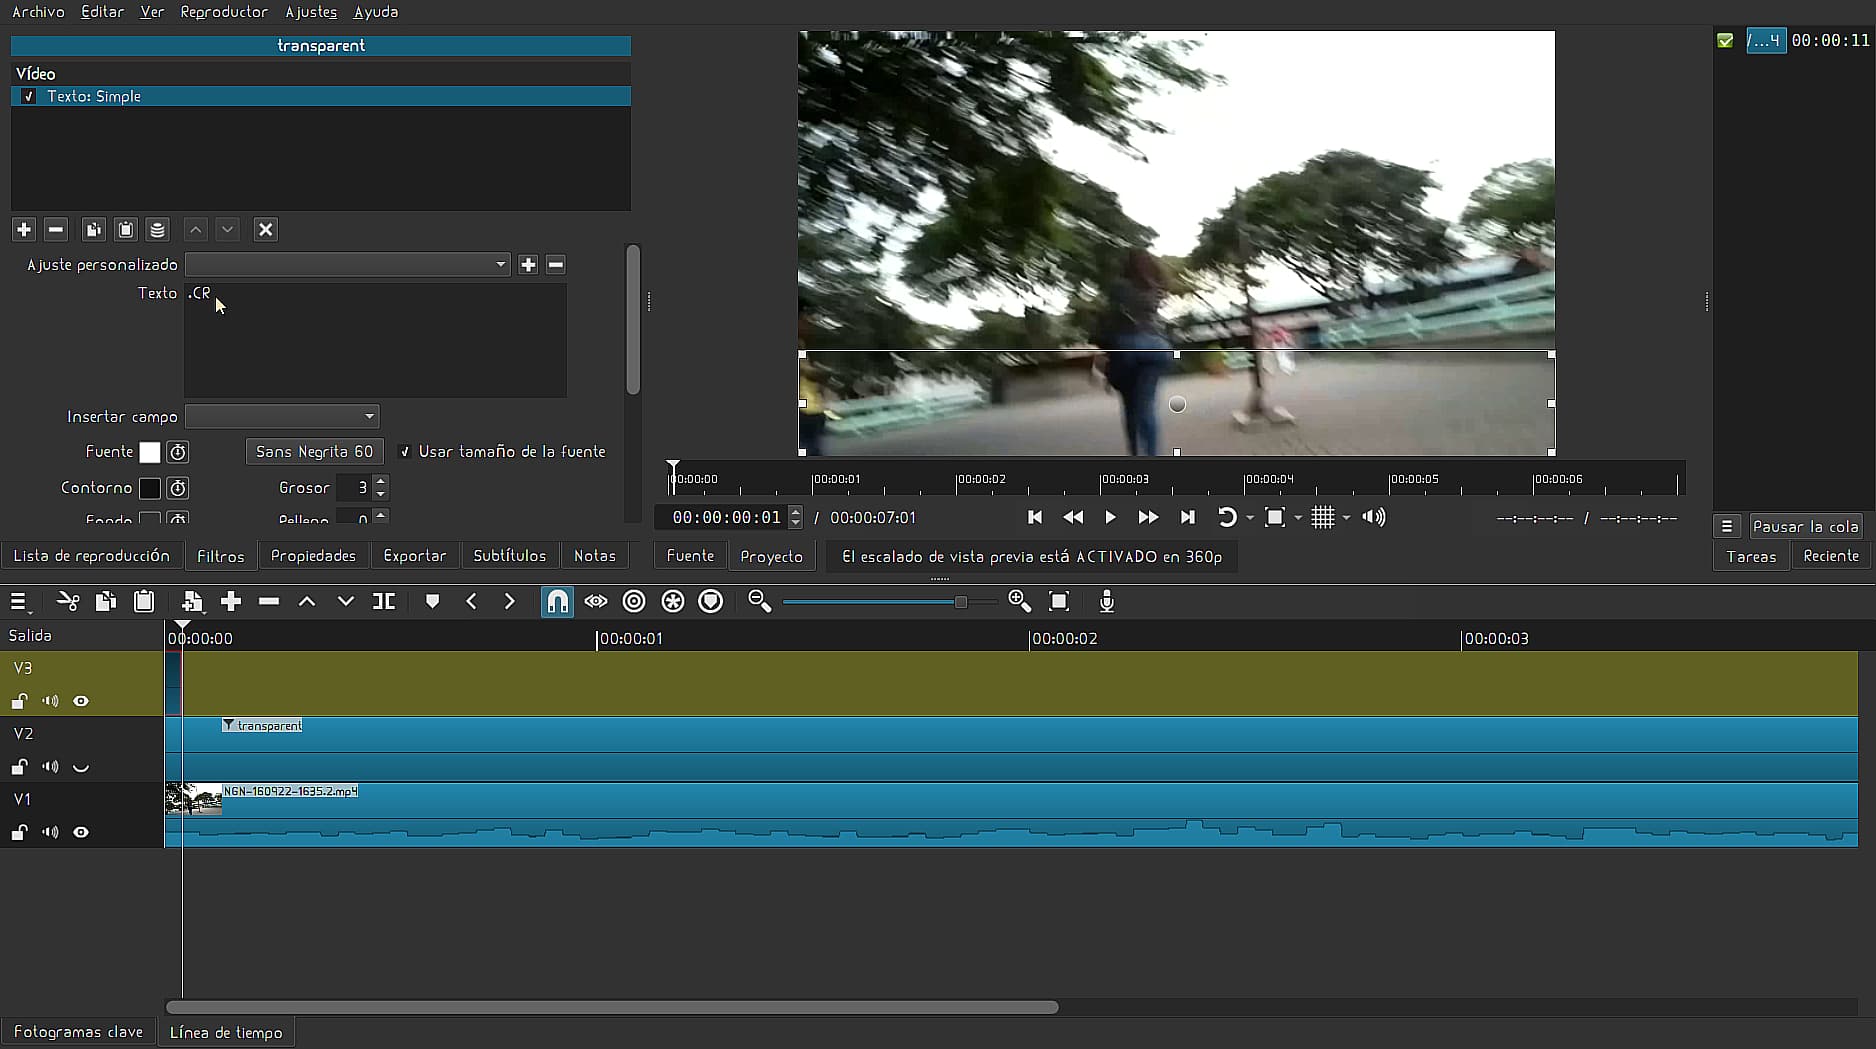
Para poner “texto“ con video de fondo en Shotcut, tenemos que crear un texto y exportarlo como una imagen png, con un fondo transparente, para luego importarlo al proyecto.
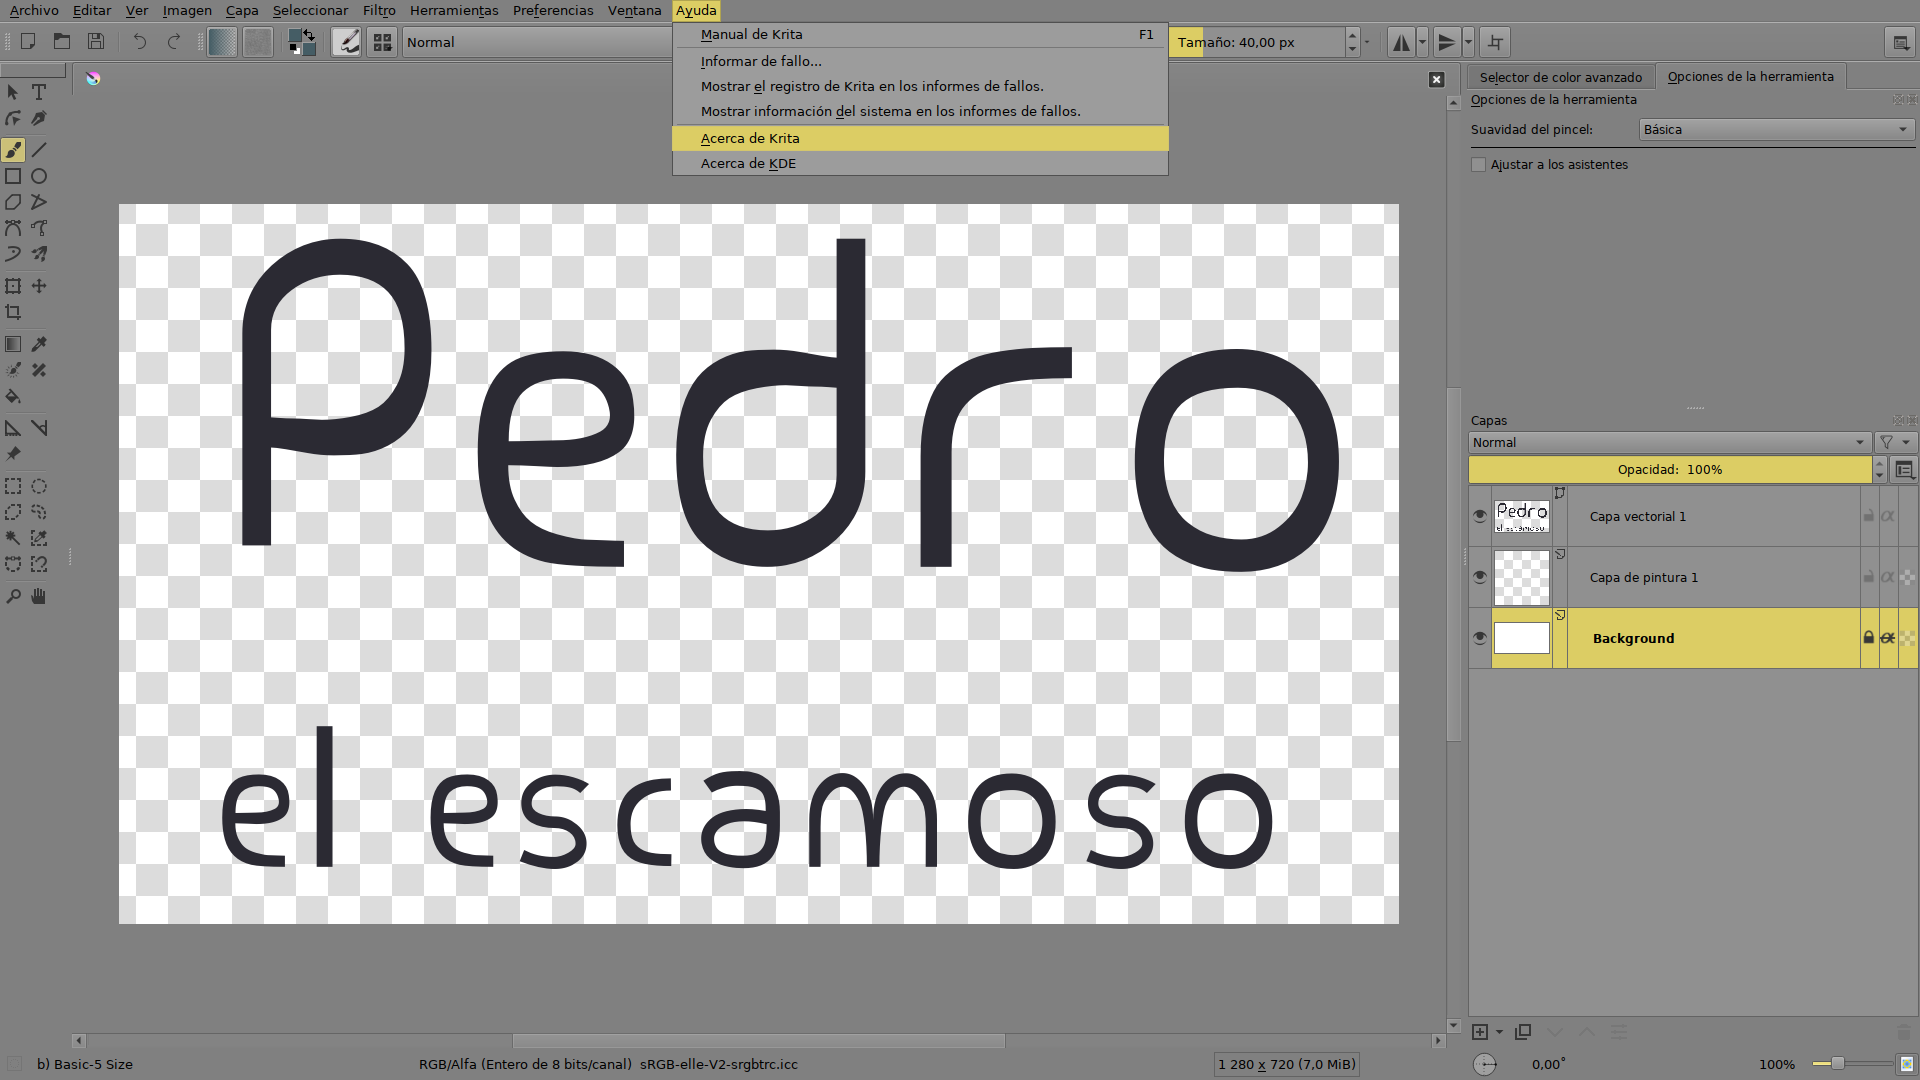
Crear el texto con algún programa como krita y guardarlo como imagen png, sin color de fondo
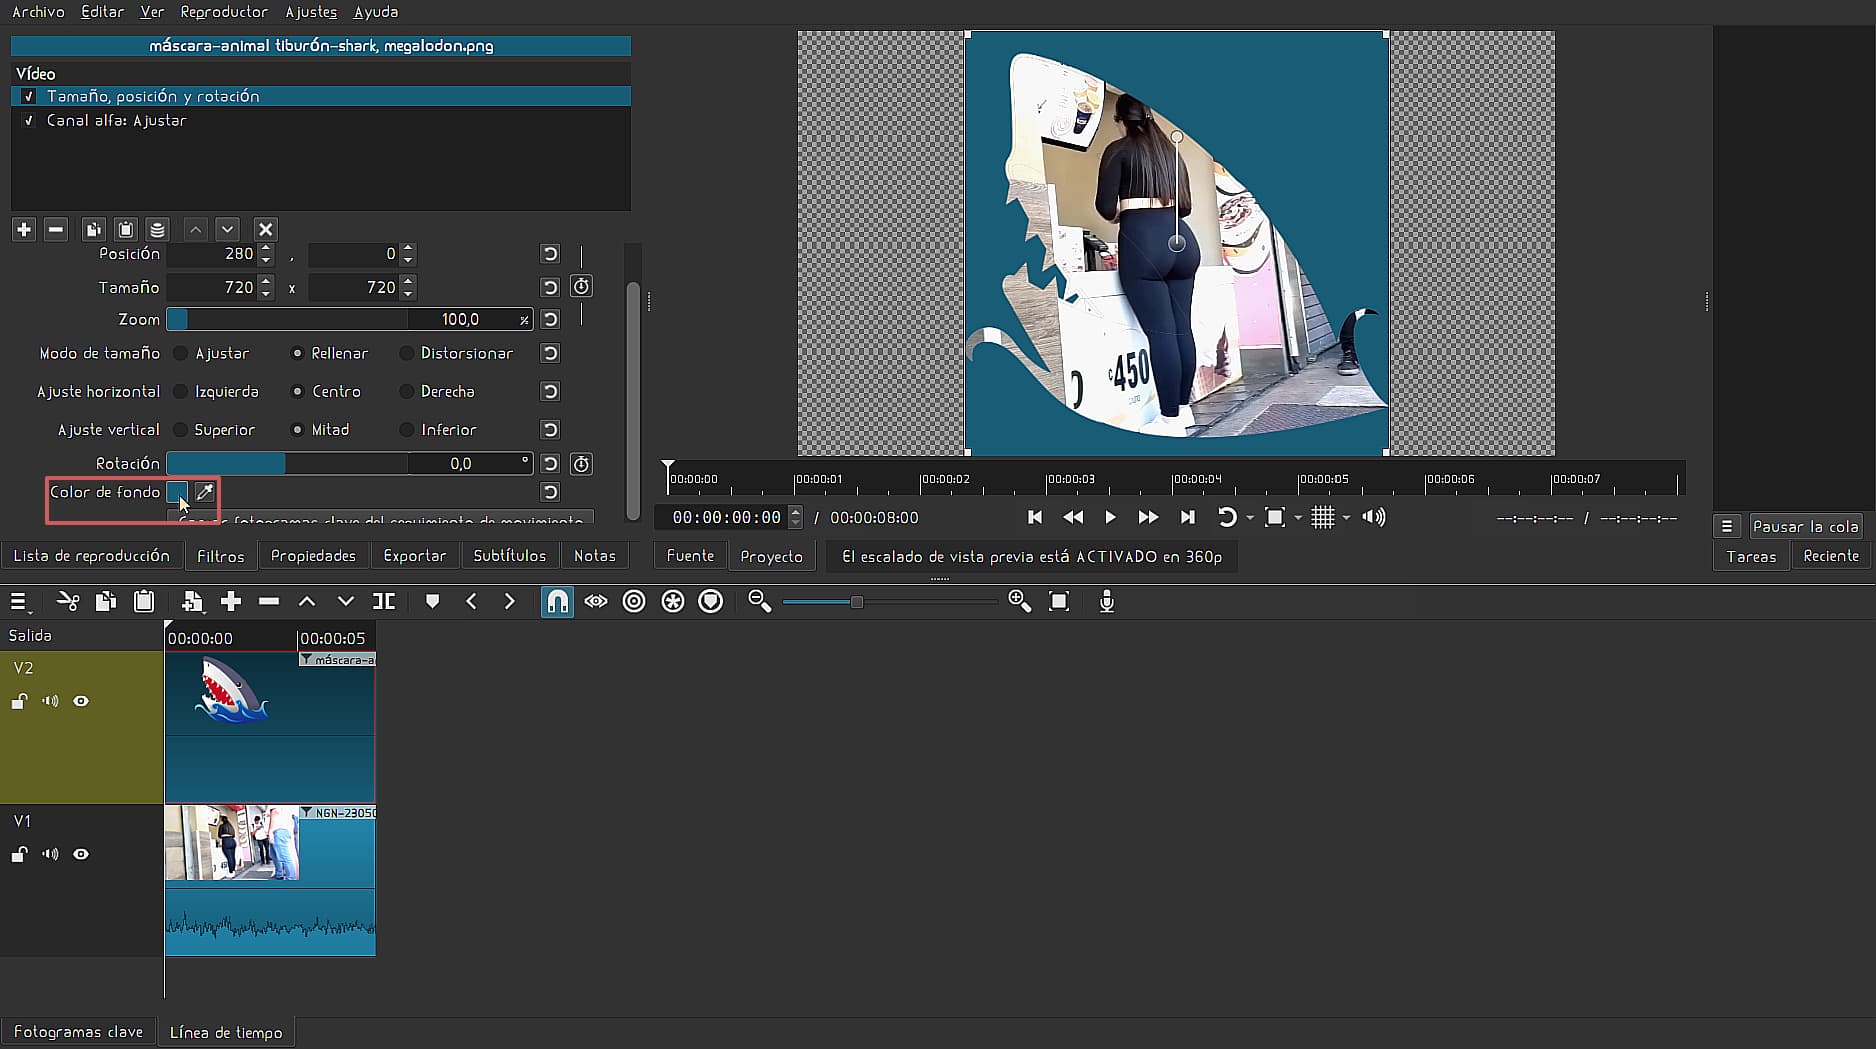
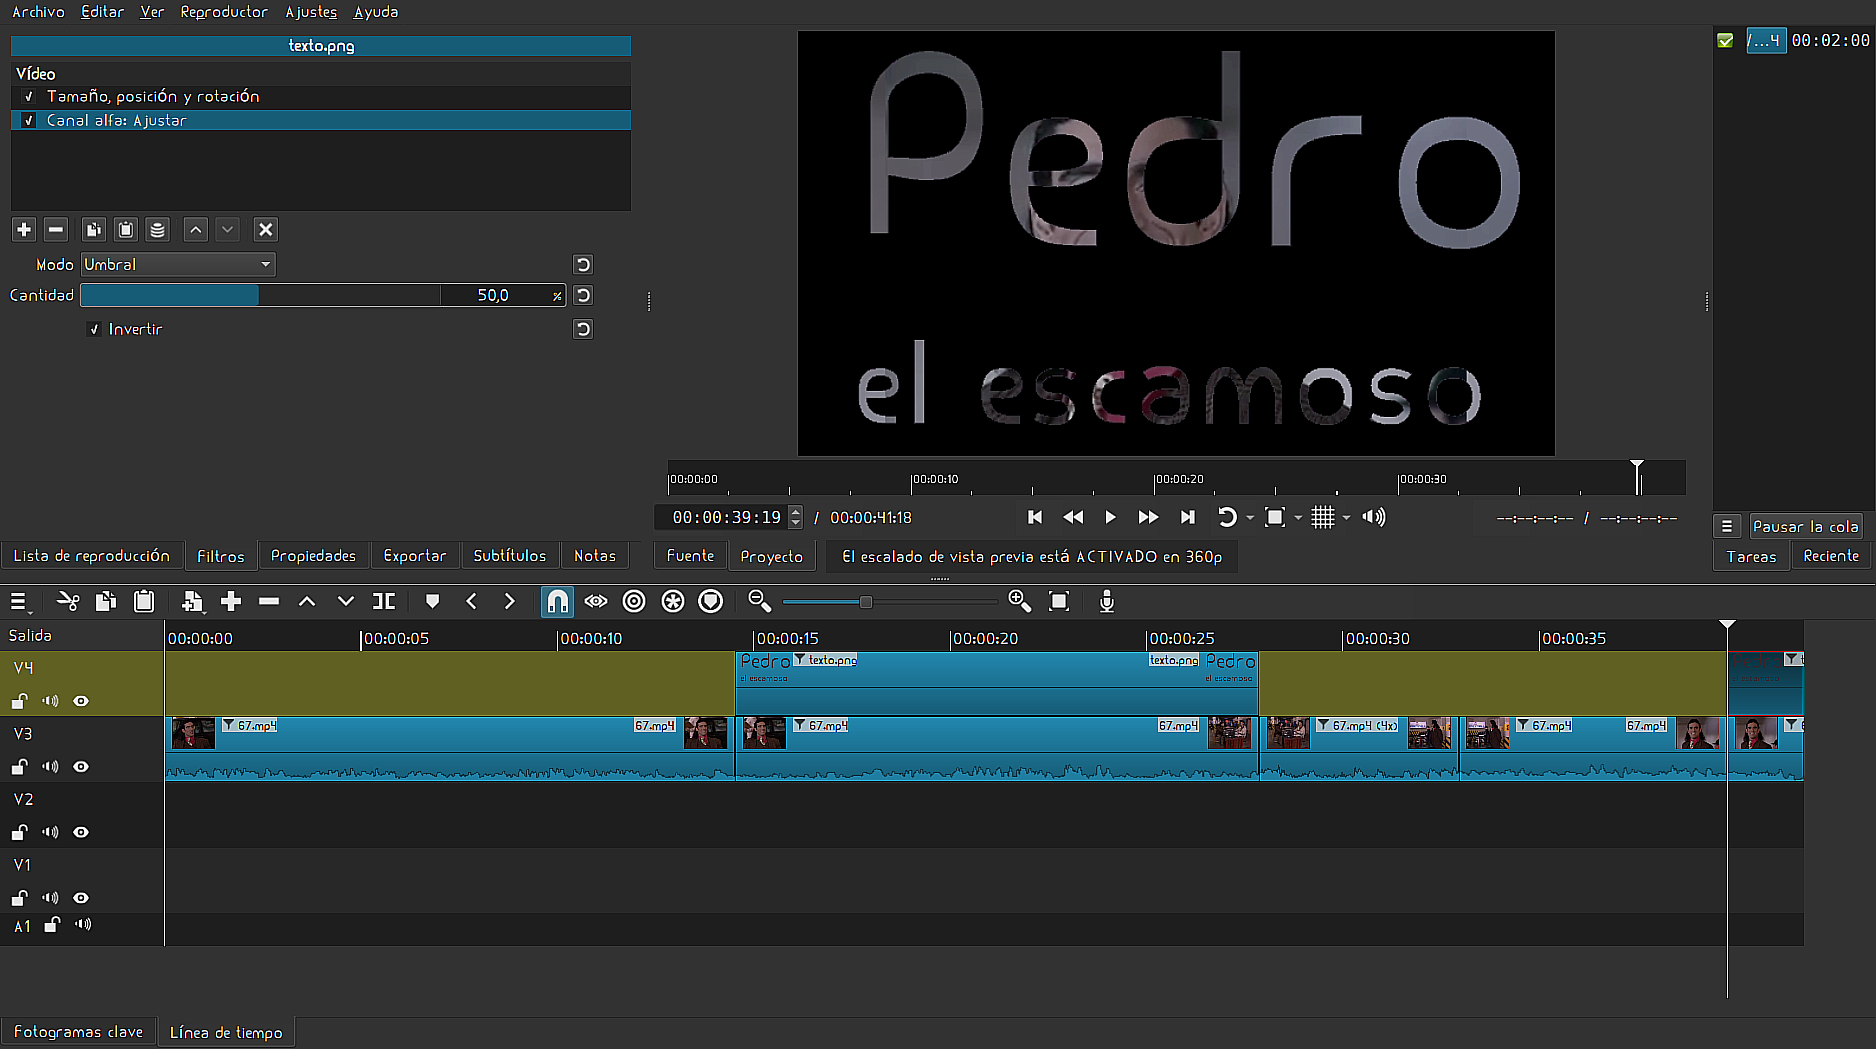
Añada primero el filtro: Tamaño, posición y rotación
; de lo contrario, a la hora de exportar el video, el fondo quedará blanco
, a pesar de que la vista previa del proyecto, lo muestra en negro
Anteriormente, exporté un proyecto modelo(.mlt) y tenía aplicado el filtro de “Tamaño, posición y rotación“, así que no descubrí ¡EL PEQUEÑO GRAN DETALLE!
La metodología que describes, conlleva más pasos toma mucho más tiempo.
No es fácil entender lo que estás haciendo, mezclando muchas cosas como “keyframes“:
Creas un cuadro de color con dos filtros de texto
Después lo exportas como una imagen “frame“ (es básicamente lo mismo)
Luego lo agarras del “portapapeles“ en la pestaña recientes y lo arrastras a la línea de tiempo.
Después aplicas un modo de fusión sobre la imagen “frame“
y ¿hay que adivinar cuál de todos es, el que funciona, si funciona? supongo.
AL FINAL quedan más preguntas que respuestas.
En la fotografía, el texto y las imágenes son tratada como capas. Sobre ellas se aplica el canal alfa y los modos de fusión.
En Shotcut el texto es tratado como un filtro; así que técnicamente no podemos aplicar el canal alfa ni los modos de fusión sobre un filtro.
DE TODAS MANERAS eso no responde a:
¿el porqué queda el fondo blanco con el canal alfa invertido, si la vista previa del proyecto lo muestra en negro?
@shotcut Dandelion, ¿por qué necesito el filtro de tamaño, posición y rotación, para lograr un fondo negro? ¡es una falla, solo sucede en Linux o qué!
Creo que cada quién es libre de elegir, sin embargo, la forma que planteas no es para nada amigable con los usuarios.
My method eliminates the step of having to use an external program (in your case Krita) to create the image.
No, I don’t have to guess. I know that to make the WHITE parts of an image transparent the blend mode to use is Multiply. It is common knowledge to anyone familiar with video or photo editing.
I do not apply the blend mode to a text filter. I used the text filter to create an image. The blend mode is apply to that image in the project.
I do not criticize your method. My intention was just to mention that there is an alternative.
But I don’t understand why you say it is not user-friendly at all
Lo que te digo es que, al final necesitas una imagen para hacerlo a tu manera, con más pasos adicionales.
En la fotografía para ponerle fondo al texto, se mueven o fusionan las capas manipulando el canal alfa; no se usan los modos de fusión.
Yo sugiero 3 pasos:
Crear la capa de texto con un programa de fotografía
Importar la imagen a una pista de video en shotcut
Aplicar el filtro del canal alfa invertido
¡Más sencillo no puede ser!
La pregunta sigue sin responderse, “el misterio” de: ¿el porqué del fondo blanco, si la vista previa lo muestra negro?
“Está bien” el método alternativo, pero luego vienen las “soluciones”, aunque todas muestran cuadros de color.
Tú usas los modos de fusión y Hudson una máscara desde archivo.
¿Estás usando Windows, puedes replicar lo que hice, tu archivo mp4 queda con fondo blanco, solamente usando el ajuste del canal alfa invertido?
If you think you found a bug, make a report in the Bug category of the forum, not here in a Tutorials category where there is a chance the developers won’t see it. I also suggest that you use English in your report.
No puedo tipificarlo como error, porque en la teoría lo “invisible” la transparencia se debería volver oscura/negra, pero termina siendo blanca. INSISTO ¿Qué es lo que hace el filtro de tamaño, posición y rotación para que cambie la situación? Dandelion @shotcut
Invert means transparent becomes opaque, and opaque becomes transparent. However, these are just the terms for 0 or 100%. If the alpha level of a pixel is 50%, then invert does nothing. Or, 25% inverts to become 75%, for example.
Personally, I’m not a fan of keyboard shortcuts in a video editor either, because we can’t see a massive change in the project later, which could ruin everything.
On the other hand, if we want to fill an icon or logo with the background video, text boxes aren’t useful; we still have to import it.
I see, but the science is still flawed. @shotcut Let me explain:
Go to menu > file > new text
/* We assume the user (they’re clairvoyant) knows it has to be transparent and will be treated as an image */
Add it to the line of text, by default.
The user enters the text with the desired format,
unchecks the “use font size” box,
and enlarges the box to fill the screen, so to increase the font size.
This shortcut saves time but requires more learning the first time.
There’s another detail there: notice that, despite typing in the filter box, I have to go to the beginning of the timeline for it to show me what I typed: “.CR.”
If the user makes the mistake of not adding it to the timeline, if they open it, it’s really show up in the source tab and that can be very confusing.
I’m not saying it’s wrong, but as a “professor” by vocation, I would never teach it, just for reasons of demonstration and content.
Without further, let me tell you that I have not used Kdenlive for 8 months, I will abandon it.
We don’t need an external program to create a “text” and put background video. 50 50
Importing the text as a PNG would be more standardized to understand and apply the filter: Alpha Channel: Adjust/ set Inverted.
The filter: Size, Position, and Rotation… would not only control the expected black background, but also allow us to play with background colors without using colored boxes.
 muestra, sample not Size, Position & Rotate Video Filter applied