Projects created with this version can NOT be directly loaded by a previous version. Only versions 21.02 and 21.03 can repair projects created in this version by removing all Time Remap filters.
Download
Get it from the link below with more detailed release notes:
Rules
Do not report about existing bugs that have not been indicated as fixed by this version.
The beta period will end by April 29.
Provide all feedback as a reply within this thread or as a GitHub Issue.
If using a GitHub issue, make sure you indicate the version.
Time Remap Limitations
It can only be added onto clips with NO B-frames. If you try to add it to such a clip, it shows the Convert to Edit-friendly dialog.
A proxy clip can mask the above check for B-frames and then export may be very slow or give bad results. However, it may also be a very convenient workaround for the check and dialog mentioned above if you are patient and confident to troubleshoot and fix problem areas upon export.
This filter cannot be disabled.
This filter does not support simple keyframes or filter trimming.
This filter can not be applied to tracks or the timeline output.
Time Remap Usage
Basically, go Filters > Time > Time Remap > Keyframes
@brian, was anything with improving the Blend mode you mentioned here:
I have to admit that the blend mode is very crude. I believe that we occasionally see frames blended when the speed is 1.0000x due to rounding errors. I think that instead of adding an option, I just need to make the blend mode match people’s expectations.
For 1.0x, there should be no blending as you suggest.
For <1.0x, it should blend between two frames proportional to the distance between the two frames of the ideal time. For example, if the mapped time calculates to frame 1.25, then it should blend frame 1 at 75% and frame 2 at 25%.
I will keep this in mind and look for a good opportunity to improve the blending logic.
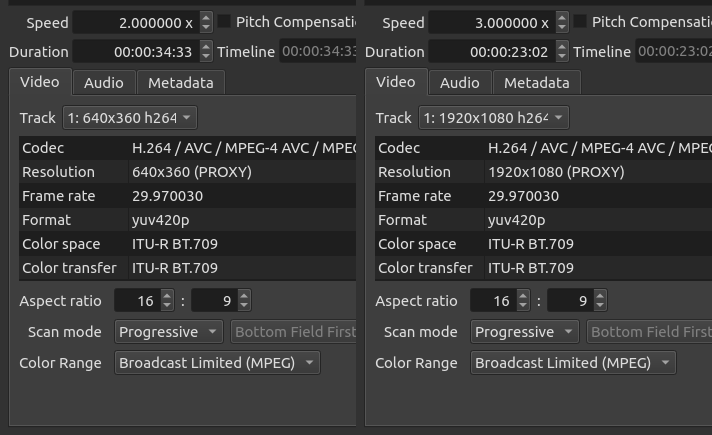
There’s a problem with proxies. In 21.03.21 if I drag a clip to the playlist and then click on its properties, it shows resolution “640x360 (PROXY)”. I can drag it to the timeline and click properties there, and says the same thing. If I close then reopen the project, both remain the same.
However, if I do the same in 21.04.14 (on Windows, or 21.04.13 on Ubuntu, also UNSTABLE-21.03.13 and UNSTABLE-21.02.09) the first part is okay, but when I reopen the project now both the playlist and timeline clips have resolution “1920x1080”. And if I drag the playlist clip to make another clip on the timeline, that one now says resolution “1920x1080 (PROXY)”. If I split the clip that says “1920x1080 (PROXY)”, then the first half of it changes to “640x360 (PROXY)” while the second half stays “1920x1080 (PROXY)”, and if I turn off preview scaling the resolutions are indeed the blurry 640x360 versus the crisp 1920x1080.
Obviously, this makes it rather impractical to work on high-resolution projects, since it’s using the original files rather than the proxies.
Well, actually there’s problems in 21.03.21 too. If you change the speed of a clip after reopening the project, sometimes it’ll change to “1920x1080 (PROXY)” rather than “640x360 (PROXY)”.
For example, put a clip on the timeline and change its speed property. Save then reload the project. Change the speed again, and now notice that it says proxy at the wrong resolution.
in 21.03.21 too. If you change the speed of a clip after reopening the project, sometimes it’ll change to “1920x1080 (PROXY)” rather than “640x360 (PROXY)”.
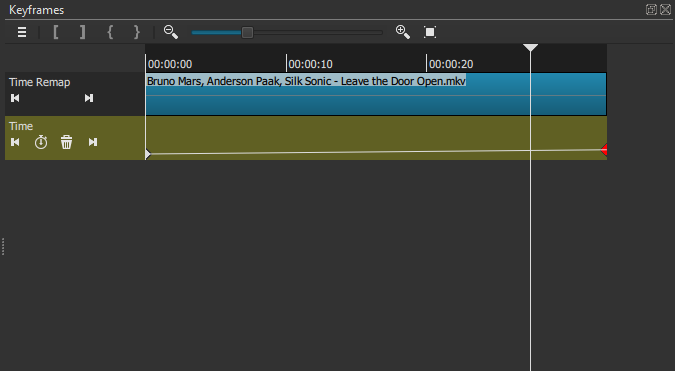
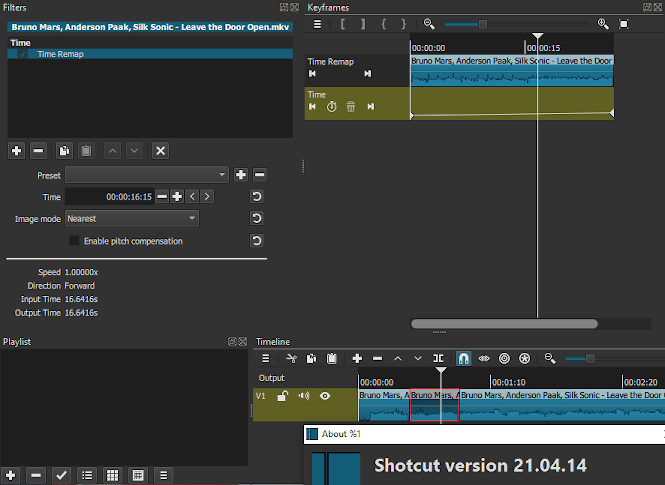
1) The “Use sub-clip” option is not working as expected. When the clip is replaced, the converted sub-clip does not start on the frame that the original sub-clip started on. It starts the sub-clip from somewhere else in the source footage. 2) After making a sub-clip I don’t get extra footage on both sides. I get 30 extra seconds from the right side only. I suggested bumping the extra footage up on both sides from 15 seconds to 30 in the previous beta thread for Time Remap so I don’t know if this is the result of that. 3) I don’t think the “Use sub-clip” option should be in the Advanced Menu. It’s going to be a very commonly used option so it’s better to have it quickly accessible. Moving it up to the normal menu would be preferable so as to not have it sort of hidden. Alternatively, but I don’t know if it can be programmed this way, the “Use sub-clip” can be automatically turned on by Shotcut depending on where the option is called. If it’s called from the whole clip then it would be off but if it’s called from a sub-clip then the sub-clip option would be turned on by default. 4) When the sub-clip option is used the default name for the converted file still adds “Converted” at the end just like it does if it was converting the whole source clip. I suggest making the default file name different if it’s converting just a sub-clip. Maybe something like “Sub-1”? I am thinking of a use case where users would be applying Time Remap more than once on the same source file in one project. If that is the case, is it possible that Shotcut can be programmed to have the default names number down the subsequent sub-clips in one project? Like Sub-1, Sub-2, Sub-3, etc… 5) There are some video files that are bypassing the B-frames dialog after applying Time Remap. Here is one: The Bruno Mars video from youtube “Leave The Door Open”. Here is the direct youtube link.
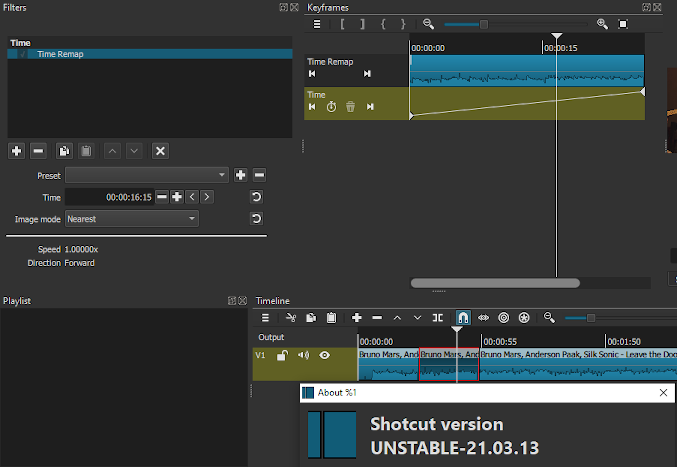
When it it’s applied, this is how the key frames are laid out by default:
Suffice it to say, despite the filter being added the keyframing just doesn’t work.
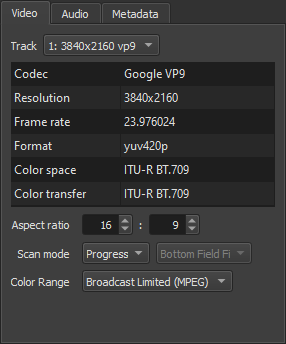
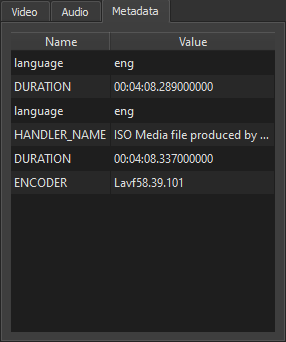
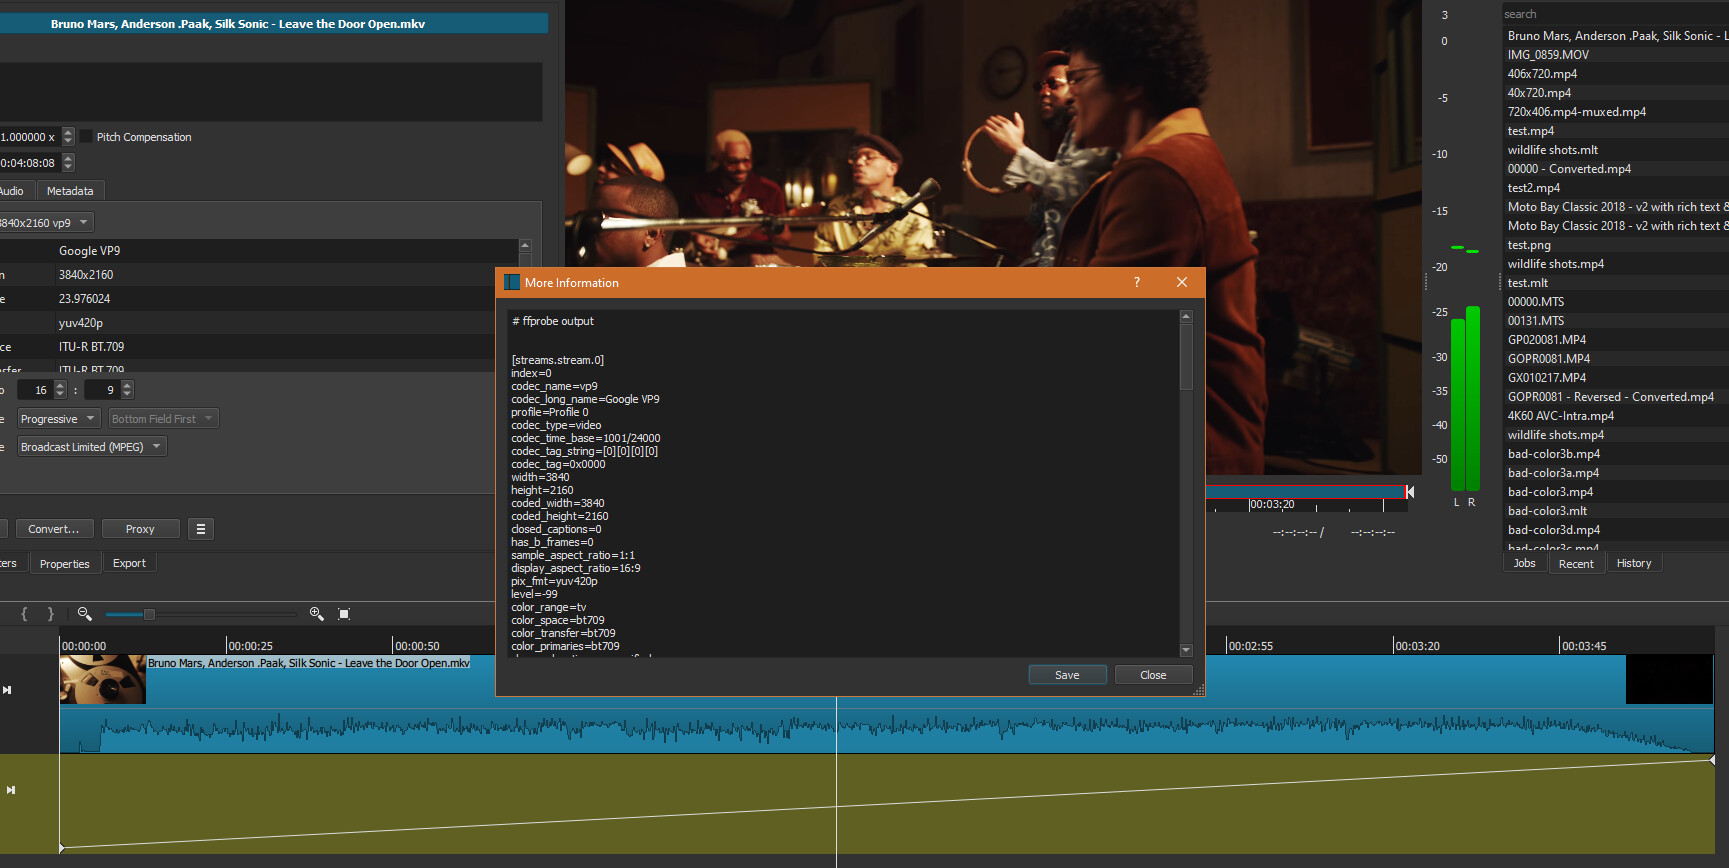
For what it’s worth, here are the video and meta data info for the mkv file I downloaded off of youtube:
I’ll get more some time later on to do some more testing.
That link takes me to youtube. Can you provide a link to a file I can download?
Are you SURE the video has b-frames? I have found other VP9 files in the past that do not have b-frames. The Shotcut properties panel does not report if the file is encoded with b-frames.
3) I don’t think the “Use sub-clip” option should be in the Advanced Menu. It’s going to be a very commonly used option
It is advanced in that most beginners or casual users will be confused about the concept of a sub-clip, however, I also agree it may be frequently used by many. One way to remedy this is to not make Advanced collapsed/hidden but to show it all under the heading Advanced.
can be automatically turned on by Shotcut depending on where the option is called
It is harmless to turn it on for a whole clip, but it does affect the scope of the subsequent replace operation. With sub-clip on, it replaces only the selected clip, and without it replaces every timeline clip based on the original source. I will think about this more, but it might be tricky to add because of the disparate code components and how this same dialog is triggered for multiple situations.
Ok. So this is working correctly. Besides the “More Information”, there is not an easy way for a user to know that a file does or does not have keyframes. Maybe something to improve in the future.
Same for me. @DRM I wonder if there is something unique about your environment or installation that keyframes are not working properly. You had some similar reports in the last beta that I could not reproduce. Do you have access to another computer you could test these same cases on?
Well, I learn something everyday. I didn’t expect that youtube uploads were done with no b-frames.
However, in regards to the keyframes I should’ve been more specific. @shotcut, you added Time Remap to the whole clip for that picture you took. When I did my picture to show how low the default last default keyframe was, it was on a split clip. In this new version, it seems that the way the keyframes are now mapped is absolute and not relative to the sub-clips.
Here is how the default keyframes are mapped to a split section of the video from the beta version of the Time Remap:
The default last keyframe is lower and when I was trying out it seems that in this version the keyframes are mapped out to sub-clips in an absolute way. So the last default keyframe is lower because that’s where that frame is found if the keyframes were added to the whole source clip. I don’t think this was intentional because this doesn’t make it very usable to keyframe if the default keyframes are not mapped out relative to the sub-clips. What if the source clip is a 2 hour video but the sub-clip is 30 seconds?
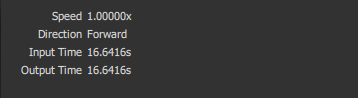
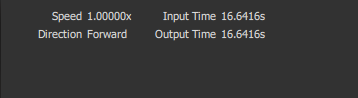
Also, @brian, I think that the placement of the Input and Output times should be on a separate column. So instead of this:
it should be like this:
That way the Input and Output times don’t get so easily cutoff when the Filters panel is made smaller.
Later I am going to try again with this version the bugs in the beta that you said couldn’t reproduce. Hopefully it’s not something regarding a Windows update. I made a report almost 2 months ago regarding the layouts being screwed up every time when I open Shotcut but @shotcut said he couldn’t reproduce it either.