The previous audio normalize filter has been renamed to “Normalize: 2 Pass”. Its functionality has not changed. You can select a clip, analyze loudness of the clip and then the filter will apply a fixed gain “shift” to achieve the target loudness across the clip. The target loudness is configurable. This type of normalization is most appropriate for pre-mixed clips like music or clips where the volume is constant for the duration of the clip.
A new audio normalize filter has been added named “Normalize 1 Pass”. This filter works differently than it’s two pass brother. Rather than analyzing the entire clip at once, it analyzes the audio in real time as the clip is played and adjusts the gain on the clip in real time in order to achieve the target loudness. The filter can accept configuration parameters to define the target loudness and constraints on how much and how quickly it can change the gain. The “Analysis Window” parameter specifies how much history should be used to determine the input loudness. The UI for the “Normalize 1 Pass” also provides status indicators which show the Input Loudness (as measured during the Analysis Window) and the Output Gain that is being applied to the clip.
The filter will reset its own analysis if it notices the clip change or if seeking is performed (as the history is no longer valid). This reset is also shown in the UI status area. Unlike the 2 pass filter, the “Normalize 1 Pass” filter can be applied to an entire track as well as a clip. This filter is most useful for clips where the audio has not been mixed, or it changes very dynamically. Also, because the filter is being applied dynamically, and it is reacting to historical loudness, it may not actually achieve the target loudness with high accuracy.
To compliment the audio loudness normalization filters, a new Audio Loudness scope has been added. This scope shows the Momentary, Shortterm, Integrated loudness as well as the Loudness Range. The Integrated and Loudness Range status accumulate over time. So, a reset button is provided to allow the user to reset the measurement in case they have been seeking or have changed some filter parameters. A time indicator next to the reset button shows how long the meter has been running.
If I understand right, you have to play the whole clip in real time in order to get the Normalize 1 Pass filter to actually work? If I apply that filter but don’t play the whole clip in real time then it won’t take effect?
Also, in regards to Normalize 2 Pass, if I do the analysis but then I decide to change the target loudness do I have to hit the Analysis button again?
I see that the Compress filter doesn’t have an analysis button like the Normalize 2 Pass does. Does that mean that the Compress filter works like the Normalize 1 Pass feature in that it analyzes the audio in real time?
The filter will always be applied. It works on an averaging window. So if you seek to the middle of a clip, the filter will have to clear and then refill the averaging window. There is an “indicator light” on the filter panel that signals when the window has been reset.
No
Yes. The compress filter works on a much shorter time window and will only reduce the gain - it will not increase the gain.
I typically use the “Normalize: 1 pass” and “Compress” filters together to achieve simple normalization. The normalize filter handles average loudness and the compress filter handles peak loudness (spikes).
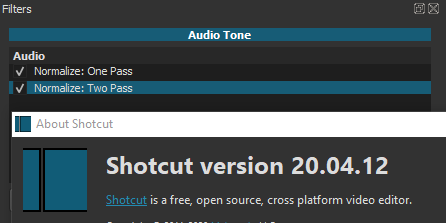
Hi all, during the COVID-19 lockdown, my singing community has taken to doing recordings of our individual parts and mixing them. Someone recently discovered the Normalise: Two Pass** filter and has been using that to balance out the voices to a similar. I have version 20.04.12 while he has 20.02.17 of Shotcut, and we’re both on Windows 10 systems. That filter doesn’t seem to be part of the filter options in the latest version, there is only Normalise: One Pass. Am I not seeing it or has the Normalise: Two Pass filter been removed? Thanks for your help! Colleen
Maybe you are trying to add the “Normalize: two Pass” filter to a track. “One Pass” can be added to clips and tracks. But “Two Pass” can only be added to clips. It is not available in the filter menu when editing track filters.
Ahhhh, I just reread Brian’s reply, and now I see what I misunderstood.
Yes, that’s it. I can see both filters if I highlight a clip (I only had one), but I can only see One Pass if I select a track.
I’m not sure how the others have bee using Two Pass, but maybe they have been doing clips and didn’t realize it? They both have the earlier version of the software, so I don’t know if that makes a difference.
Is One Pass/Compress the only option to control output volume? I have used Two Pass on all of my tracks and am experiencing some clipping on my export. Is there an easy way to eliminate that?
Clipping is probably a sign that compression needs to be stronger, or the volume is being raised too high for the dynamic range of the sound. One other option could be adding a Limiter to the Output track, which is basically a brick wall compressor to prevent clipping. It usually takes -1.5 dB to be effective on clipping.
I assume that selecting Master and then adding the Compressor filter was the method to apply it to the export. Is this correct? I set the Threshold to -5 dB and that did not seem to eliminate the clipping. Was that the correct setting to use?
Filter type and placement are very dependent on the kind of audio being mixed, but I’ll try to summarize a common case.
Suppose a project has one video clip whose embedded audio is speech, and then suppose some background music is playing on a separate track.
The background music is already going to be compressed to perfection because it is pre-mastered material. If a compressor was put on the Master/Output track, then the music would be double-compressed (once by the producer, once by you) and the result could quickly sound flat.
So in this scenario, we only want to compress the speech, and leave the music untouched. The first goal is to get the speech compressed to about the same dynamic range as the music so they sound similar. This means the compression filter needs to be placed on the speech clip. The compression amount will be very dependent on the content. Was it windy outdoors, or quiet in a studio? Look at the non-compressed volume of the speech, and set the threshold slightly louder than that. Then play with the ratio (no more than 5:1) until the gain reduction meter starts to show compression happening. Reducing by 3 dB is a good start, but speech can often take much more reduction. Use makeup gain to recover the volume after being compressed.
At this point, we have pre-compressed music and now-compressed speech that should gel together pretty good. However, the combination of the two tracks could still clip. This is where a Limiter on the Master/Output track comes into play. It smashes the living daylights out of any signal that approaches the clip point. But everything below the imminent danger zone is untouched. It’s less intrusive on the signal than applying a second compressor to avoid clipping.
Granted, if the background music was classical music with a wide dynamic range, then another layer of compression could be useful. It always depends. But generally speaking, for a project with any complexity at all (including basic background music), more fine-grain control of individual tracks would be necessary, along with a Limiter acting as the cleanup crew.
There was a bug in a previous release that would cause problems with the one pass filter. That bug is fixed in the 20.07.11 release. Make sure you have updated to the latest version.
Hey I love your program. As an audio DSP programmer, I feel that the normalization implementation is overcomplicated and not actually normalizing the audio. It should be measured in dBA!!! with zero dB peak being normalized. it’s a loop involving 5 lines of programming code: run through all samples, compare max min to the last highest sample, find the highest for all the audio track, multiply all samples by 1/highest sample to achieve a perfect normalization at 0 dBa or -9 dBA / a user input field. I never knew a normalization filter could clip the peaks and result in distortion, but the shotcut ones seemd to do so. Awseom proggy though, cheers so much!!!
For me, “Normalize: One Pass” causes a variable volume, as if someone is constantly adjusting it. The result is a pumping of the volume, like an automaitk gain in an amateur recording. I don’t like that at all.
Why do you recommend this filter and not the “Normalize: Two Pass”, which does not do this?
Maybe that “pumping” effect would be reduced if you increase the Window Size parameter.
The one pass filter works great for my clips. Many of my clips have inconsistent volume levels within the clips and from one clip to another. The one pass filter evens out the audio and makes it consistent.
If the two pass filter provides results that you want, then it is good to use. In general, it is going to provide the best results on audio sources that are even and consistent - like pre-mixed music or commercial sources.