New to Shotcut? This tutorial is aimed at the Basic skill level to get started using Shotcut. If you’re Intermediate to Advanced, perhaps a lot of this tutorial you already know but might learn more of how Shotcut performs certain core functions.
The Basics
Before we start, go read the F.A.Q. (Frequently Answered Questions). Read all of it. Bookmark this page, as this answers a lot of very basic questions and problems you may face using Shotcut.
Make sure you have the latest version. Each version changes quite a lot, as new features are added, and previous bugs are fixed. Don’t assume you have the latest version you downloaded two months ago. While on the downloads page, look at “Recent Posts”, click on the top post to read about recent changes, and features. To read about all of the developments, read: https://shotcut.org/blog/
Version numbers are Year.Month.Day of revision.
Learn about Shotcut with Video Tutorials. Take the time to actually go through the lessons yourself to learn.
As you’re learning with the Tutorials, practice using Keyboard Shortcuts. Learning keyboard shortcuts now will save you a lot of time when editing. And when you’re using Shotcut, it’s just a couple clicks away.

- Don’t skip the basics. There is a lot of vital information in the Basics.
New Project Window
New Project window.
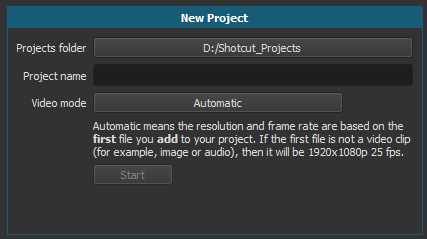
- Set a specific “Projects Folder” for all of your Shotcut projects.
- Name your Project. (This creates a subfolder within your named “Projects Folder”)
- Video Mode (Default is set to Automatic)
- Recommended to set actual Video Mode (Resolution, FPS) here. This sets the stage for your video. There are multiple modes to pick from 720p, 1080p, 2160p (4k). Or make your own custom video mode. Custom video modes can be made right from here.
- Click Start
Playlist Editing - Simple
Playlist Editing - Simple
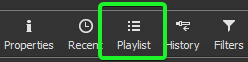
On the top toolbar, click “Playlist”
Let’s just do one file for this tutorial.
Drag/drop one item into the Playlist panel.


The video will start playing, press the space bar once to stop. Space bar once again to start.
Or click here on the viewer: ![]()
Now that we have the video in the timeline, let’s trim the video. In the main viewer, make sure you’re on the “Source” tab.
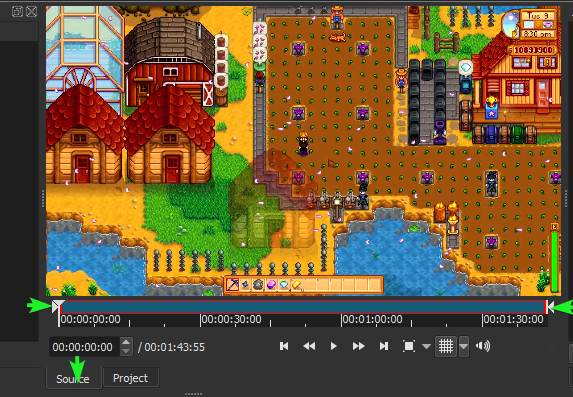
We are going to move the
- left arrow to the right
- right arrow to the left

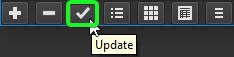
Click on the check mark to update the clip. This sets the In and Out points you want.
Moving the Playhead Location (Playhead is a common used term in video editing)
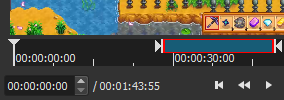
Just click on the bar where you want the Playhead to be.
While moving the Playhead left & right (Scrubbing) can be done by holding down the left mouse button and drag it across the bar so you can preview quickly to find the spot in the video you want to focus in on. If you get to that exact spot, you can use the following Keyboard shortcuts: I for In point, O for Out point.
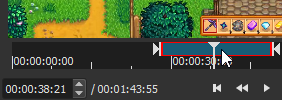
Below this bar on the left is where you can really fine tune your exact location within the source video clip, by either typing in the exact location, or use the small up/down arrows to go frame by frame (multiple keyboard shortcuts options here). If you hover the mouse over the value, use the scroll wheel up and down to go frame by frame. Format is HH:MM:SS:FF (Hours:Minutes:Seconds:Frames).
Adding a Text Filter
Adding a Text Filter
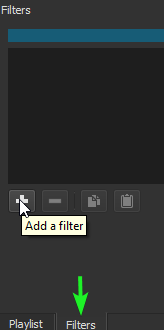
Click here: ![]()
Click the plus symbol. If you don’t see this, click on the Filters tab (green arrow).
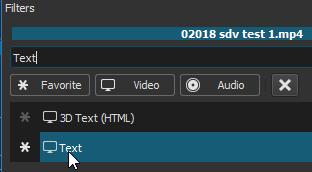
Selecting a filter. There are some pre-selected favorites (which you can modify), Video specific, and Audio specific filters. If you know the name of the filter, just search for it at the top. Maybe you didn’t intend to add a filter, click the X to get back out of selecting a filter.
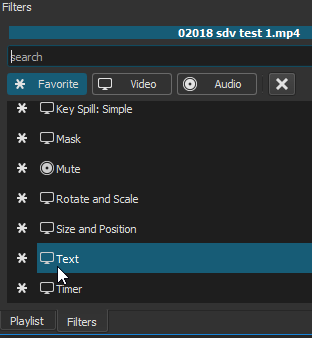
So put Text in the Search bar. And now click on Text. (Mixed bag results with 3D Text)
Uggh… the everlasting #timecode (joking here… this actually the default)
![]()
Just type your own text here.
Then you can customize your text. Verdana is the default font. Personally I don’t care for it, so I’m always changing the font. You can change it where the green arrow is at, which is the font selector.
Slight bug with font selector and work around
-
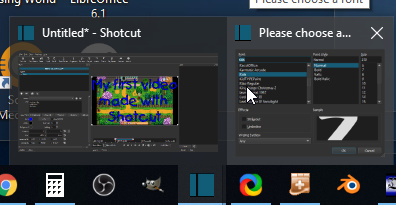
Known Bug with the Font panel, while in the font window if you click outside the window, it put the font window behind Shotcut, not allowing you to change the font, clicking on the font selector doesn’t do anything. But the font selector is still there, so either minimize Shotcut, or move Shotcut’s window enough to re-engage with the font selector. In Windows 10, you can hover over the Shotcut Icon in the taskbar and pick the font selector to bring it back.
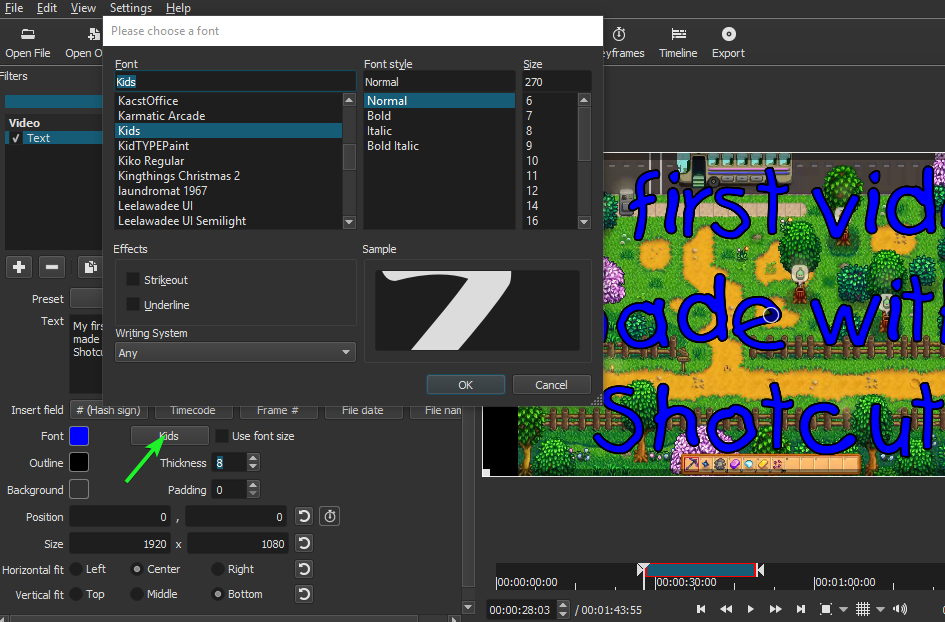
Resize your text box by dragging the white box in the viewer. Or set a specific font size in the Font Selector and tick “Use font size”. You can still use this box to move the text where you want at. You can also use Keyframes with the Position.

That white box will not appear in the final edited video. It’s just a visual for you while you edit.
This single text filter will appear across the whole video since we are working with just one video clip, and did not use any Keyframes. You can apply multiple text filters, all with keyframes. Multiple filters. But this is just a basic-get-you-started tutorial.
Saving your Project
Save your project file (.mlt - XML source code).
Do it now. ![]()
Top left of Shotcut: ![]()
Center bottom of the preview window: ![]()
And you save your with multiple versions doing “Save As”
![]()
Examples:
- myproject v1.mlt
- myproject v2.mlt
- your project 5 added filter.mlt
- your project 6 added one more filter.mlt
- Master 3b edit done dont touch it.mlt
- Project x4 181205
- Project x4 181206
Exporting to a Video File (MP4)
Export your project to Video format.
After saving your project, click Export
-
Here:

-
Or here:
 File - Export Video
Just for learning, don’t click any presets, just click Export File in step 2. By default the filename will be pre-selected from saved mlt project file name.![]()
Or you could name your file as you would normally do with any other program, leaving the .mp4 extension intact.
Without the .mp4 ![]() Not playable!
Not playable!
With the .mp4 ![]() Playable!
Playable!
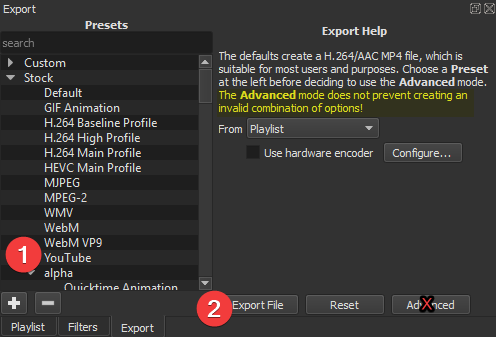
If you want to upload to YouTube, click the YouTube preset, then click Export File. Same file naming principles apply as outlined above.
Do not click on Advanced unless you know what you are doing.
For learning purposes, leave hardware encoder unchecked.
While exporting, don’t touch your computer, let it run. Depending upon the length and complexity of the project, it may take minutes, hours, possibly even a day or two, all dependent upon your CPU speed and computer hardware.
Progress bar with estimation time on the right, and will fluctuate while rendering.
![]()
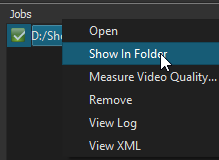
Export is done, and the green check mark indicates it’s done.
![]()
Right click on the completed job. Various options here. Open will open it within Shotcut. Show In Folder, will open up that specific folder (where you saved it), with that file selected.
Again, this is meant to be a real simple tutorial. Get your feet wet type turorial.
Recommended Tutorials
- There are many awesome tutorial channels out there on YouTube beyond the tutorials listed at the top of the screen. Here are a few channels I highly recommend. Both of these channels helped me decide to use Shotcut for the first time, and I’ve stuck with Shotcut.
Forum Tips
-
New forum users can only import one image per post. Screenshots are more helpful than you can imagine. Screenshots can just be dragged/dropped into the here.
-
Files like mlt’s, txt, gif, zip can be dragged/dropped into the here.
Or you can use this tool
-
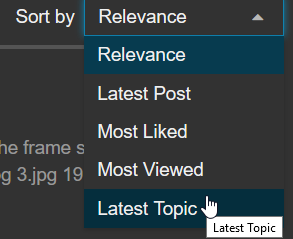
When searching this forum I find it best to search by Latest Topic.
-
When requesting support, read this post. While not all of the information may not seem pertinent, at times it is. With Version 18.11.18 GPU Effects are hidden or not available.
All images in this tutorial are taken with Shotcut version 18.11.18.
Please let me know if there are grammar issues or mistakes, lol.