The Export panel (also File > Export Video…) is used to create a new video or audio file from your project because File > Save saves a project file. Think of this like a photo editor that saves its own format (e.g. .psd or .xcf) versus saving a JPEG or a word processor that saves to its own format (e.g. .doc or .odt) versus a PDF.
The most important thing to know is to click Export File to export your project as a new video file. It opens the standard save file dialog for your operating system where you must choose a folder and give it a name.
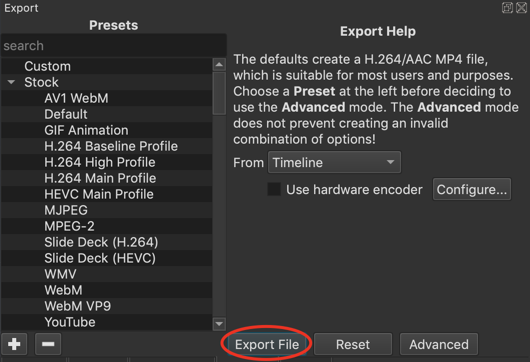
Here are the other things to know about the Export panel in its basic mode:
Click Advanced to show many more controls and options. However, by clicking Advanced you should understand that Shotcut expects you to be advanced and know what you are doing. There are simply too many combinations of settings and options that Shotcut’s advanced export mode lets you create invalid combinations and does not protect you from yourself.
The Reset button is used in advanced mode to reset all the options and settings to their default values.
The list of many things on the side are Presets. There are many presets provided by Shotcut in the Stock category, and you can add your own that will be shown under the Custom category. The + and - buttons at the bottom of the list are used to add and delete custom presets. NOTE: It is not necessary to choose a preset! Shotcut comes with default values that creates a high quality H.264 MP4 file at a reasonable size and speed that automatically adapts to the resolution, frame rate, and visual complexity of your project. Clicking Reset or the preset named Default restores the panel to its default values.
The From field lets you choose what to export. You can export more than just the timeline. In fact, you do not even need to use the Timeline in Shotcut! Here are the options:
Timeline: This is the default if you have added anything to the Timeline.
Current Playlist Bin: Exports the Playlist as a single, sequential file. Since a playlist has optional bins (categories), it depends on which bin is currently chosen. If you are not using bins then it is the entire playlist.
Each Playlist Bin Item: Exports a separate file for each item in the playlist or, optionally, the current bin if using playlist bins.
Source: You can export a single clip that has been trimmed and filtered in the Source player.
Marker…: Exports a range Marker, which is a marker with a duration.
Use hardware encoder is option to use the hardware-accelerated encoder in your NVIDIA or AMD GPU or CPU (Intel Quick Sync on most processors since 2012, but it may depend on your motherboard as well). You will need to tell Shotcut which you have, but if it has not been configured Shotcut tries to automatically detect it when you click the checkbox to turn it on. Pay attention to the status message area just below the player controls for several seconds after clicking the checkbox to see what it reports. This feature currently only supports the H.264 (aka AVC) and HEVC (aka H.265) codecs.
Configure… opens a dialog for the configuration of the hardware encoder. This is useful in case there was a problem with automatic detection, you want to see what automatic detection found, or you want to change it if you have more than one available on your system.
Next, you might need to understand some basic, fundamental concepts of video and audio compression to understand why it takes long or why the file size is not what you expected. Please see this article https://vimeo.com/blog/post/video-compression-basics/
would like to understand some basic export settings more deeply.
I mostly use h.264 (mpeg4) export setting and often use the Youtube option, but i adjust the quality from 55% to 64%. I dont see much difference honestly but the video file is approx. 30-40% larger.
As i understand it if i re-encode the same video again and again, the quality will drop with each encoding process (unless i use 100% quality - right?).
If i only want to adjust music/audio but the same video track unchanged how can i achieve a re-encoding without loosing video quality?
What does the quality option mean in general and how does it compare to file size? Does 100% mean lossless? What export settings would be the best with resp. to quality/file size relation?
They have a direct relationship, but it is not necessarily linear. There is no way to answer the what quality means without fully explaining video compression, which is very complex and depends on the codec. At a high level “quality” speaks for itself. Look up the meaning in a dictionary if you need to. Higher means better and bigger size; lower means less and smaller size.
Whether 100% quality means lossless depends on the codec. For non-hardware H.264 in Shotcut, it does mean lossless, but that is a rare thing. Most codecs are either lossless or not or require explicit lossless mode option.
What export settings would be the best with resp. to quality/file size relation?
This is impossible to answer because it is subjective and depends on the context and usage, but I tried to give you something that I think most people want in this ratio with the default options (aka Default preset) with H.264 quality 55%.
If i only want to adjust music/audio but the same video track unchanged how can i achieve a re-encoding without loosing video quality?
The only true way to avoid losing quality is to use one of the intermediate (visually lossless) or lossless presets. However, most people do not need true or nearly lossless. Start with the defaults, and adjust from there. It also depends on what you are doing with the files and their value.
Just one more question: are there video codecs that dont mix video and audio track in the compression process? If so, would it be possible to use these codecs for audio adjustments without touching the video track in the re-encoding process - thus resulting in lossless video-reencoding?
The background to these questions are the following: I do a lot of image sequence (3d rendering from 3d animations or google earth e.g.) with many thousands of pictures so i have to encode them in smaller pieces otherwise the data handling would be too complex for SC and my system. Later on i put these video pieces together to form the final video. I want to minimize quality losses for each process and sometimes i have to adjust small parts or audio tracks even afterwards in a third encoding process.
Codec copy is not supported. The closest thing available to that is Properties > menu > Extract sub-clip, which uses the in and out points of a trimmed clip. Shotcut is not primarily a ffmpeg command line front end, but that particular function is.
I have done a short test to compare and understand the quality factor in h.264 export. I actually used 54 sec. of video footage in FHD h.264 as a basis with some audio and exported this in different quality settings starting from 10% up to 100%. I used the YT-preset with unchanged parameters beside the quality (in the advanced - codec settings).
Here are my results:
Quality___ encoding time____file size__ artefacts
10%______38 s______________9.3 k__very massive artefacts, blocking, color flickering, loss of detail
20%______44 s_____________13.8 k__lots of visible blocking, color flickering
30%______49 s_____________24.8k__less visible artefacts, but still obvious
40%______53 s ____________ 44.3k__slightly visible artefacts
50%______58 s_____________85.8k__hardly visible to no artefacts
60%______78 s____________196.3k__no visible artefacts (for me on laptop screen)
70%______83 s____________372.2k__no visible artefacts
80%______95 s____________598 k___no visible artefacts
90%_____112 s____________921 k___no visible artefacts
100%____116 s___________1585 k___no artefacts
Best quality to file size ratio is somewhere between 50…60% i would assume. For me, already at 40% there are hardly any visible obvious artefacts. Over 50% you can be quite sure you wont see any artefacts unless you have an eagle’s eyes
More than 70% quality is a disk space waste unless you absolutely need 100% quality (for a later re-encoding e.g.)
As a rule of thumb (except for the extreme ends) you can approx. say 10% more quality means a doubling in file size.
Note: all measurement were done on a Thinkpad P50 laptop with render preset=“fast”. You can set the render preset on the EXPORT - ADVANCED - OTHER tab. “fast” was the default here, you can set it also to “veryfast” (or “medium”) which decreases render times about 30% on the cost of output quality (at the same quality setting).
Agreed. I frequently mention 68% quality on the forum, but that’s because people specifically ask for the highest quality settings. Had they asked for reasonable quality settings, I would have quoted closer to 55%. To be worthy of the 68% level, a video needs to be exquisitely captured, beautifully color graded, shown on a giant screen, and serve the dual purpose of transcoding copies into other formats. Some members here can actually pull that off, so if they ask for highest quality settings, I’ll tell them what it is without a lot of questions.
I posted this elsewhere in a sharpening feed and it was deleted, which it had to do with me searching about sharpening my videos.
…I’ve been using shotcut for about 6 months… great editor, perfect cuts and great for chapters but I use a lot of slides with text and also my narrative tracks are becoming very cinematic which I do not want. I need the videos to be very crisp. So I set mine at H.264 high profile thinking that it would of the highest quality…
I then stumbled on a video about quality and learned that the quality for yt export is set at 55%… that is about half… and very upsetting as for my previous editor it was set to 100%…
YT allows a vid to be 256 gb, which personally for me no problem if the size is bigger…
The problem is most people using this (in my opinion) are most probably using the videos to share their expert areas and are novices in video production, like myself. It’s like rembrandt creating the canvas for his paintings and since I had Easy Video Maker that left it at 100% default I just didn’t think SC would put the quality so low – and because of this I’ll have to go back and re-edit at least 3 videos which will take months to do…
And there are many comments on that video that mirror my frustration.
As I’m also a db programmer personally I don’t think it should be up to a programmer to make any settings that say “High profile” other then at 100% but possilby add a flag alerted to the user, with a query that would determine approximate size of the video to the user, giving them the option of lessoning quality if they choose to do so.
My last post of this was deleted. Let’s see instead that you actually take my advice – it wouldn’t be too hard to create that query and it would be a nice addition to your program…
I’m gonna say again here as my post was also removed, unless you want lossless (which literally means 100% quality, not a single pixel different from what you see), manually setting 100% quality is bad.
You can use a range marker for 30 seconds of your video and test default, 65% and 100%
Exporting a video with x264 at CRF 0 (lossless, “100% quality”) might sound ideal, but it’s often a poor choice because it generates extremely large files without noticeable visual improvement compared to slightly lower quality settings. CRF 0 preserves every single detail, including noise or imperfections, which dramatically increases file size and makes storage, playback, and sharing impractical. In most cases, a CRF value between 18–23 achieves excellent visual quality at a fraction of the file size, making it a much more efficient choice for most users.
I am gonna say again with a different reply this time, as my post was also removed.
This one in her case doesn’t, she needs around 80% quality in her case, because 55% with yt compression is actually making her video look very blurry. I agree 100% quality is useless unless you are Sony which wants to keep every single detail and has the hardware and money to do so.
Also, a popup at start to decide export settings should be added to later avoid export at lower quality. It just makes it easier for end users.
You’re in luck… this is already done for the January 2025 version. The new quality setting is approximately equal to “visually lossless”, which means there is no loss of quality that the human eye is able to detect. Storing more data beyond that (i.e., 100%) is usually wasted disk space for a final export. See the announcement for the next version here:
Unfortunately, the computer world is full of geek talk that is confusing to people that don’t live in it. In this context, “High Profile” does not refer to High Quality. It’s actually written as “High” profile, meaning there are three popular profiles for H.264 encoders… baseline, main, and high (there are export presets for each). The difference between them is the mathematical tools that they’re allowed to use to make file sizes smaller. Baseline uses simple math functions that mobile and hardware devices can easily decode on weak battery power. High profile uses more complex math that needs a faster computer to decode, but the advanced math allows for smaller file sizes at the same quality level. (These days, of course, all systems are capable of playing all profiles since this codec has become 20+ years old and technology has improved drastically.) These preset names are not references to quality… they are references to computational complexity to get the requested quality.
However, to address the common request for highest quality without huge file sizes, the High profile has been updated to provide visually lossless quality, and it is now a one-click solution for high-quality future exports.
If you have a PowerPoint presentation and want the ultimate in small file sizes, also consider the “Slide Deck (H.264)” export preset. It was designed for that purpose, although in your case you may wish to improve its default audio settings.
There is a fairly obvious preset for 100% H.264 named “lossless/H.264”. No need for multiple clicks each export to change quality, only one. Want a different quality %? Make a custom preset; it could include only that parameter (crf).
With respect to defaults, you cannot please all of the people all of the time. Shotcut’s default quality for H.264 is the same as the default in x264–the implementation of that codec that Shotcut uses on the CPU (the most popular encoder of all time). I am not going to replace all defaults throughout the application with a popup dialog that requires the user to make an explicit choice (like a wizard UI).
Learn and accept how defaults, options, and presets work as that is how Shotcut and most productivity software operates.