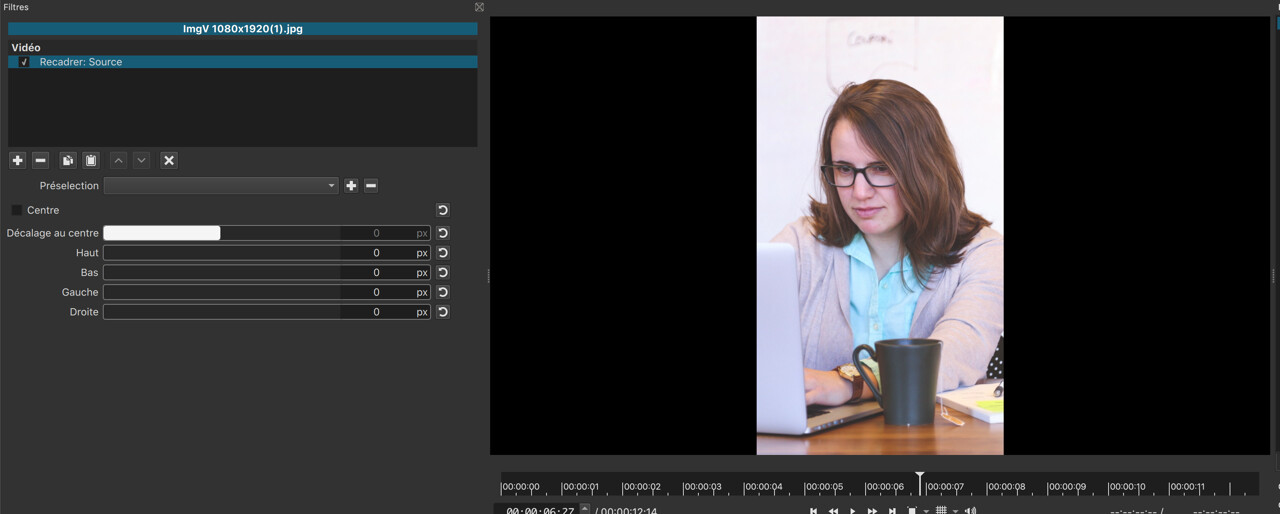
Merci @Austin pour cette explication claire. Je n’utiliserai désormais plus l’option “Center Bias”. J’ai voulu reproduire ce cas chez moi et j’ai un problème avec les valeurs des sliders haut et bas. Projet 1920x1080 Image 1080x1920 Filtre “Crop: Source”
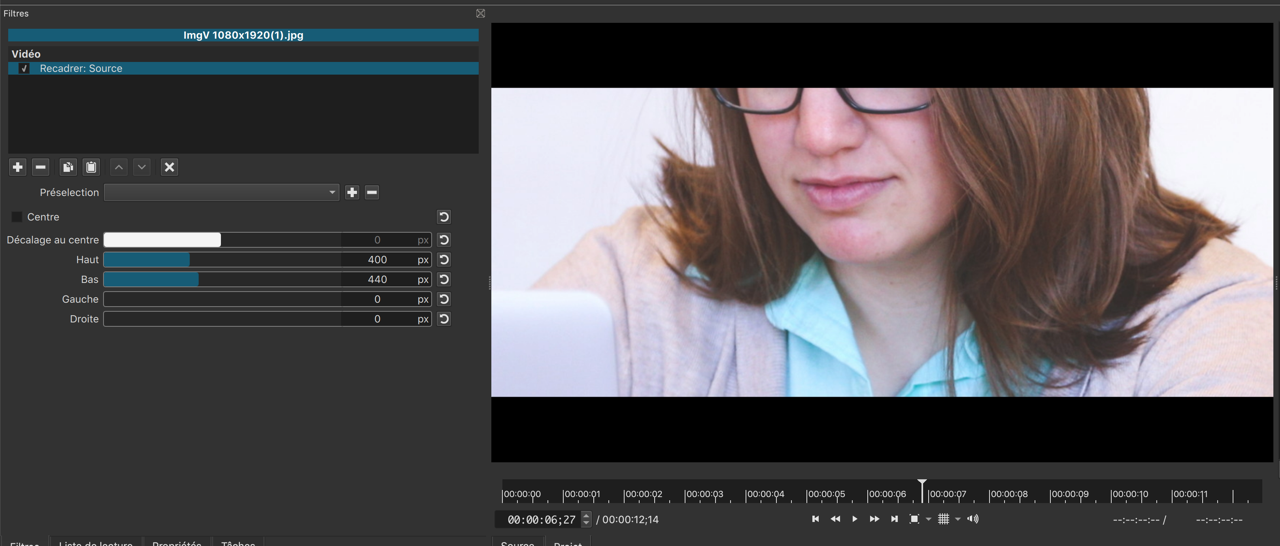
Haut 400 px Bas 440 px
Pour obtenir une image sur toute la largeur (donc de 1920x1080) je dois retirer au maximum 740 pixels.
Je suppose donc que l’unité employée dans l’UI ne correspond pas aux valeurs réelles, ou alors j’ai raté quelque-chose ?
Thanks @Austin for this clear explanation. I will not use the “Center Bias” option anymore.
I wanted to reproduce this case at home and I have a problem with the values of the top and bottom sliders.
Sorry, sorry, sorry. I forgot about the change in coordinate systems after proxy support was added to Shotcut.
Before proxy support, the pixel values in Crop: Source referred to literal pixels. After proxy support, the “pixel” values became relative to the project timeline resolution rather than the source video resolution. This is what allows a crop value to remove the proper amount of source video when the size changes from full-resolution original media to quarter-resolution proxy media. Otherwise, literal pixel values defined for original media would remove too many pixels from the smaller proxy media.
So the new math works like this…
As we mentioned earlier, a 1080x1920 source video would have to be shrunk to 608x1080 to fit within the project resolution of 1920x1080. (Technically, I think Shotcut might truncate decimals to 607 instead of rounding 607.5 up to 608.) Even though the crop isn’t happening on the shrunken version, the crop values are still based on this shrunken version. This provides a common base for determining a percentage amount to crop when switching between full and proxy resolution.
So, if there is a 608x1080 video on the timeline (after fit-to-timeline resizing), how much crop do we need to do to turn it into a 16:9 aspect ratio?
608/h = 16/9
h = 342
So, lifting a 608x342 crop out of the 608x1080 video would give us a 16:9 aspect ratio.
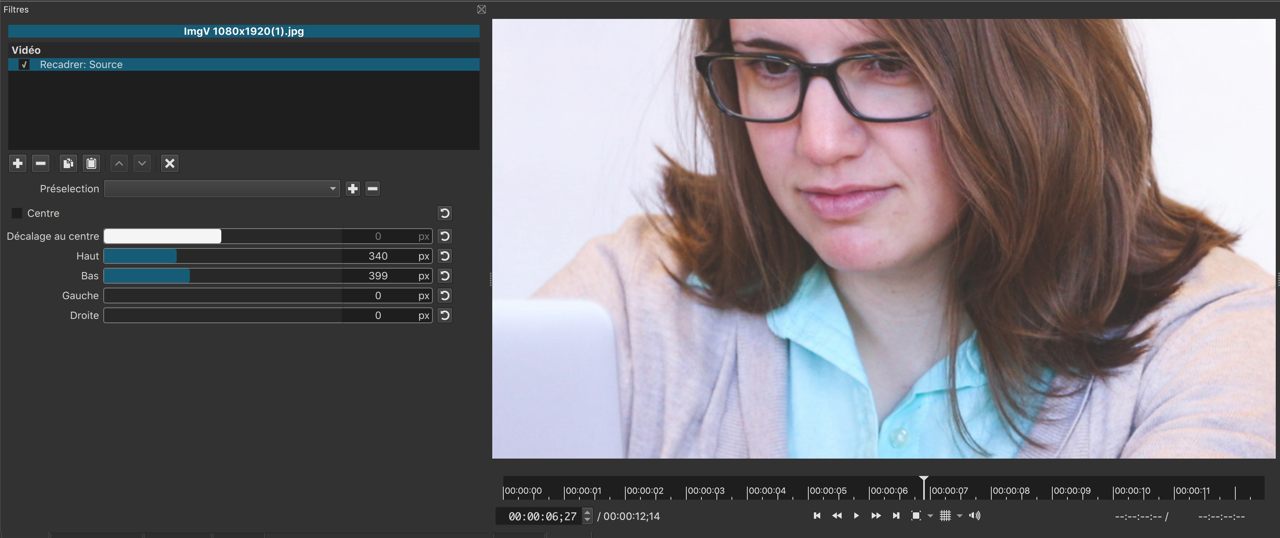
Then, we ask how many pixels we have to crop from 608x1080 to get down to 608x342, and the answer is 1080 - 342 = 738 pixels of height to crop (in timeline resolution units).
When the “Crop: Source” filter actually processes the video file, it will calculate 738 “timeline pixels to crop” divided by 1080 “timeline pixels of height” equals 68.333% of the height to be removed. If the original source video is 1080x1920, then cutting 68.333% of its height turns it into 1080x608, which is a 16:9 aspect ratio that upscales nicely to 1920x1080. Likewise, if the source video is a 304x540 proxy of the original, then cutting 68.333% of its height turns it into 304x171, which is also 16:9 aspect ratio, and enables preview playback to work in proxy mode.
It’s a little convoluted due to proxy support, and sometimes it’s just as easy to eyeball it until it looks good. But there is a good reason for the complexity.
Here’s another example of the math when changing aspect ratios, if interested:
In theory, simply checking the “Center” checkbox with a zero bias should accomplish the same thing without having to do any math… assuming you want to preserve the exact center of the vertical video. The bias will just pan the video left/right or up/down depending on the aspect ratio.
The reason I recommended the OP to use actual values is because one of the screenshots above showed the Center checkbox in action, but the video was shifted to the right side with a black bar on the left. I had to consider the possibility that a black bar may have been baked into the source video, and may need to be cropped out with a Left pixel value in addition to Top/Bottom.
I can’t figure what you mean by this. If I have a video that is (vertcal) 1080x1920 and fit it into a video mode of 1920x1080 then the vertical length (1920) has to fit in 1080 pixels and the horizontal length has to shrink accordingly. Which basically means that the video is downscaled by the proportion 1920:1080. Downscaling discards information (pixels).
The comparison shots clearly show that increasing the resolution first (I calculated wrongly the 2880 should be 3414) creates less information loss than downscaling (reszie-to-fit-the-video-mode) does as shown by the following diagram:
Sorry, I do understand now - it has to do with using the “crop: source” filter, which I didn’t use
I must admit - the “Crop: Source” filter UI is one of the least intuitive UIs I have come across. Trying to understand it is not for the faint-hearted.
In this specific example, the end result was similar because the source video was ultimately narrower than the output width. Since enlargement had to be done no matter what, this was masking the difference between Crop: Source and SPR.
EDIT: The description in this post of how SPR works is inaccurate. I’m leaving the post intact for sake of following the conversation, but please see later down this thread for updated details of how SPR works. Long story short, it’s fine… there is no resolution loss to worry about when zooming into an image.
The short story is that Crop: Source took a 1080x608 crop of the original video and enlarged it to 1920x1080. Meanwhile, SPR took the 608x1080 fit-to-timeline video and used Zoom until a 608x342 portion got enlarged to 1920x1080. The Crop: Source method provided three times as many pixels to the enlargement process as SPR did, so its final appearance should be better, assuming a high-quality source.
Here is a more prominent example where the source is larger than the output:
Source = 2160x3840 (vertical UHD)
Timeline = 1920x1080 (horizontal FHD)
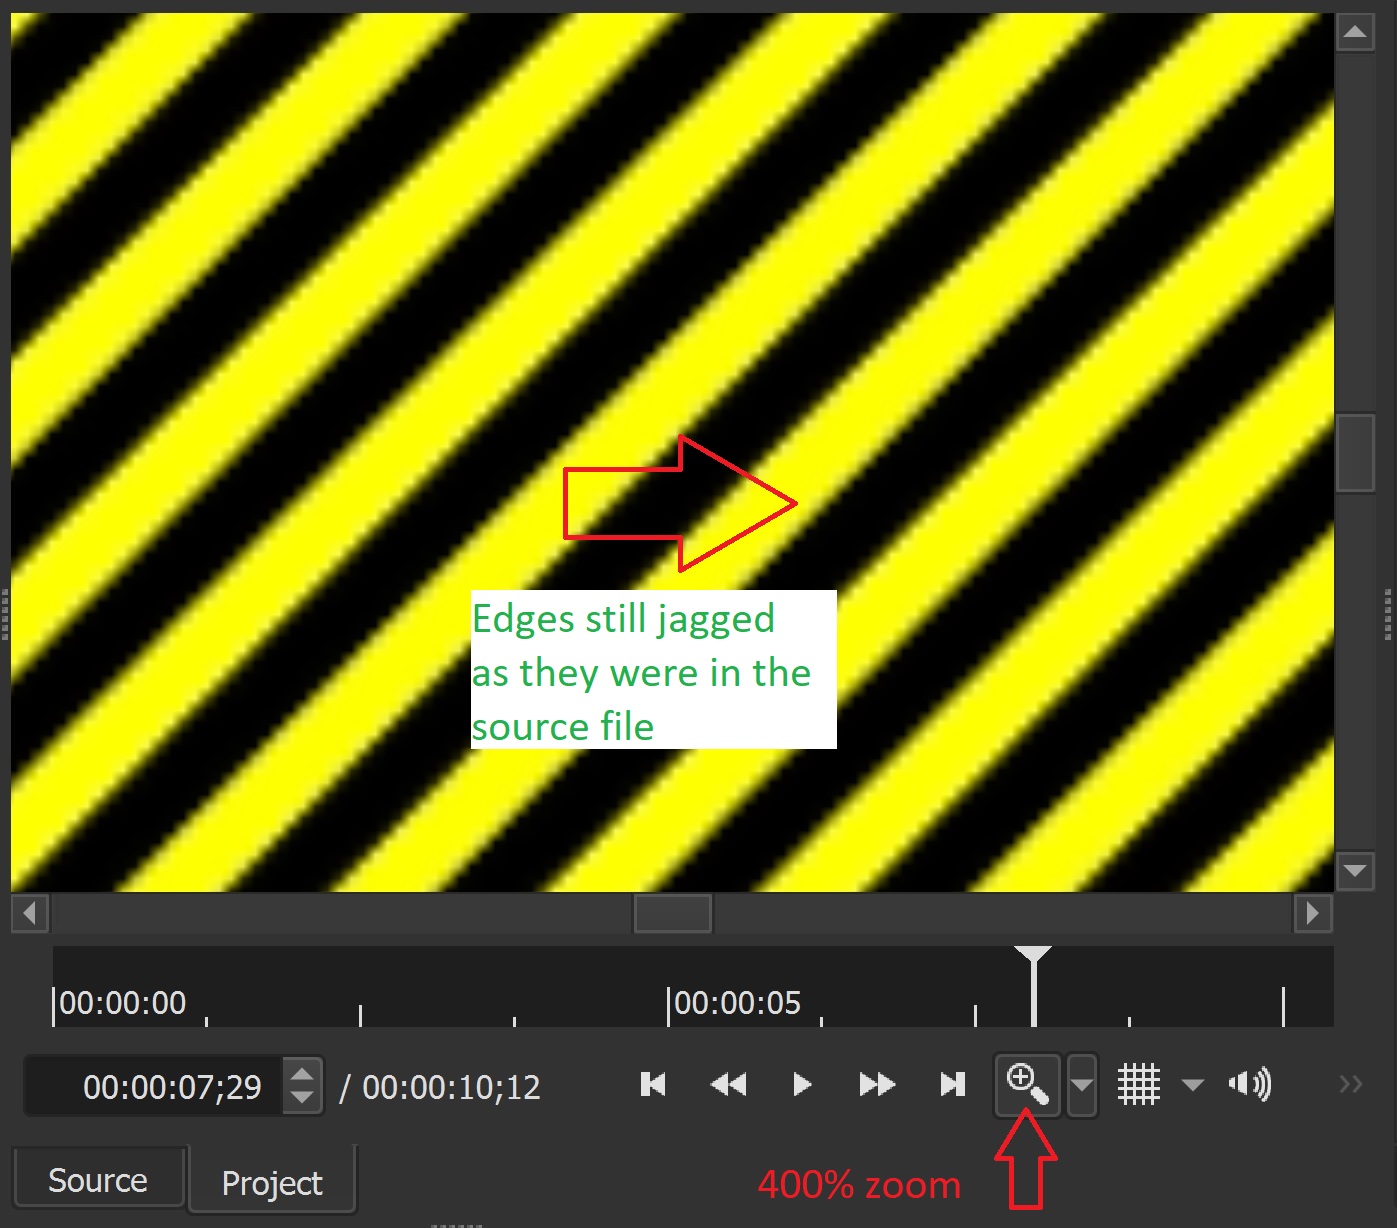
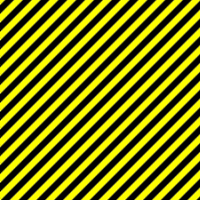
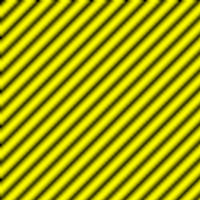
Sample image (yellow and black diagonal stripes, jagged edges): hazard.zip (2.6 KB)
Process with the Crop: Source filter:
2160x3840 gets cropped to 2160x1215 (a 16:9 portion of the original).
Shotcut’s fit-to-timeline resizer shrinks 2160x1215 to 1920x1080.
Shrinking 2160x1215 to 1920x1080 may sometimes increase definition because the source is larger than the output.
Process with the SPR filter:
2160x3840 gets shrunk down to 608x1080 to fit into the timeline.
SPR is applied to the 608x1080 version to enlarge it to 1920x1080.
Enlarging the 608x342 portion to 1920x1080 shows substantial loss.
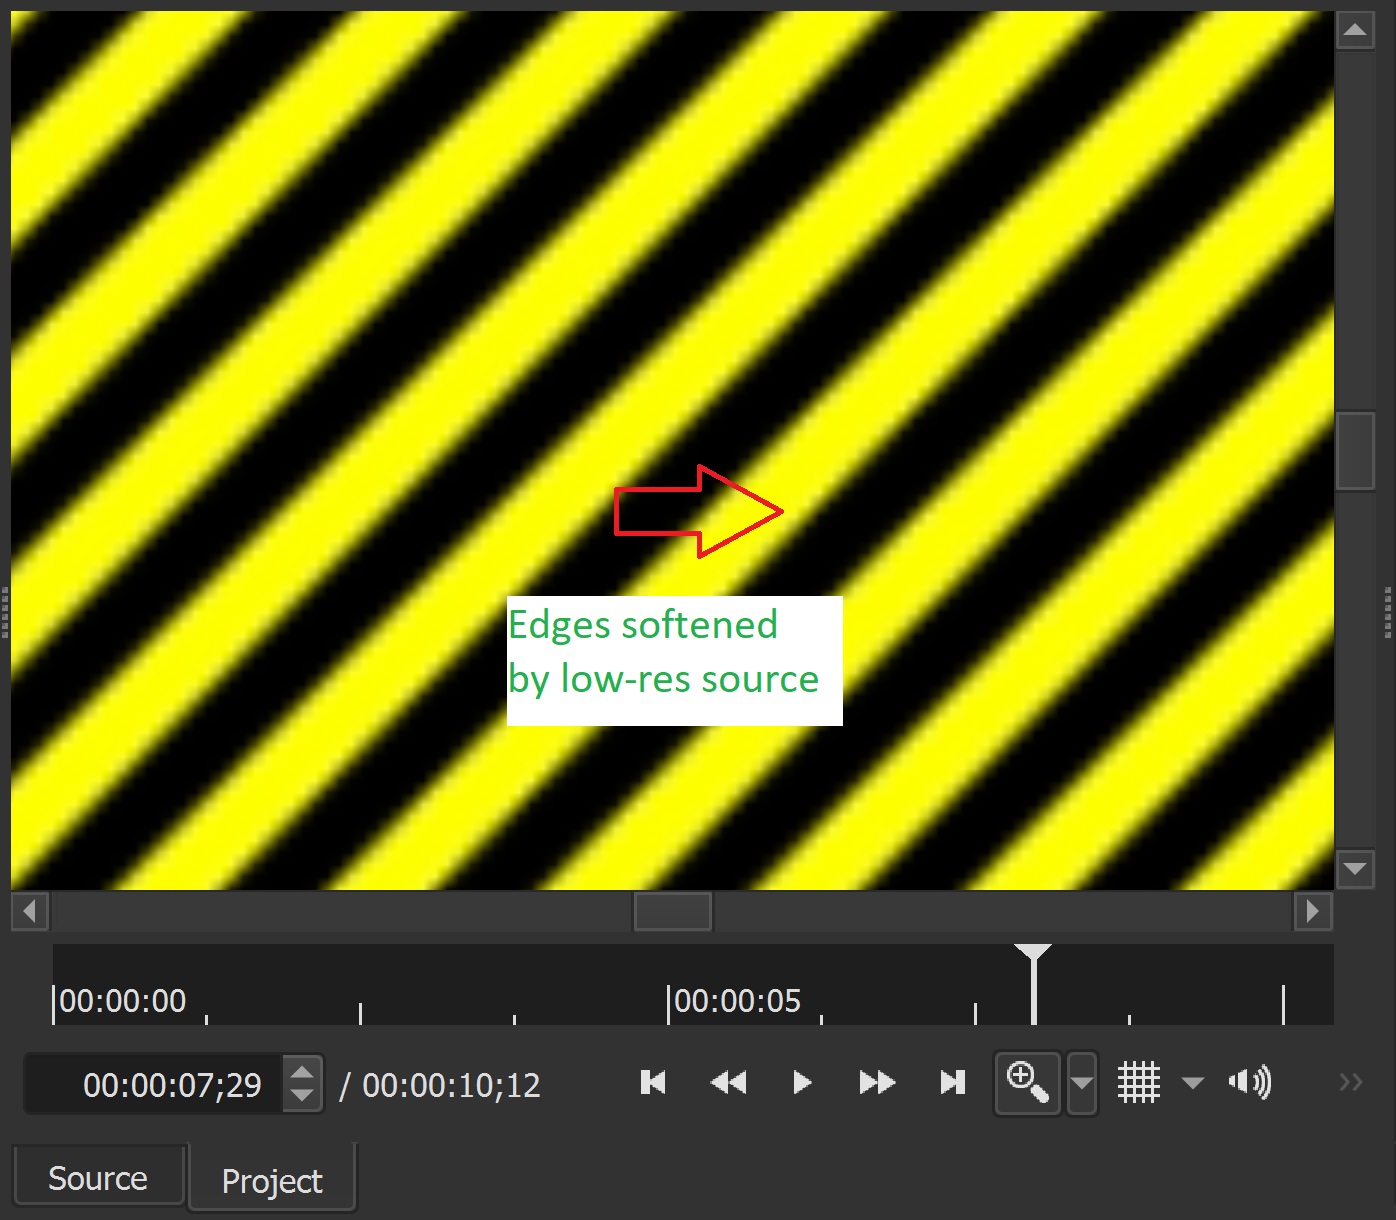
Here is the Shotcut preview window zoomed to 400% with the Crop: Source filter:
Some unavoidable softening is going to happen by the very nature of upscaling or downscaling, but the result of Crop: Source at least gives a sharper result that should enhance even better with a Sharpen filter. There is detail for a Sharpen filter to grab that doesn’t exist in the SPR version.
Since it is common for cameras to take still pictures in their highest resolutions (often higher than 4K), then we often gain resolution benefits by using Crop: Source into a 1080p project rather than using SPR. The same goes for 4K video-in and 1080p project-out. But if the same resolution is used for both input and output, with rotation orientation being the only difference, then enlargement is required either way. However, Crop: Source should theoretically provide more detail, and Crop: Source is computationally less math to do than SPR, so at least it has the speed advantage.
Just saw your post as I was about to hit Reply. I agree! Part of me wonders if the UI could be tweaked to show pixel values in the UI but calculate and store percentages underneath. Yes, the pixels would change depending on whether we were looking at originals or proxies, but even those numbers might make more sense than the timeline value that’s somewhere in-between.
Thanks. I am doing and following your instructions, interspersing with my activities. I’m not able to “find” these parameters that they suggest, both to configure BEFORE and configure the export. The invitation to use the TEAM VIEW and show it on my pc is kept.
Aff, now I have to translate English, French and learn the SHOTCUT technique, I’m going to freak out, laugh. Thanks. My difficulty (one of them) is finding and using the parameters you suggest, I just don’t find them.
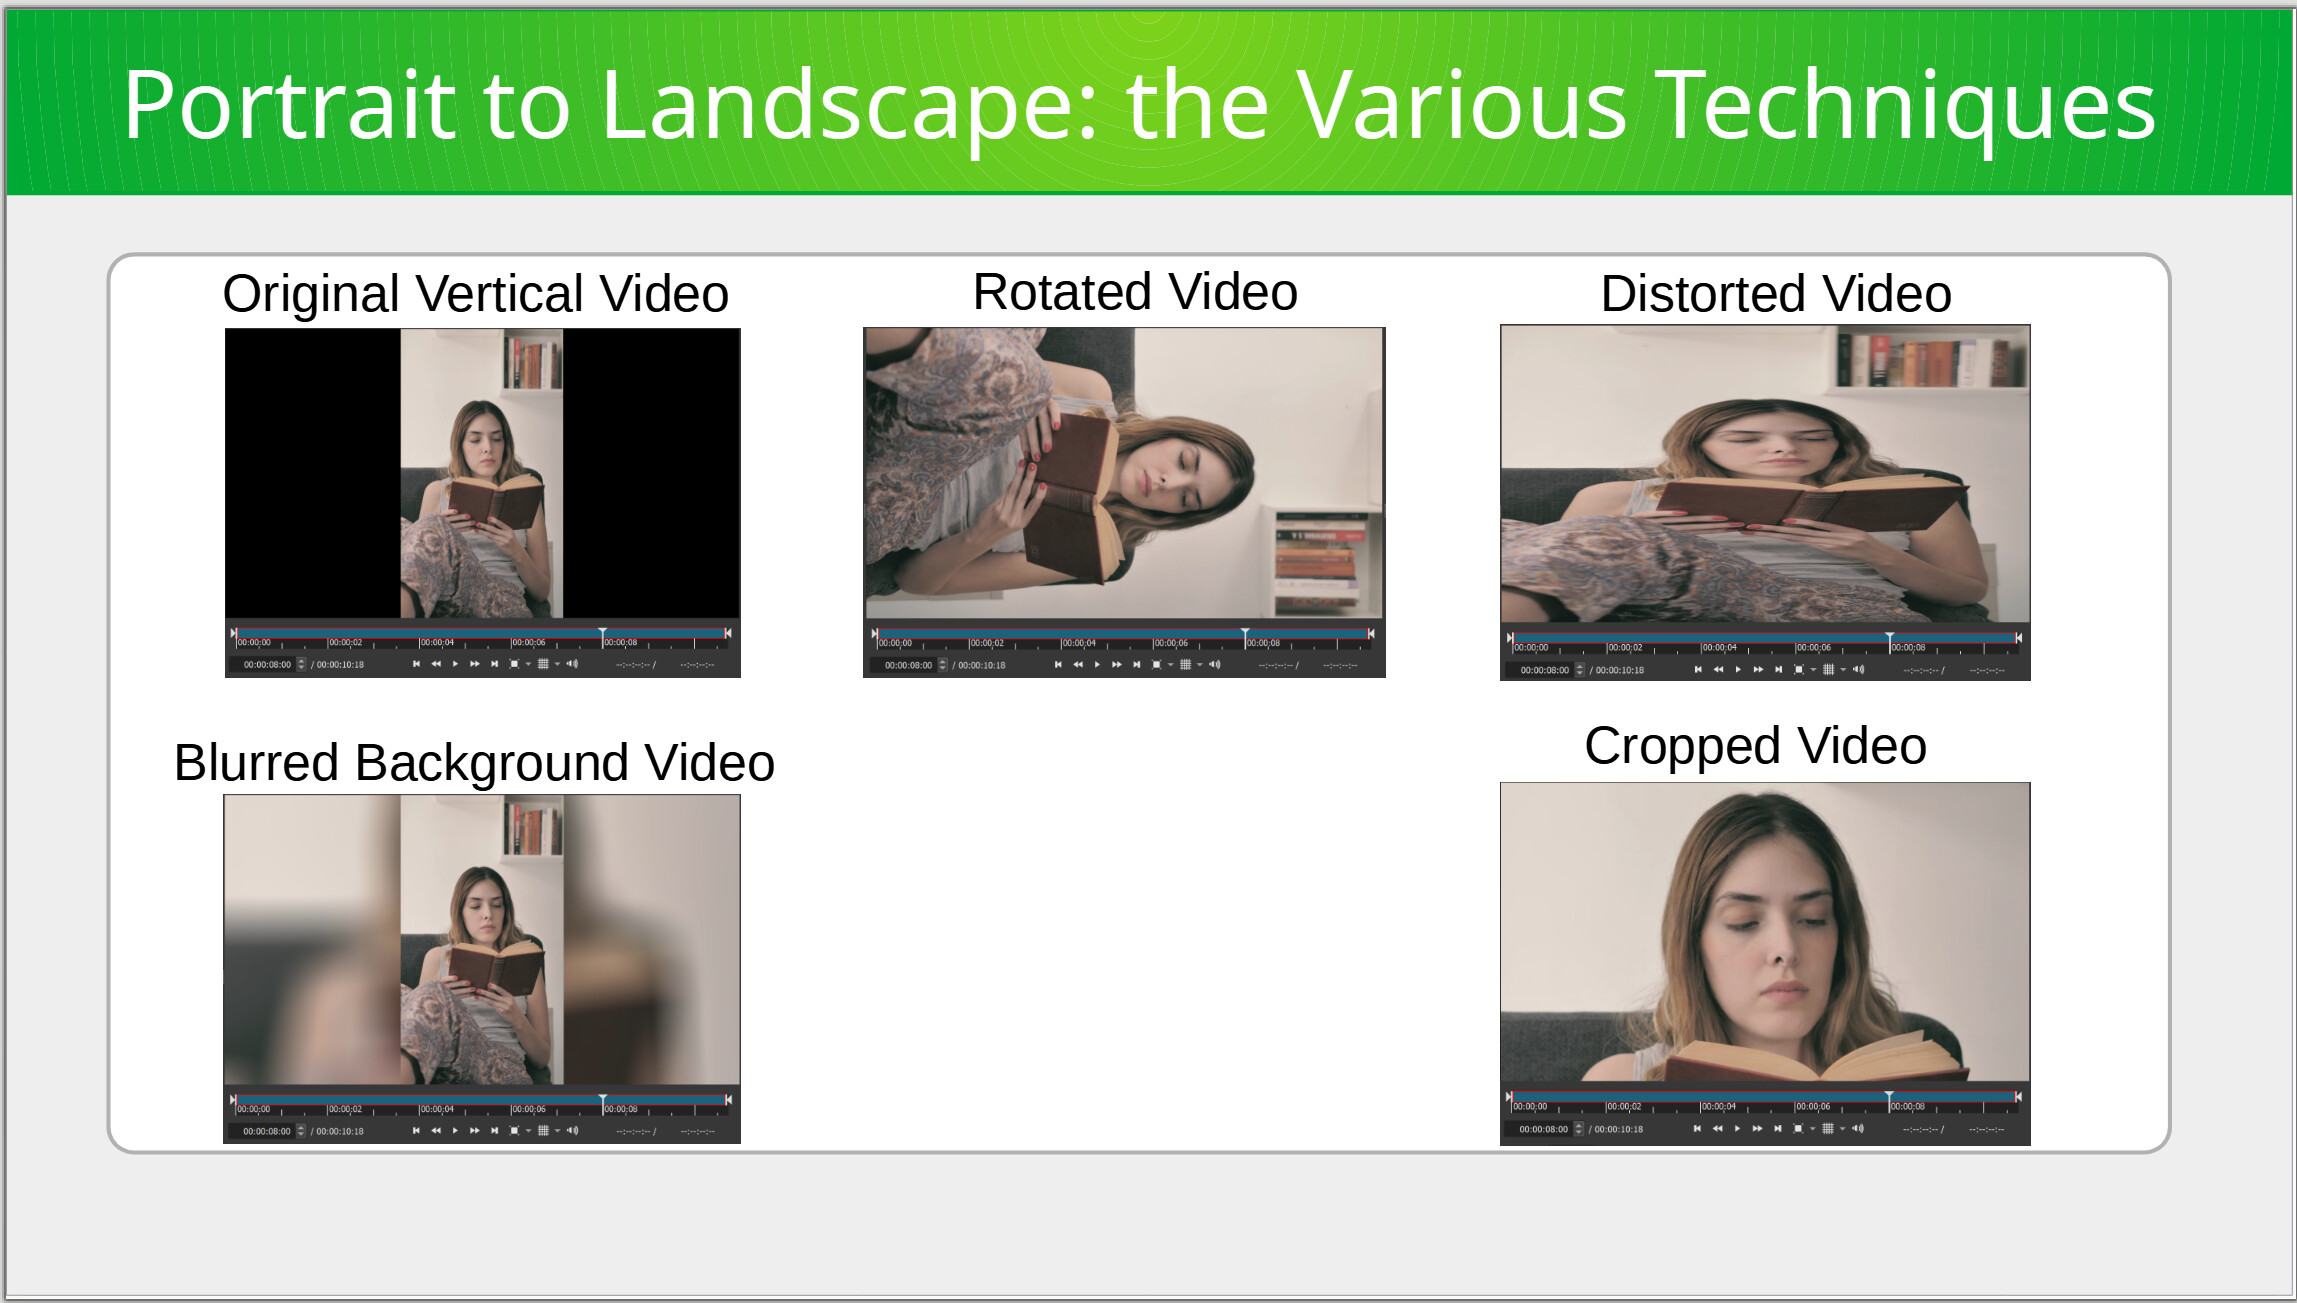
I am in the process of putting together a tutorial of the various techniques for converting a Vertical (or Portrait) video into a Horizontal (or Landscape) one. This image shows the various options.
@shotcut@brian
Would it be possible to make a note in the SPR filter’s documentation about any risks towards loss of resolution? SPR seems to work differently now than I remember, and I can’t figure out exactly what it’s doing.
Sample image (diagonal yellow and black lines with sharp jagged edges): hazard.zip (2.6 KB)
Filter stack #3 (has the softest edges of the three):
SPR #1 with size 608x1080 (Zoom 100%)
SPR #2 with Zoom set to 316%
All three of these stacks basically accomplish the same thing, but get different results in terms of edge sharpness. I don’t know what’s causing that difference.
The part that makes me go “hmm” is stack #3. If the hazard image was truly scaled down to 608x1080 then scaled up by 316%, then I would expect a horribly fuzzy rendition of those diagonal lines. Doing this sequence in GIMP produces the expected softness. But the diagonal lines are still well-defined in Shotcut, which I can only imagine happening if all the SPR filters get their zoom values added together to produce a single, final zoom amount that goes against the original image one time, as opposed to carrying out every SPR operation in sequence on the resized-to-fit-the-timeline image. The lines are so sharp that I’m led to believe SPR maintains access to the original high-resolution image for its processing, which would be awesome.
As an example, here is a 200x200 crop of filter stack #3 exported from Shotcut:
And here is a 200x200 crop doing the filter stack #3 sequence in GIMP:
Huge difference, which has me assuming that SPR is somehow maintaining access to the original image data. But does it always?
Regardless of the actual mechanics (which I’m hoping can be added to the documentation), this is a pleasant surprise where Shotcut is producing way better quality than expected when source clips are zoomed in with SPR. But I don’t understand how it works, nor do I know when and how the auto-resizer may change things if there is no Crop: Source or SPR filter, and therefore I don’t know when I’m at a risk of resolution loss from upscaling or rotating or otherwise filtering an image. Could a documentation note be added stating when filters see the auto-resized version of a frame as opposed to receiving the full-size frame from the original file? Thanks for considering.
There is an empty slot available on your demo board… what about a “custom background” option? Kinda like the blurred background option, except they can put their own custom color clip or image/video clip on V1 with the vertical video on V2. Maybe a background of slow rippling water or other B-roll video could fit the theme of whatever’s happening in the vertical video.
I do not think I can document the magic. There are many variables. I suggest people not to overthink and try things to find what works for them. I am not really following this thread since I found it too confusing. You are really surprised that different implementations (crop source, affine, gimp) and combinations give different results? Or you are not, but want a full explainer? There’s too many variables involved. I will add a few hints here, but not sure about adding to the documentation yet. Maybe it can be refined to be included:
The Crop: Source filter removes rows and columns from the edges of an image before anything else implied or not.
There is implicit scaling (upstream from all user-added filters) from the source resolution to the project resolution that maintains the source aspect ratio by padding with black. But on the rare occasion a downstream filter can bypass this or govern its target resolution.
Size, Position & Rotate (aka affine transform) has different behaviors depending upon:
If Preview Scaling is on:
→ tell upstream to scale to Size with the preview scaling factor applied.
If there is more than one of this filter on the same object, or
if Size mode is Fill, or
if Size mode is Distort, or
if the source image is larger than Size (down-scaling):
→ tell upstream to scale to Size
Otherwise (one transform filter on this clip), Size mode is Fit, and source is smaller than Size:
→ bypass the upstream scaler.
Size, Position & Rotate uses interpolation when mapping source pixels to each destination pixel.
In stack #3, you would expect the image to be initially scaled to 608x1080; however, the two filters are compounding such that the first filter thinks there is preview scaling at 3413p (316% zoom = 1919x3413). Thus, the first filter behaves under the preview scaling rule above because the second filter asked it for 1919x3413. The way preview scaling works at the engine level is different than the user presentation within Shotcut. In Shotcut there is a global setting but not so in the engine. A filter in the engine receives an image request at a resolution (typically at video mode with preview scaling applied), compares it with the current video mode resolution, and scales its parameters accordingly. Since the second transform filter is requesting 1919x3414 and the video mode is 1920x1080, it scales its size parameter by ~3.16x. Thus, the first filter ends up also requesting 1919x3414 from the upstream scaler. I have no plans to change or address any of that. Basically, I do not know how and lack the confidence to do so without breaking a use case or backwards compatibility.
Before version 20.09 IIRC the Size, Position & Rotate filter would always bypass the upstream scaler and do its own scaling, but that gave very poor quality for down-scaling and was changed.
This actually makes sense, and thank you so much for taking time to describe the many logic paths. This is very useful and relevant.
…as opposed to SPR receiving a timeline-shrunk version from upstream and doing the scaling itself on the shrunk version.
This is the clarification I think many people – including myself – were seeking.
In other forum threads as well as this one, several people have posted their concern that the implicit scaler might shrink a large image down to timeline resolution first, and then SPR would use that shrunken version for any zoom operations. The fear was that resolution would be lost due to zooming into the shrunken version rather than zooming into the original image data.
The test I did above proved that resolution loss was not happening when zooming in with SPR, but I couldn’t verify whether that would remain true in all circumstances. Your clarification helped us know when to be concerned and when not to be.
I think a simple statement saying “don’t worry about resolution loss during a zoom with SPR because the original source frame is used” is all people need to see in the documentation to stop worrying. Without this clarification, some people (including myself earlier in this thread) have advised using “Crop: Source” rather than SPR as a preferred method of zooming to avoid resolution loss, but it turns out that the loss problem doesn’t even exist. I feel like I noticed a bigger resolution difference in earlier versions of Shotcut, but maybe that was just different interpolation methods I used at the time.
Thanks again. I’ll update my previous inaccurate posts.