Has anyone managed to achieve anything with the ‘GPS graphic’ filter?
I can’t seem to find any documentation on it.
I am making an assumption that I will be able to make a ‘squiggly’ line travel along a path as dictated by the data in the GPX file.
what I have done…
new project - new transparent colour - apply the gps graphic filter to the transparent colour and import the appropriate GPX file - so far so good
I am presented with a graphic white line of the GPX data… excellent…
on playing the clip however nothing happens… essentially every frame is the identical so its a static picture if you like…
Graph data is set to Location (2D map)
There are options for things like GPS offset which seem to be time based but in the context of what is essentially an XML file with Lat/Long & a timestamp don’t seem relatable to anything I can envisage so I’ve ignored that.
Are there any tutorials out there? - my google-fu says not but maybe there are?
Or have I got the wrong end of the brown sticky thing?
Cheers
After more investigation I have had some success… but way more failure.
Exporting/rendering content with the filter applied often results in the filter not being present in the final export whereas it is in the preview window… the line size is completely different as well (when it does export) from the preview size and could do with having a limit above 10 (maybe up to 100)
Fiddling with the various colours and pre-sets also regularly breaks the whole filter with the no progress on the ‘now’ dot regardless of play head location - at this point you have to delete the filter and go back to square one.
The back ground function is flawed as it will only let you have a background the exact size of the GPX track - If showing a GPX track progress on a map I don’t want the GPX track to go up to the very edge of it - needs to allow a border?
As hinted by the filter if you do want a map to be centered alongside the GPX track you need to work out the center of your GPX map (maxlat+minlat/2,maxlon+minlon/2) - can’t it give you this information as the filter has it to hand? - I ended up writing a powershell script to parse the original GPX file to get that info which might not be possible for everyone.
The fact that you have to set the play speed is a little weird? - why wouldn’t it just spread out the GPX track progression equally over the playlist item length you are attaching the filter to?
Due to the limitations of the background feature above I decided to just show an image on another video track instead and use the move/rotate filter on that to align the GPX track to the map - however when altering the size of the GPS graphic filter you’ve lost the correct aspect ratio forever and that technique then requires lengthy fiddling to get it all to match up - maybe a ‘fix aspect ratio’ option would help here?
In summary I suspect this filter has been written with one use case in mind - a real time ‘racetrack’ type scenario in the top corner sort of thing with say cockpit footage as the main event - it likely works well for that but its a little short sighted when there are plenty of other use cases for such a filter, my videos concentrate on cycling/hiking and showing a summary of the route backed onto a map over say 5-10 seconds is a nice feature that would’ve been appreciated.
Don’t get me wrong I understand there is a lot of criticism above but I can definitely see the promise in the work done thus far - I honestly think its 90% there and a lot of this can maybe fixed with just an expansion of options
For this filter, you really should start with one of the Presets. In this filter, there are several very useful ones that provide almost exactly what one needs or at least the best starting point. Even to understand how all of the options work together one should study the presets.
I was gonna explain exactly this but I see you figured it out, this is correct - that was the main reason the filter was made. I do welcome other use cases and suggestions but the limitation is that I don’t want the interface to become exagerately bloated (it probably already is the most complicated filter in Shotcut).
Can you reproduce this consistently with a simple project or provide some screenshots/more details?
For the line size do you use preview scaling? That might affect the output size.
You can do this by using -10% and +110% for crop horizontal/vertical (there’s actually a bit of space to mouse drag the handles exactly to hint at this possibility, but you can go even -100% and +200% and beyond (by manual typing) to make plenty of extra border).
There’s a little “i” button next to the image load that does exactly this.
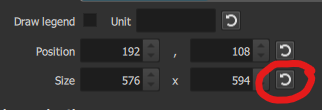
This one is a bit hidden but it’s there. Sadly as the filter got hugely complicated and interface performance became an issue I had to reduce/combine the number of buttons/inputs so the “reset” button on the size does exactly this: resets to the correct aspect ratio (it modifies vertical height to do this).
There’s helpful hints when hovering over different buttons/areas on the filter and you can also read more details here for most inputs.
The default preset: 2D map: full map progress line should reset everything to the proper visibility (otherwise do report it as a bug).
As I mentioned the filter got very complex and some presets only affect parts of the settings, ie: some “reveal” hidden combinations that would be hard to present otherwise (like setting a color to transparent to “hide” parts of the track) therefore you might stumble into some weird combinations that aren’t as straightforward. I recommend to choose a preset that sounds close to your needed result and then move to the individual settings.
If you find a combination that you feel it should intuitively do something else let me know.
I think your intended usage is pretty useful, I’ll look into adding a button to spread the entire animation/track over the length of the clip/video/image.
I’ll try to make some time for this, haven’t gotten around to doing it even though it was planned.