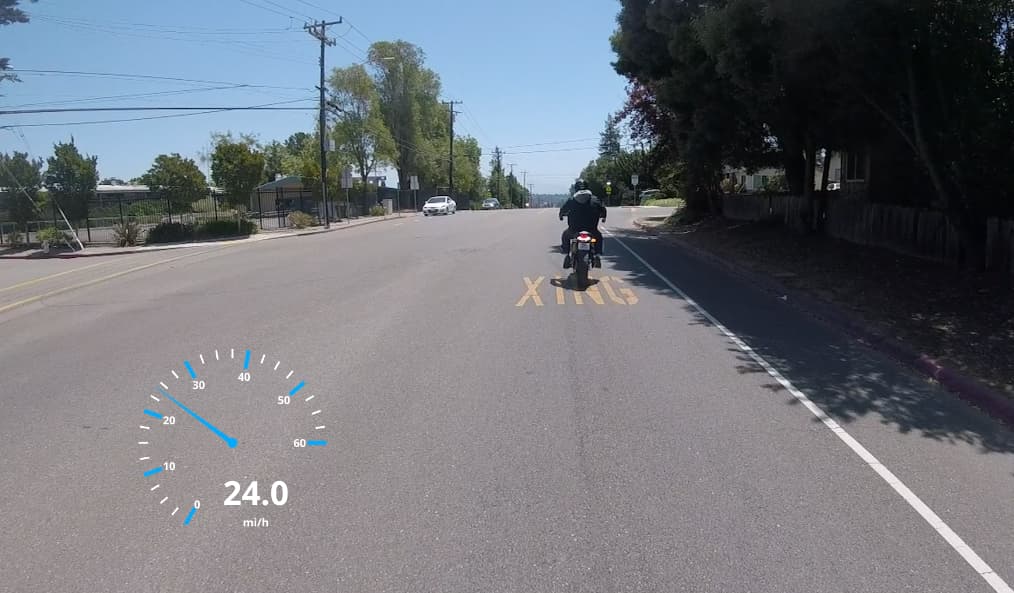
The GPS Graphic filter allows you to overlay telemetry data—such as speed, altitude, coordinates, and maps—directly onto your video. This is an essential tool for action videography, including cycling, drone flight, motorsports, and hiking, where visualizing the “where” and “how fast” adds context to the footage. For example:
Requirements
To use this filter, you must have a GPS data source. Shotcut supports:
- External Files:
.gpx,.tcx,.fit,.nmea, and.kml. - Embedded Telemetry: Some cameras (like GoPros, certain DJI drones, and Insta360) embed GPS data directly into the video file metadata.
- Shotcut can extract the telemetry in GoPro camera videos to GPX using Properties > menu-button > Export GPX. (This requires the
gopro2gpxexecutable if you are on a Linux or BSD system running a build we did not make.)
Getting Started: Choose a Preset
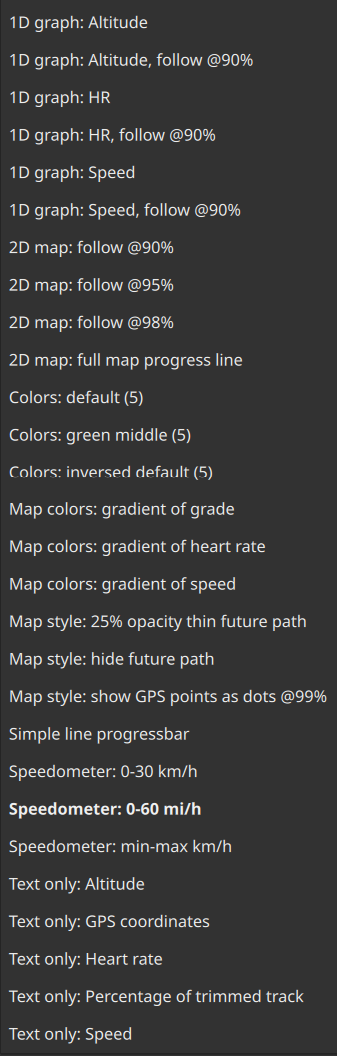
This filter comes with a long list of ready presets! It almost feels unusable without them, and they provide a great teaching aid. Please start with one of these to get started.
Parameters

The GPS Graphic filter is divided into several sections to manage the data source, visual style, and synchronization.
| Parameter | Description |
|---|---|
| File | Select the GPS data file. If your video has embedded data, click “Extract from Video.” |
| Graphic | Choose the type of visualization (e.g., Speedometer, Map, Altitude Chart, Compass). |
| Units | Toggle between Metric (km/h, meters) and Imperial (mph, feet). |
| Smoothing | Reduces “jitter” in the data caused by GPS signal noise. |
| Sync | Adjust the time offset if the GPS recording did not start at the exact same moment as the video. |
Don’t forget! Some of the parameters have a tool tip that you can hover the mouse over to get helpful information and tips.
Types of Graphics
Shotcut provides a wide variety of preset graphic types that can be customized for color, size, and position:
1. Speed and Distance
- Speedometer (Dial or Digital): Displays the current speed.
- Odometer: Shows total distance traveled.
- VSI (Vertical Speed Indicator): Useful for aviation or drone footage.
2. Maps and Navigation
- Map: Displays a top-down view of your path. You can choose different map providers (OpenStreetMap, Stamen) or use a “Path Only” view.
- Compass: Shows the heading/direction of travel.
- Coordinates: Displays the raw Latitude and Longitude.
3. Elevation and Force
- Altitude: Displays the current height above sea level.
- Elevation Chart: Shows a profile of the terrain covered.
- G-Force: Visualizes acceleration and cornering forces.
Workflow: Adding and Syncing
- Add Filter: Select your clip on the Timeline and add the GPS Graphic filter.
- Load Data: Click the folder icon to load your
.gpxfile or use the “Extract” button if using a GoPro. - Choose a Preset: Select a graphic type from the dropdown.
- Position the Graphic: Use the VUI (Visual User Interface)—the rectangle in the preview player—to drag the graphic to a corner and resize it.
- Synchronize: If the speed doesn’t match the action in the video (e.g., the speed increases after the car starts moving), use the Sync slider or enter a time offset in seconds.
Customizing the Look
You can modify the appearance of the graphic to match your video’s aesthetic:
- Colors: Change the background, text, and gauge colors.
- Fonts: Select any system font for the data readout.
- Opacity: Make the background of the gauges transparent to show more of the underlying video.
Important Notes
- Privacy: Remember that GPS data contains precise location information. Be mindful of this when sharing videos that show your home or private locations.
- Hardware Acceleration: Rendering complex GPS graphics (especially high-resolution maps) can be CPU-intensive.
See also: GPS Text Video Filter