Tutorial: How to export a video with transparency

LOL!

2 Likes

Don’t you hate it when you include a quote in a post and the forum decides it’s not important and removes it ?

1 Like

Yup!

Don’t complain too much. I have some publications that have no comments at all. :sob:
It must be because I don’t include quotes for a parallel discussion of something else, hahaha. :joy:

1 Like

Hi,

Just for my info : do we have to export to do that? Just opening MTL as a clip doesn’t work ?

Hello:

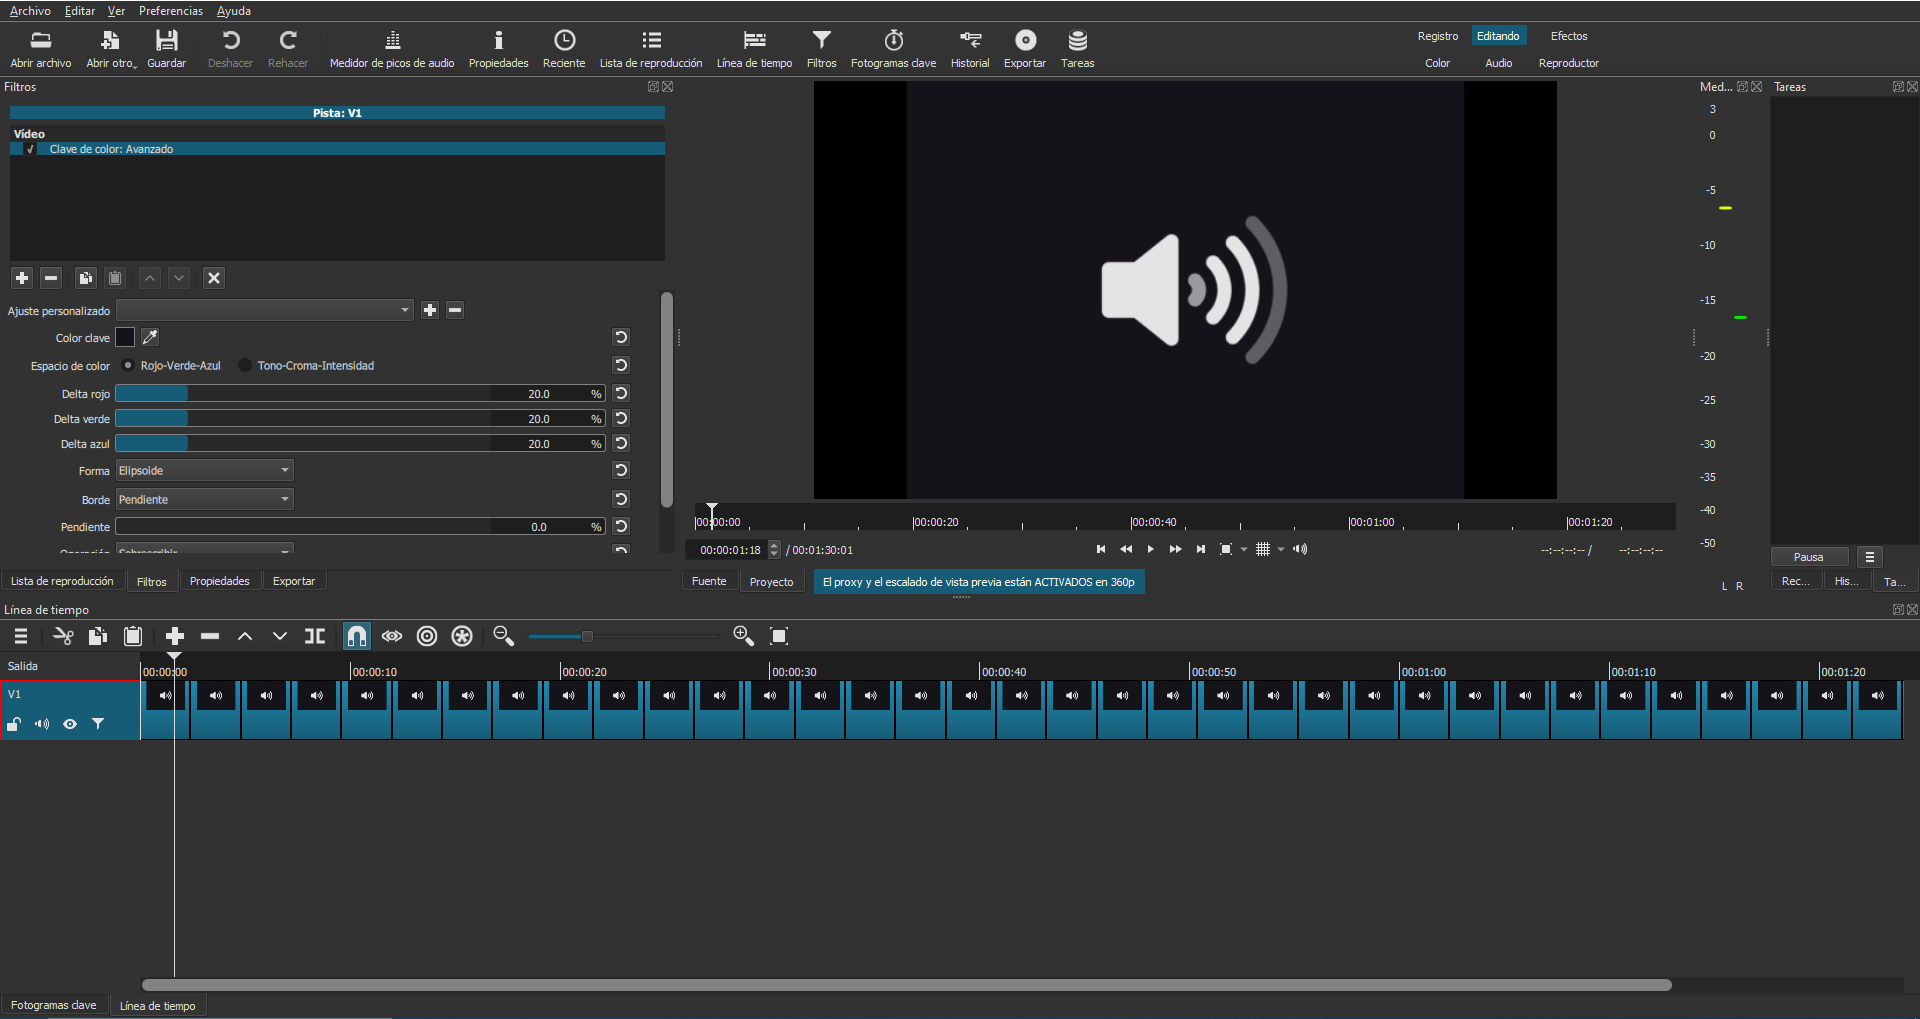
Here is an example with an animated GIF (speaker) that I copied and pasted repeatedly for a longer duration. Then I applied the Chroma Key filter to remove the black background and make it transparent.
I saved that project as .mlt.

I then incorporated this file into another project, maintaining the transparency properties.

The complete video is here:

1 Like

It works if the MLT file you open as a clip only have one track.
The YouTube button I used as an example in the video have 3 video track (including the green background) + 1 audio track.

If you open it as a clip in a project you’ll have to use a Chroma key filter to remove the green

If you remove the green track from the MLT, save it and open it as a clip, there will be a black background under the button animation that you will also need to remove with a filter.

The point of the tutorial is to create videos with transparent parts that you can use in your projects. Like a PNG image file.

3 Likes

Pour bien comprendre.
Le fichier .mlt n’a qu’une seule piste, c’est bien dans le projet où on le crèe. (parce que dans le projet où on l’importe il tient sur 1 seule piste)

J’ai fait un essai.
Dans le projet pour créer le masque, j’ai 2 pistes.
V1 l’image (ou la vidéo) de fond
V2 le masque vert.

Dans le projet où j’importe le masque, j’ai aussi 2 pistes.
V1 l’autre image (ou la vidéo) de fond
V2 le fichier .mlt importé comme un clip.
Un filtre ChromaKey sur le clip V2 et BINGO cela fonctionne parfaitement.

In the project where I import the mask, I also have 2 tracks.
V1 the other background image (or video)
V2 the .mlt file imported as a clip.
A ChromaKey filter on the V2 clip and BINGO it works perfectly.

Donc encore merci pour ce tutoriel, comme en plus on peut importer directement le fichier mlt, plus besoin de passer par la phase d’export au format .mov (au moins pour les formes géométriques simples)

So thank you again for this tutorial, as you can import the mlt file directly, no need to go through the export phase in .mov format (at least for simple geometric shapes)

2 Likes

@Namna
Dans les tests que j’ai fais, si le fichier MLT comporte plus d’une piste dans sa forme originale, lorsqu’on l’importe dans un projet il ne prend qu’une piste, mais la transparence ne fonctionne pas et on doit utiliser un filtre pour retirer le fond…
Alors que si on l’exporte au format .mov comme expliqué dans le tuto, la video comporte des zones transparentes, comme une image PNG. Donc pas besoin de filtres pour retirer le fond vert (ou noir).

In the tests I did, if the MLT file has more than one track in its original form, when you import it into a project it only takes one track, but the transparency doesn’t work and you have to use a filter to remove the background.
But if you export it in .mov format as explained in the tutorial, the video has transparent areas, like a PNG image. So you don’t need a filter to remove the green (or black) background.

J’ajoute que c’est seulement utile pour les animations qui servent très souvent. Pour un truc qui ne va servir que dans un projet, c’est plus logique d’importer le ficher MLT et d’appliquer un filtre.

I would add that this is only useful for animations that are used very often. For something that will only be used in one project, it makes more sense to import the MLT file and apply a filter.

Yes, but if the Chroma Key filter was already applied to the Output track of the source MLT clip, the chroma key happens automatically in the parent project.

I tried it and it worked, but with a slight potential bug. Filters on the output track become filters on the clip itself in the parent project. The result is duplicate Chroma Key filters. I may open a separate bug topic if I can’t figure it out.

1 Like

Je ne comprend pas, ça fonctionne chez moi même avec 3 pistes
V1 Image de fond
*V2 clip vert avec masque simple shape *
V3 clip vert avec masque simple shape

I don’t understand, it works for me even with 3 tracks
V1 Background image
V2 green clip with simple shape mask
V3 green clip with simple shape mask

Le projet original du bouton YouTube utilisé dans le tuto.
The original YouTube button used in the tutorial.

Le même projet avec la piste verte enlevée
Same project with the green track removed.

Nouveau projet avec le MLT original contenant la piste verte. Besoin d’un filtre pour enlever le vert
New project using the original MLT with the green track. Filter needed to remove the green part.

*Nouveau projet, mais avec le MLT sans piste verte. Notez que la transparence fonctionne seulement lorsqu’il n’y a que le logo YouTube d’affiché. Ce sont les moment situés dans les espaces vides de la piste V1 du MLT (image2 ci-dessus) *
New project, but with the MLT without green track. Note that the transparency only works when there is only the YouTube logo displayed. These are the moments located in the empty spaces of the V1 track of the MLT (image2 above)
youtubeButton04


I tried your method, and it worked. That’s good to know :slight_smile:


À noter que un des avantages d’exporter avec transparence au format .mov est qu’on évite les éventuels problèmes causés par l’utilisation d’un MLT de taille X dans un projet de taille Y
Note that one of the advantages of exporting with transparency in .mov format is that it avoids the possible problems caused by using a MLT of size X in a project of size Y

2 Likes

OK, j’ai compris, on ne parlait pas de la même chose.
Merci.

OK, I get it, we weren’t talking about the same thing.
Thank you. :wink:

1 Like

Excellent point. I wasn’t really advocating for Use MLT XML As Clip. I was just noticing that embedding Chroma Key filters on the Output track had an additional benefit if the MLT Clip feature was ever used.

1 Like

Another reason someone might want to export as a .mov is it makes it possible to share your animation with people that use other video editors.

Worked in Kdenlive (with proxy deactivated):

Worked also in Openshot

If you want to test the YouTube animation somewhere (or use it in your videos) You can get it here:
https://icedrive.net/0/81F8JaGJDv

No problem. I got it :slight_smile:

1 Like

Hi @MusicalBox, I just got time to watch this for the first time. I’m gobsmacked at the graphic quality of your screen capture - very crisp. What capture software did you use? Also your on-screen graphics are excellent. How the @!!@ did you do the little orange arrow animation at 0:57?? Great!
Also, are you sure you didn’t hire @bentacular for the voiceover? :slight_smile:
Brilliant work :+1:

2 Likes

Je ne sais pas comment @MusicalBox a réalisé cette flèche.
Il existe des polices de caractères où chaque caractère est remplacé par un symbole.
Téléchargez la police, passez le curseur au dessus du symbole et une bulle d’aide vous dit qu’elle est l’équivalent caractère clavier.
Ensuite dans SC vous sélectionnez cette police et tapez le caractère correspondant dans le filtre texte.

I don’t know how @MusicalBox made this arrow.
There exist fonts where each character is replaced by a symbol.
Download the font, hover over the symbol and a tooltip tells you it is the keyboard character equivalent.
Then in SC you select this font and type the corresponding character in the text filter

2 Likes

Genius!

1 Like