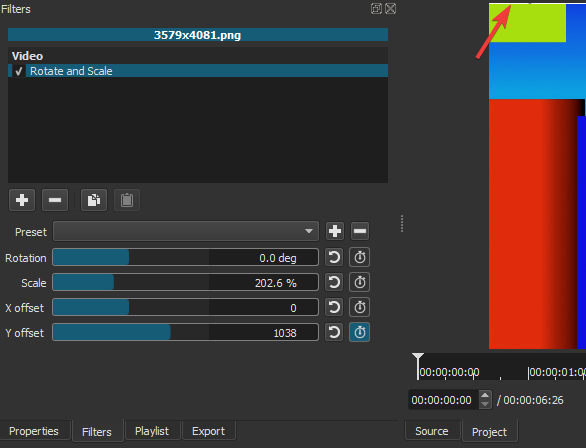
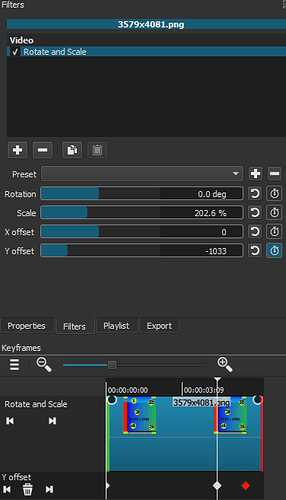
All right, I had some time to work on this more and I was able to figure out how to make the Size and Position filter parameters that I needed to pan this photo while filling the 3840x2160 screen.
A really big help were some videos from Tux Designer, especially this one about Keyframes - https://www.youtube.com/watch?v=cNrMxxk7quU
After seeing that, I was able to create the keyframe, and then play around with the size and position filter values to get a smooth pan/zoom from the beginning of the image display to the end.
Now that I know how it works, I can do whichever pan/zoom combination I want. I still don’t know what Keyframes are, what that word means, but now I know how to use that feature. It’s not an obvious thing. In the Keyframe, I drag the beginning black dot all the way across the item so that it is just one single pan/zoom throughout the entire duration of the image based on whatever parameters I have in for size and position…
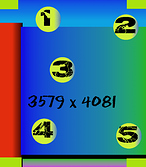
For this 3579x4081 image that I wanted to fill width and pan down from top to bottom… here is what I did -
With the image selected in the timeline, I added a filter Size and Position. Then Keyframes shows up. In Keyframes, I grab the top left black dot and drag it all the way to the right. At this point, it is a matter of choosing the correct 4 values for size and position at the beginning and 4 values at the end. Make sure you are at the beginning in the Keyframes (using the play head vertical line in Keyframes area). If you are not at the beginning or end, the size and position parameters will not be editable. Here I changed the y-value to fill to 3840 width. I found that changing the y-value allows you to change the size (aka zoom). Changing the x-value did not seem to do anything. Since I want to fill the width, that would normally be the x coordinate. But since that doesn’t work, I have to calculate the proper y coordinate to match the x coordinate I need. 3840/? = 3579/4081 Solve for ? and get 4378.6, so 4379 is good enough. I set that in the y field under Size and then the image fills the width! The image is already positioned at the top with position at 0,0 so that’s good. Now we need to adjust the size and position at the end, so move the playhead in Keyframes to the end. Then set the same y-value of 4379 so that it will also be the correct width at the end. And we need to change the position so the image shows the bottom. The image is 4081 tall but it is now scaled to be 4379 tall, and the play window is 2160 tall. We need to position the image to be 2160 - 4379 = -2219 for the y-value so that the bottom of the image is aligned with the bottom of the play window. And that’s it.
Actually I went back and decided the 3579 width is close enough to 3840 that I should just keep the width at 3579 for quality reasons so that did change some of what I had above. I then had the beginning just be the original height 4081, and height 4081 at the end also. And ending position was 4081 - 2160 = -1921. I also included a little x position at both beginning and end to center it.
I uploaded a video so you can see the result for yourself - https://www.dropbox.com/s/5fen4p5a3i6oqis/Plitvice%20Lakes%2002a%20-%20test%20keyframes%20pan.mp4?dl=0
From here, I have begun to do other kinds of pan and zoom with the other required calculations. For example I have done a pan and zoom that holds the top or bottom of the image on the top or bottom of the frame, while zooming between showing full image (with black bars on left and right) to filling the frame width. The presets under Size and Position offer some options, but not many. Coming from Movie Maker, I believe that had available useful combinations of zoom in/zoom out/no zoom along with pan to top/bottom/left/right/top-right/top-left/bottom-right/bottom-left/none. That was about 22 combinations. Shotcut’s stock presets under Size and Position cover 10 combinations.
So I learned to make my own presets to fill in the gaps. However, since I have to set the size and position, my presets are only appropriate for images with the same dimensions. For example, if start with a 4000x3000 photo and I use Keyframes and make a pan/zoom that zooms in from showing the full image to filling the 3840 width and holds the top the image at the top of the frame with no x direction panning, and I save that as a new preset… then that only is a good fit for other 4000x3000 photos. As a result, I think I will make presets for my most common photo dimensions and then customize it individually for the others if I want. This will eventually be a lot of new presets!
I found I wanted to copy the presets I had on my Mac laptop to my Windows desktop. I looked up where presets are saved here - https://shotcut.org/FAQ/#where-are-the-log-presets-database-and-settings-stored . I see that directory under Windows, but I don’t seem to have the same directory on my Mac. I can only get to ~/Library/Application Support. There is no Meltytech or Shotcut in there.
So how can I find my presets files on my Mac? Are they stored somewhere else now or is there something I can’t see?


