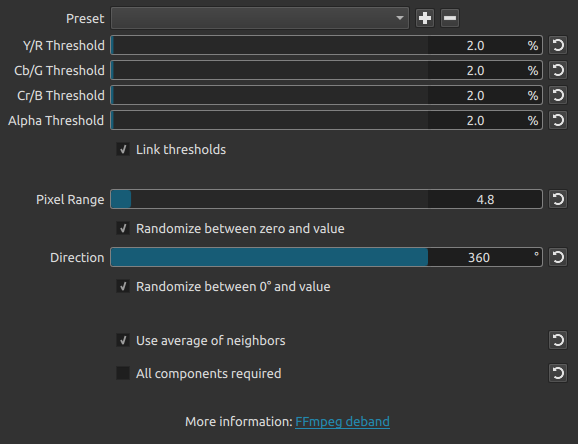
The following zip file has a QML UI for the Deband filter:
deband-1.2.zip (594.9 KB)
To use it, copy the “deband” folder from the archive into the following folder under the Shotcut program root, then restart Shotcut:
<ShotcutRoot>/share/shotcut/qml/filters
The code has been tested against Shotcut 21.03.21 and 21.05.18 and 21.06.15.
The two image files in the archive are for testing the filter. Documentation is provided below.
If the developers are interested, I can create a pull request. I realize the timing is not ideal since a release candidate is already underway.
Comments and suggestions are welcome!
Deband Filter
Table of Contents
What Is It?
The Deband filter tries to remove banding from an image by replacing streaks of solid colors (bands) with gradients or dithering.
Quick How-To
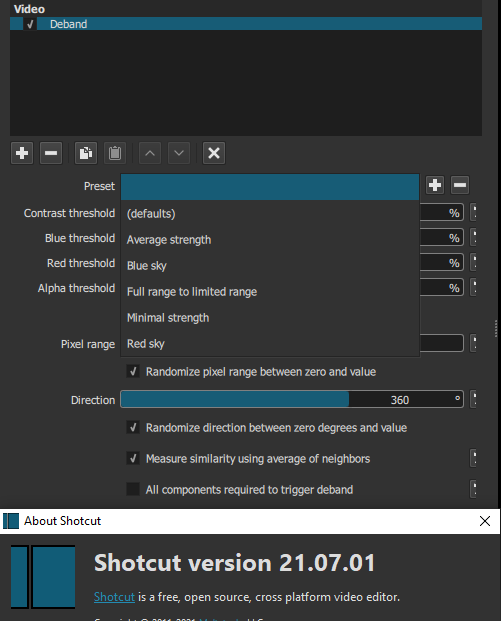
Add the Deband filter to a clip. Start with a preset based on the following criteria:
-
For minimal processing, use the “Full range to Limited range” preset. (This is also the default setting.) This preset is designed to gently remove bands that appear when full-range video is dropped onto Shotcut’s limited-range timeline. Minimal processing is good for 2D graphics and PowerPoint-type material where edges should remain crisp.
-
For average processing, use the “FFmpeg default values” preset. This is good for live-action camera footage.
-
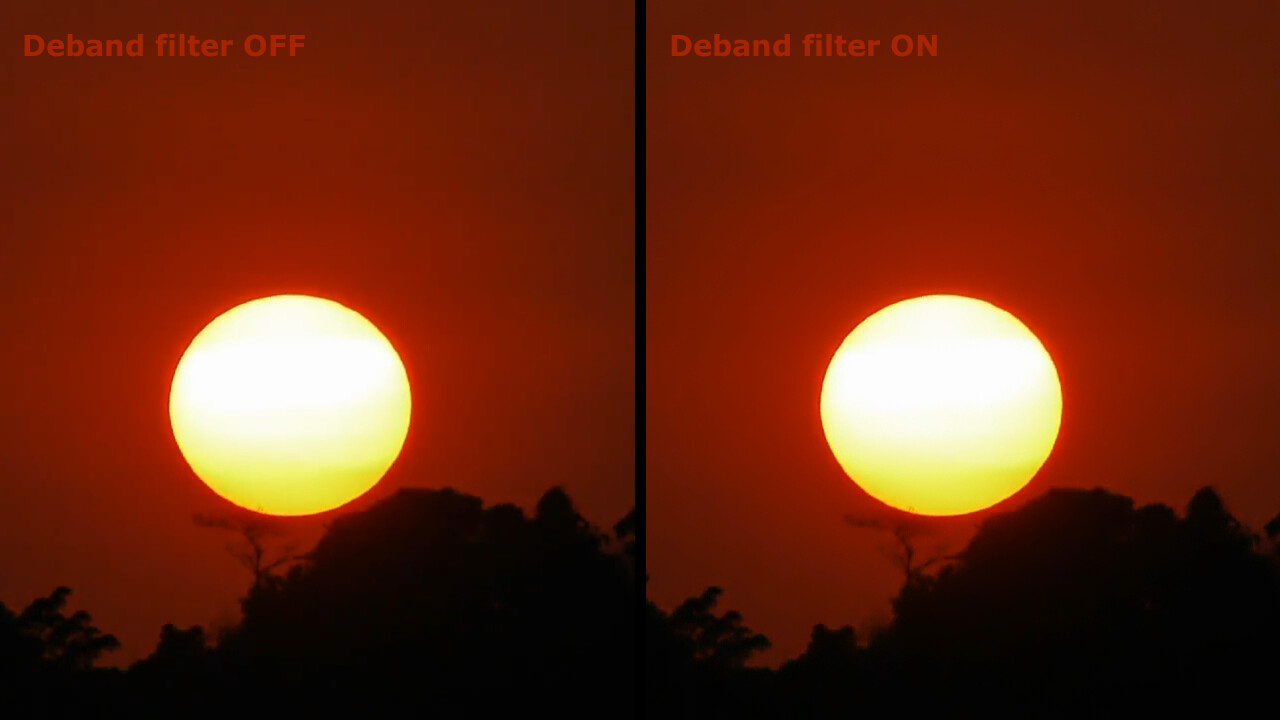
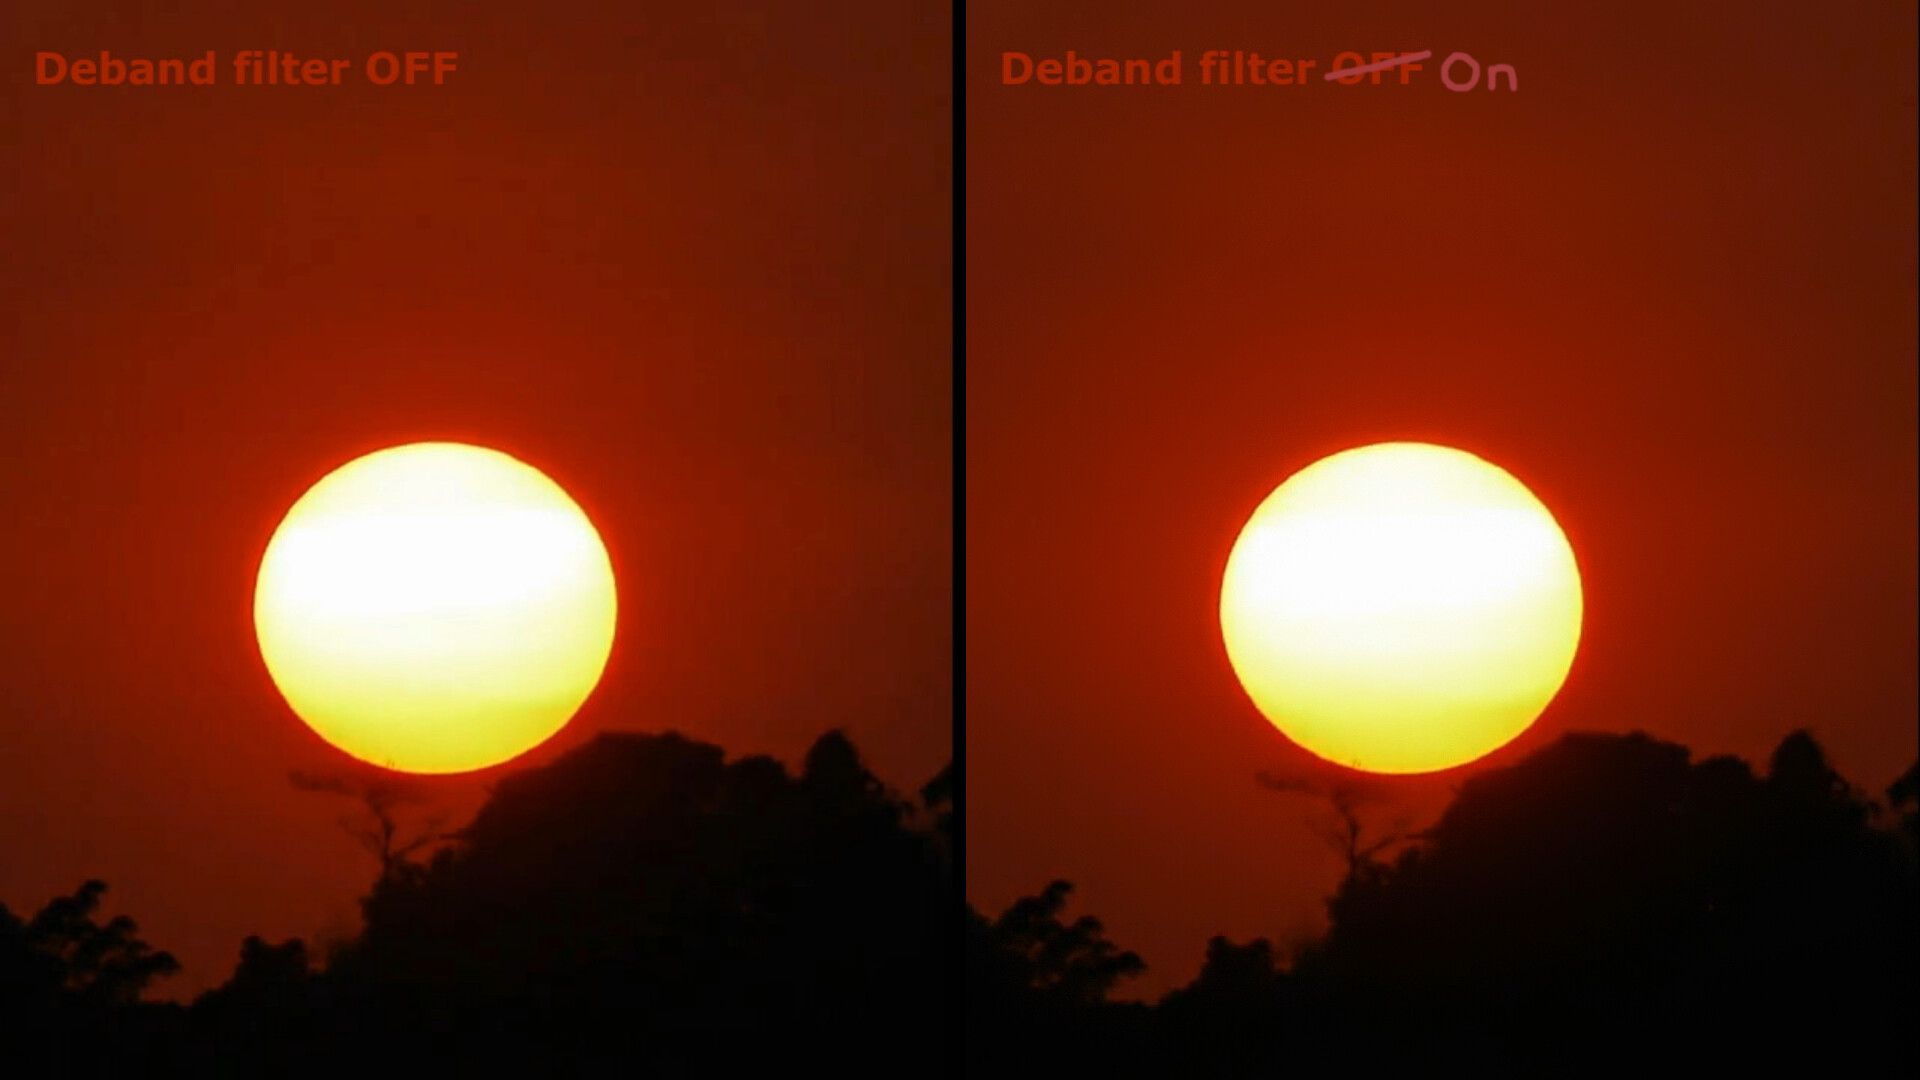
If a streaky blue sky is involved, heavier processing from the “Blue gradient in open sky” preset may be needed. For a red sunset, try the “Red gradient in open sky” preset.
These are just starting points. Customize as needed.
Depending on the source video, the results of Deband may seem very subtle. If the output is viewed on a four-inch smartphone screen, this is certainly true. But on a screen that is “medium-sized” or larger, the Deband filter can create profound improvements.
Also, the most distracting thing about bands is their tendency to wiggle like caffeinated worms during video playback. Although Deband results may look subtle on a still image, using Deband to stop the worm-wiggling in a video makes a significant improvement in perceived realism and the viewer’s ability to stay focused.
Common Uses
Banding is a common side effect of the following processes:
-
Full to limited range conversion (including image files)
-
Low-bitrate codecs smearing gradients to reduce file size
-
Compression macroblocking is essentially a series of short bands
-
Posterization or clipping introduced by extreme post-processing filters
“Full range” refers to a video signal (RGB or YCbCr) that is encoded in the 0-255 range. “Full range” is also called JPEG or PC range.
“Limited range” refers to the 16-235 range, which leaves room for sync signals, ringing artefacts, and the Gibbs phenomenon. “Limited range” is also called MPEG, TV, legal, broadcast, or studio range.
Computer screen recordings are often RGB 0-255, and some video cameras save their files as YCbCr 0-255. Since the Shotcut timeline is YCbCr 16-235, a conversion must take place for these sources. Shotcut invokes swscale in a non-dithering mode that often introduces banding (overlap) as colors are squished into the reduced range. The Deband filter tries to detect these bands and convert them back into smooth gradients, typically by adding dithering.
Note that many image file formats (like JPEG, GIF, PNG) are encoded with 0-255 values. They will be converted to 16-235 when placed on the timeline, which makes them prone to banding. The Deband filter therefore has potential to make many still images look better than they would without any processing.
Demonstration
The following image has gradients that go from RGB 0 to RGB 255:
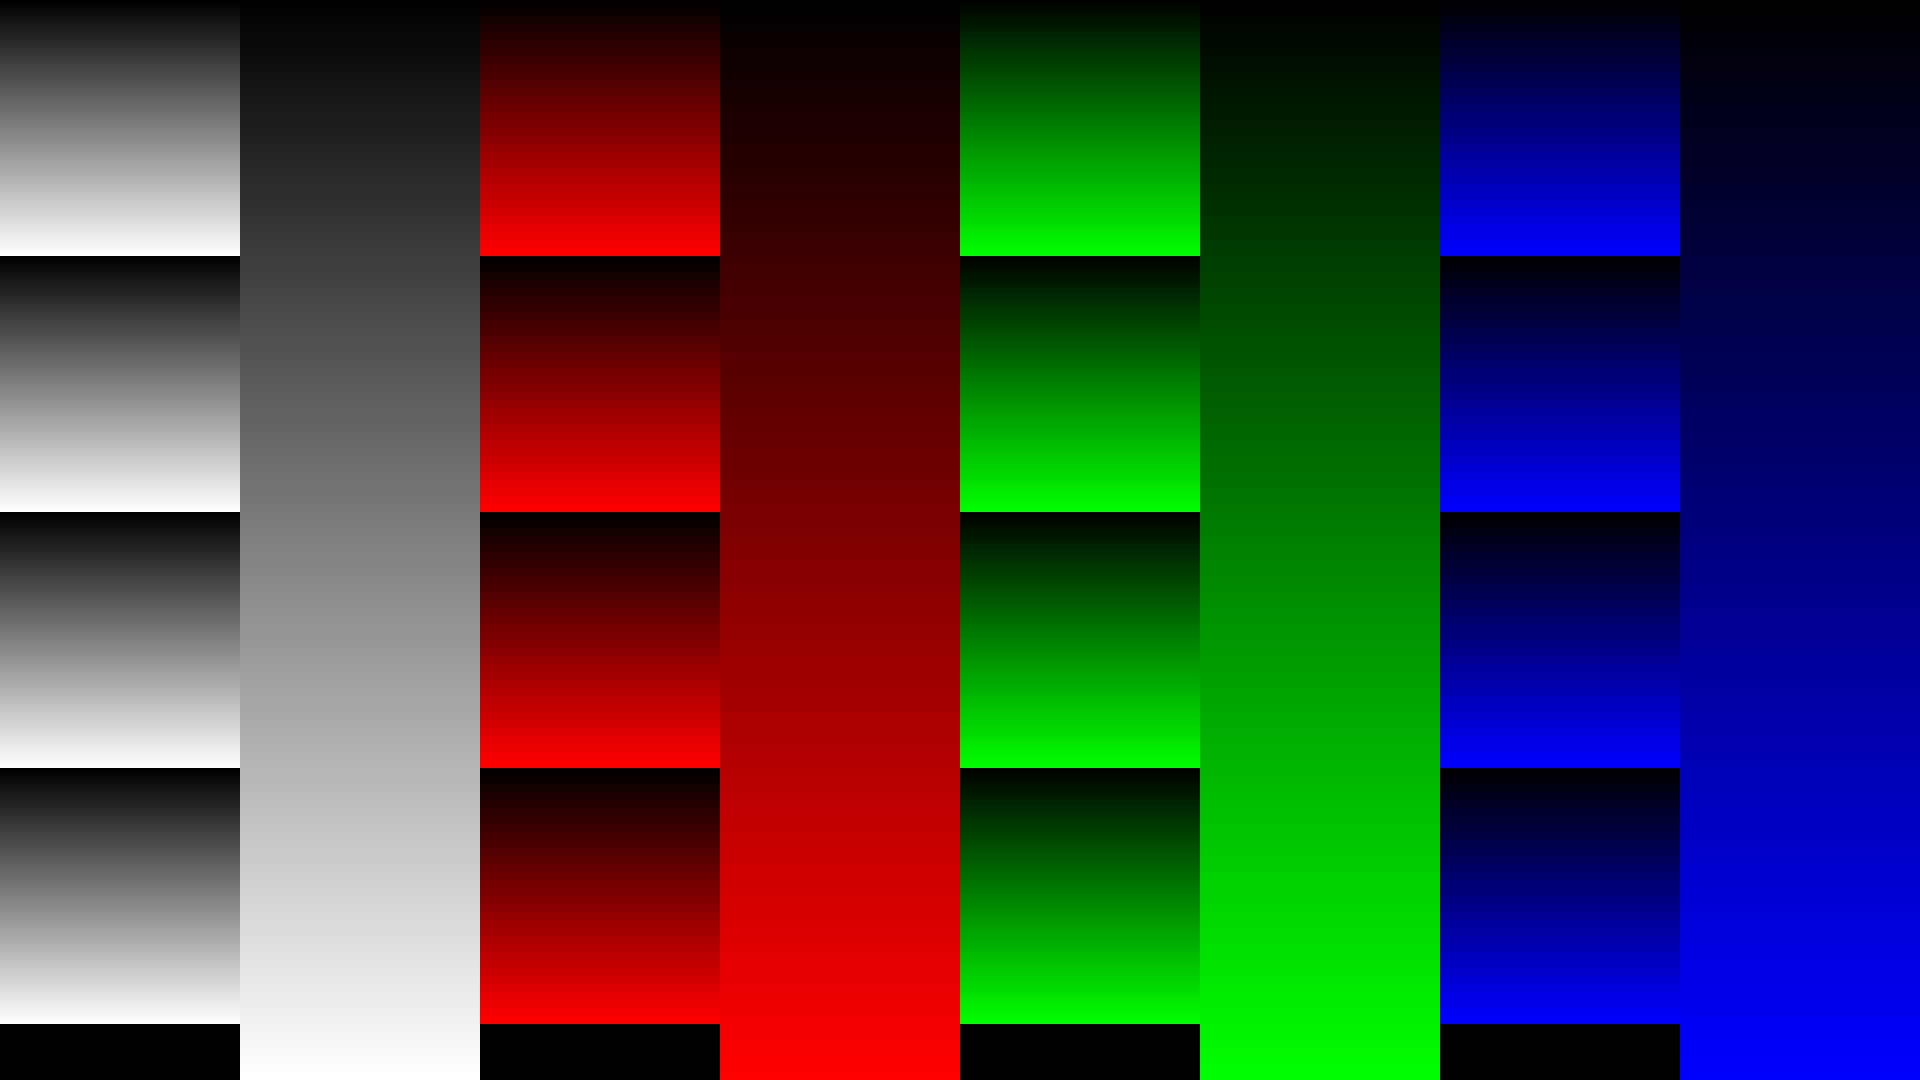
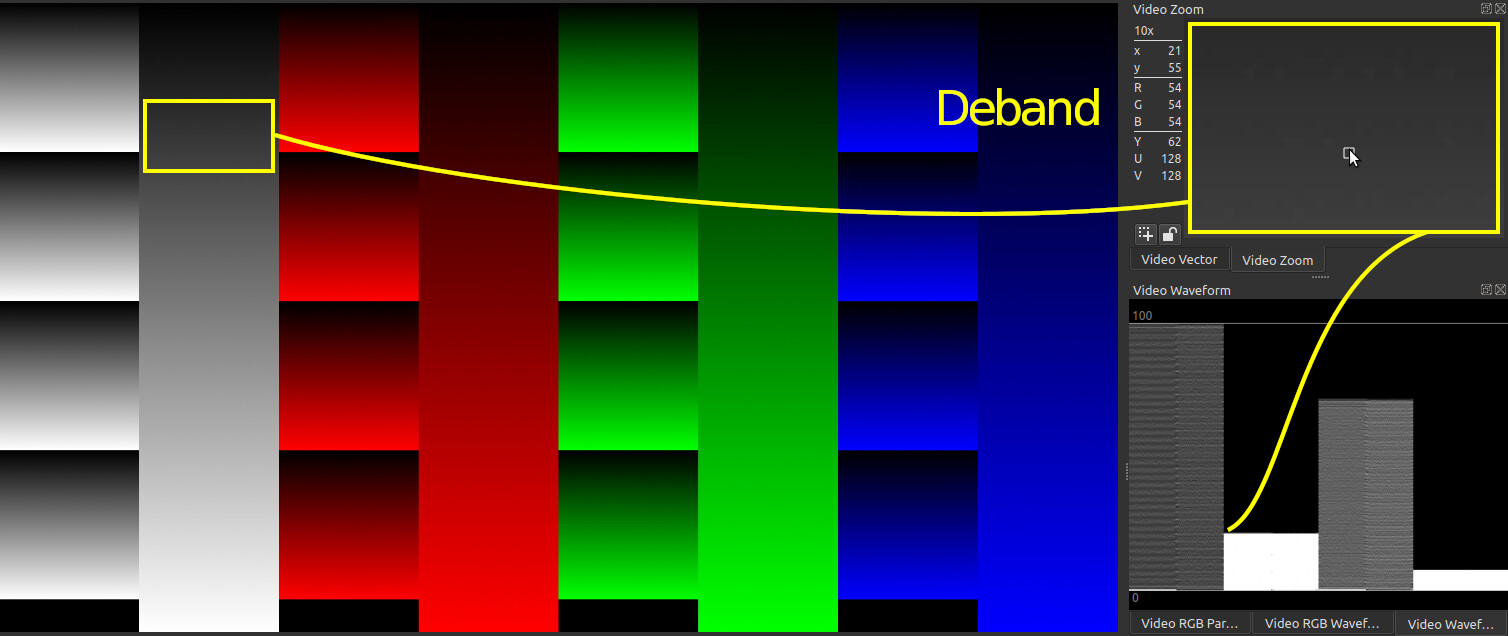
When Shotcut loads this image, banding can be seen in the Video Zoom scope as multiple lines having the same color value. Although the Y (luma) value changes from 16-235 without skipping values, the display conversion back to RGB 0-255 does skip values.
For instance, going from Y 61 to Y 62 correlates to RGB 52 to RGB 54. The skipped RGB 53 causes RGB 54 to look unexpectedly brighter than its neighbors. This discontinuity ruins the illusion of a smooth gradient.
The Video Waveform scope also shows uneven value distribution rather than a solid vertical bar. A solid bar would mean equal representation for every value from 0 to 100 IRE.
Below, we see what the image looks like after applying the Deband filter with the default settings:

Unfortunately, the forum software has shrunk the image so much that the dithering is hard to see. Here is an exaggerated view (enlarged and emphasized with a Curves filter):

The strategy behind the default settings is to assume that bands will be very narrow (at most three pixels wide) as a result of gradients being squished during range conversion. This explains the small default pixel range. We also expect banding to happen only when values are very similar to each other (where overlap happens when squished), therefore the thresholds are small as well. These are the gentlest and least invasive Deband settings. For slightly more processing, use the “FFmpeg default values” preset.
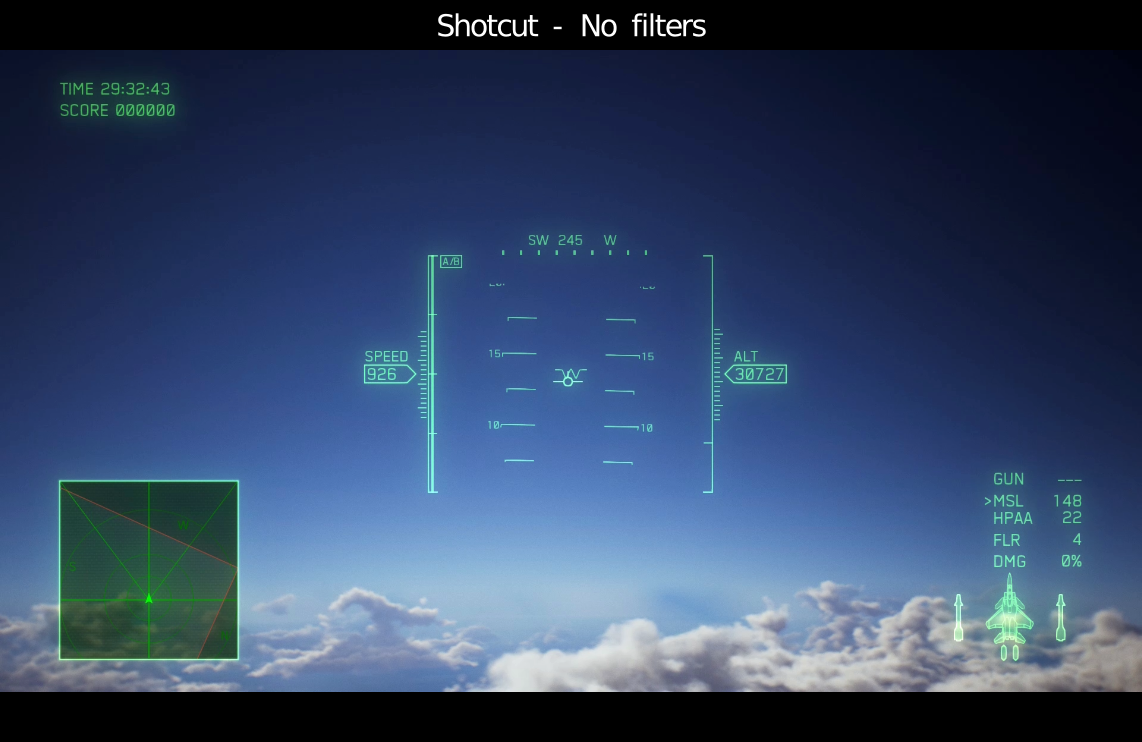
Some scenes, like open blue sky, require more aggressive processing from the Deband filter. @IceFox2421 contributed the following screenshot (used with permission) which features a sky that was splotchy in the game itself, then was captured in 0-255 range, then was brought into Shotcut, which introduced even more banding with the timeline’s full-to-limited conversion. The screenshot also shows what the footage looks like in Adobe Premiere, which benefits from a better full-to-limited conversion process. Lastly, the screenshot goes back to Shotcut using the Deband filter, and shows very competitive results in the final image quality.
On some browsers, this will animate (click the image to enlarge first):

If not, here are the frames for comparison:


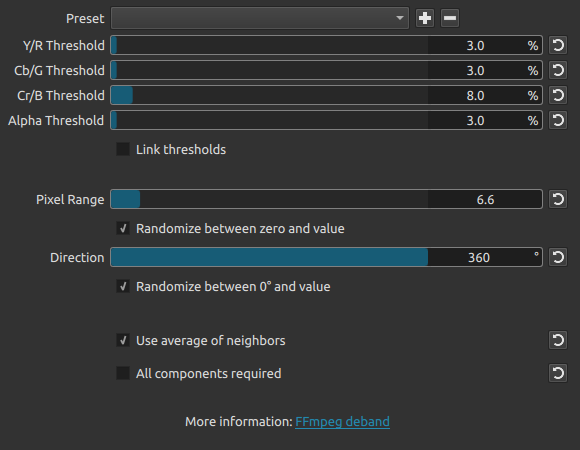
For open sky, the strategy behind the settings is to use a higher threshold for blue and a lower threshold for all the other colors. Bear in mind that the Shotcut timeline is YCbCr unless overridden with mlt_image_format=rgb24, meaning blue is manipulated with the Cb of YCbCr rather than the B of RGB. Lastly, we use a large pixel range to scan for slowly-changing gradients, as the sky does not quickly change from one tone to the next.
How Does It Work?
The Shotcut Deband filter uses avfilter.deband (FFmpeg | MLT Framework) for processing. The general idea is to take a pixel and look at its neighbors within Pixel Range. If they’re the same general color (within Threshold range), then assume this area should have been a gradient (or an in-between value) rather than a band. The pixel will be replaced with the average value of its neighbors. If the Randomize option is selected to skew that average, then any bands will in essence become dithered. If dithering introduces too much “snow” or impulse noise into the image, try adding a Sharpen filter with the Amount around or below 30% (which will actually create blur despite the name) and with Size around 12%. Sometimes this can blur small patches of dots out of existence without harming the overall image. In extreme cases, consider a denoise filter to smooth the dot patches out (but not to the point of recreating bands, of course).
Limitations
A more proper way to convert full range video to limited range is to provide a scaler with access to the original 0-255 data, then perform a dithered conversion using error diffusion in linear color space. swscale and zscale can be manually invoked in such a way, but this is not directly available in Shotcut. (See the Alternatives section below for details.) Since Shotcut is currently 8-bit, dithering is not invoked in swscale. Likewise, since Shotcut does not use zscale, conversions are not done in linear space.
Since the Deband filter is seeing data that has already been compressed to the 16-235 range by swscale, Deband does not have the luxury of examining the original 0-255 video data. This is an automatic disadvantage in terms of technical accuracy. But, given proper parameters on a scene-by-scene basis, even a discerning audience would struggle to see the difference.
Alternatives
Video can be manually pre-processed into limited range before importing into Shotcut. This gives swscale or zscale access to the original 0-255 values.
Let’s create a sample 0-255 input video for this demonstration by using the test image provided at the top of this document:
ffmpeg -loop true -i FullRangeGradients.png -t 00:00:04.000 -r 30000/1001 -vsync cfr -pix_fmt gbrp -c:v utvideo -an FullRangeGradients.mkv
Below are two ways to convert the sample input video into a dithered limited-range intermediate.
Convert with swscale passing through 10-bit so dithering can be invoked when returning to 8-bit:
(see this note about dithering on FFmpeg Trac)
ffmpeg -i FullRangeGradients.mkv -filter:v scale=out_color_matrix=bt709:out_range=full:flags=neighbor+accurate_rnd+full_chroma_inp+full_chroma_int:sws_dither=none,format=yuv444p10le,scale=in_color_matrix=bt709:in_range=full:out_color_matrix=bt709:out_range=limited:flags=bicubic+accurate_rnd+full_chroma_inp+full_chroma_int:sws_dither=ed,format=yuv422p -pix_fmt yuv422p -color_range mpeg -colorspace bt709 -color_primaries bt709 -color_trc bt709 -c:v libx264 -qp 0 -g 8 -bf 0 -preset ultrafast -movflags +faststart+write_colr -an -y FullRangeGradients-swscale.mp4
Convert with zscale using dithering:
ffmpeg -i FullRangeGradients.mkv -filter:v zscale=matrix=709:range=limited:filter=bicubic:dither=error_diffusion,format=yuv422p -pix_fmt yuv422p -color_range mpeg -colorspace bt709 -color_primaries bt709 -color_trc bt709 -c:v libx264 -qp 0 -g 8 -bf 0 -preset ultrafast -movflags +faststart+write_colr -an -y FullRangeGradients-zscale.mp4
Stack all three videos on separate tracks in Shotcut and toggle track visibility to notice that the swscale and zscale versions have smoother gradients than the source video.