Pretty good @muscalbox. But 20,000 euros for a cat? That’s a lot. 
Well done 
L’important dans ce challenge n’est pas le montant de la récompense, ni le nom du personnage, mais l’animation d’entrée des portraits. Comme mentionné dans le premier post une rotation doit être appliquée à l’apparition de la vignette.
@MusicalBox le chat doit tourner de -15 à -3°
Et pour le second personnage, l’animation de son élimination avec le passage de son image en couleur à son image en noir et blanc en passant par le fond gris.
The important thing in this challenge is not the amount of the reward, nor the name of the person, but the entry animation of the portraits. As mentioned in the first post a rotation must be applied to the appearance of the thumbnail.
@MusicalBox the cat must turn from -15 to -3°
And for the second person, the animation of his elimination with the passage of his image in color to his image in black and white passing by the gray background.
OK. Mon erreur, désolé.
Dans votre premier post, vous dites: “Par exemple, j’ai essayé de reproduire cette animation.”.
Je croyais que le but du défi était aussi de reproduire l’animation originale du programme de télé…
Aussi, je ne me suis pas encore penché sur le problème de l’animation du personnage éliminé. ![]()
À suivre.
OK. My mistake, sorry.
In your first post, you say: “For example, I tried to reproduce this animation.”
I thought the goal of the challenge was also to reproduce the original animation of the TV program.
Also, I haven’t looked at the problem of the animation of the eliminated character ![]()
To be continued.
Voici donc ma 3e tentative :
So here is my 3rd attempt:
P.S. J’ai oublié de donner une couleur différente à la bordure de la deuxième image. Désolé.
P.S. I forgot to give a different color to the border of the second image. Sorry.

5 Likes
Et bien voilà,
Et le gagnant est @MusicalBox
Well, here it is, 
And the winner is @MusicalBox
2 Likes
I decided to improve my animation a bit. Now it looks like this. I have not been able to achieve the effect of a three-dimensional frame. My goal was to make one picture on one track.
p.s. I spent a lot of time simulating bezier animation curves, I really miss the ability to create bezier keyframes like in some other programs. I really hope that one day I will see beziers in this wonderful video editor.
3 Likes
Well done @musicalbox! I’d also like to congratulate @dimadjdocent and @BeretGascon for their equally fine contributions, and @elusien for the great code, which I will be using in future projects. I think you are all winners! What a fantastic challenge, so thanks to to @namna for initiating it. Sorry I didn’t have time to participate.
@BeretGascon , I’ve only just seen your post above but thanks for the details of how you did it. Very useful. I’d love to see the MLT files you mentioned. Also @musicalbox - any chance of the MLT please?
Well done folks!
Bravo @musicalbox ! Je tiens également à féliciter @dimadjdocent et @BeretGascon pour leurs contributions tout aussi fines, et @elusien pour l’excellent code, que j’utiliserai dans de futurs projets. Je pense que vous êtes tous gagnants ! Quel défi fantastique, alors merci à @namna de l’avoir lancé. Désolé je n’ai pas eu le temps de participer.
@BeretGascon, je viens juste de voir votre message ci-dessus mais merci pour les détails sur la façon dont vous l’avez fait. Très utile. J’aimerais voir les fichiers MLT que vous avez mentionnés. Aussi @musicalbox - une chance du MLT s’il vous plaît ?
Bravo les gens !
1 Like
Here’s how I did it.
-
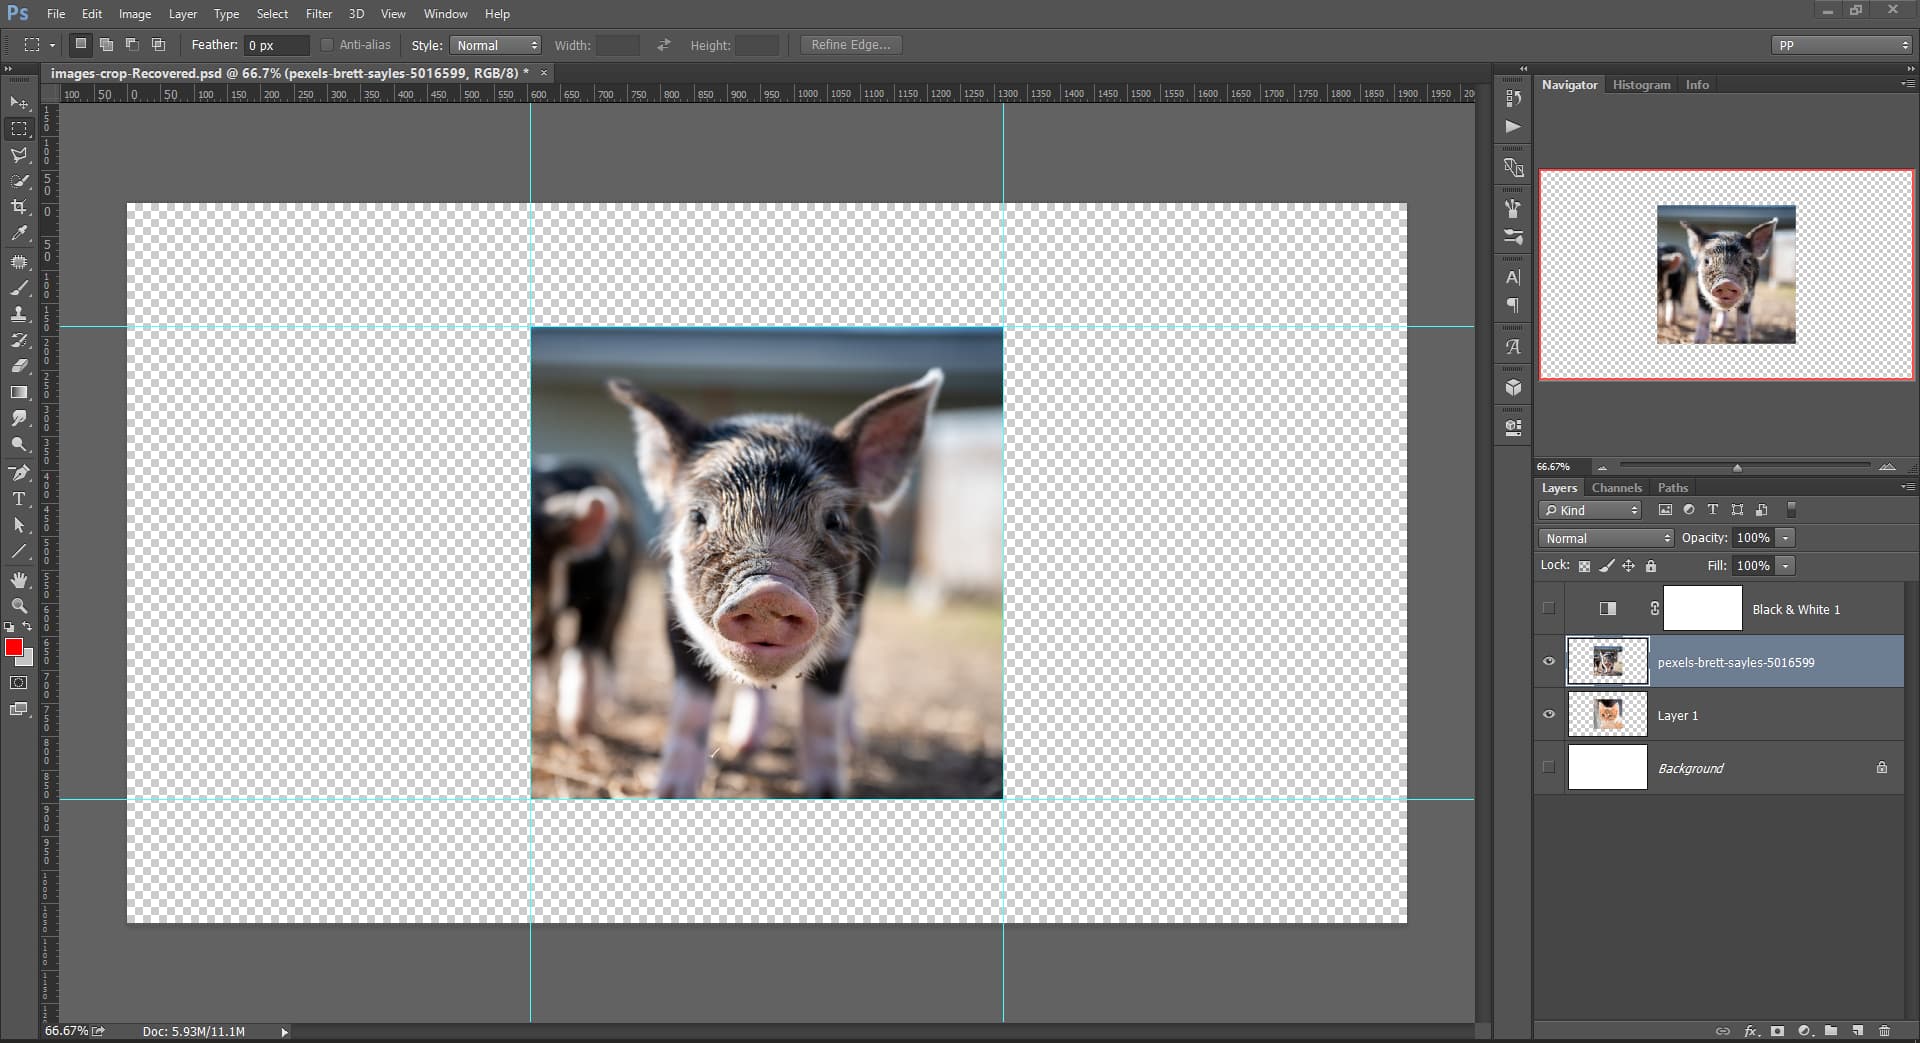
The only external program I used is Photoshop to create the 710px x 710px square image of the subject, on a 1920 x 1080 transparent background.
-
Import the image in Shotcut, on track V1
-
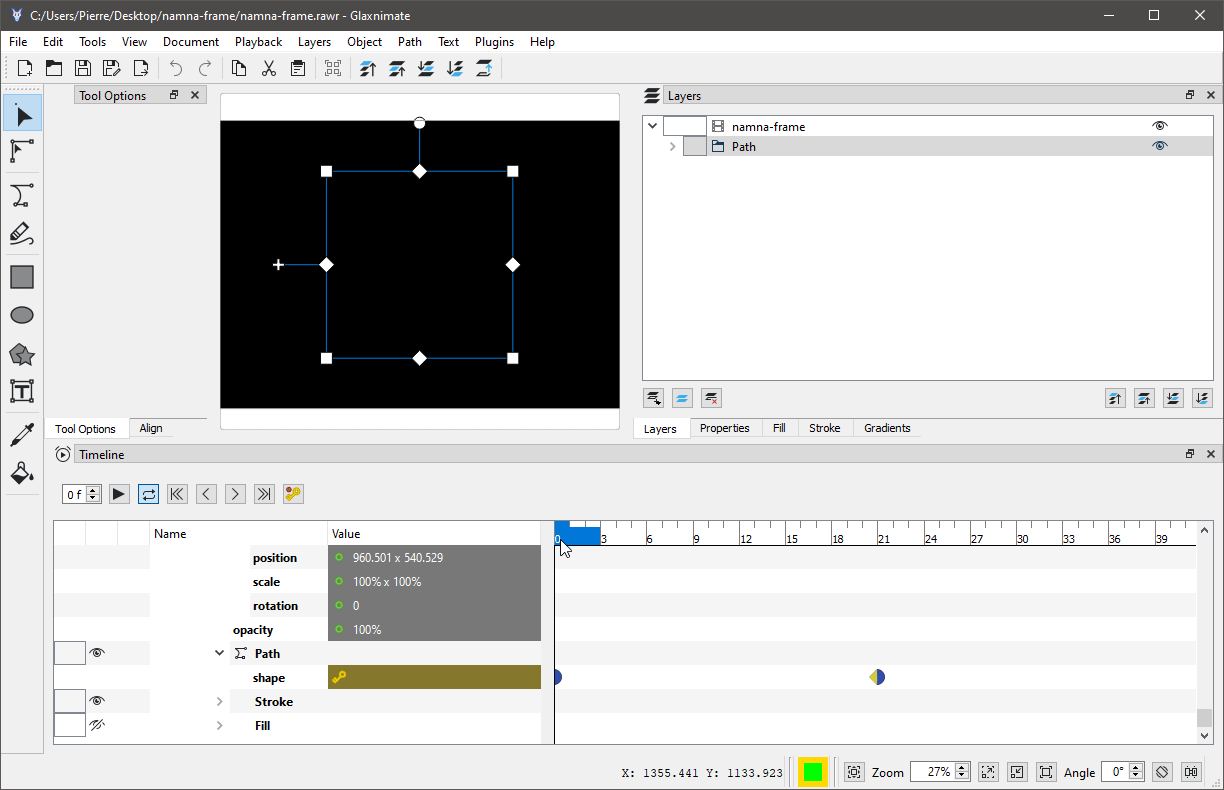
On track V2 use Open Other… > Animation (Glaxnimate) to create a 710px x710px animated border.
-
In Shotcut, add two filters on the image clip.
Mask: Simple Shape (with keyframes) to create the image reveal
Crop: Rectangle set at 710px X 710px to isolate the square image.
Don’t mind the black color clip on track V1 in the video below. It’s only used as a background so you can see the animation.
-
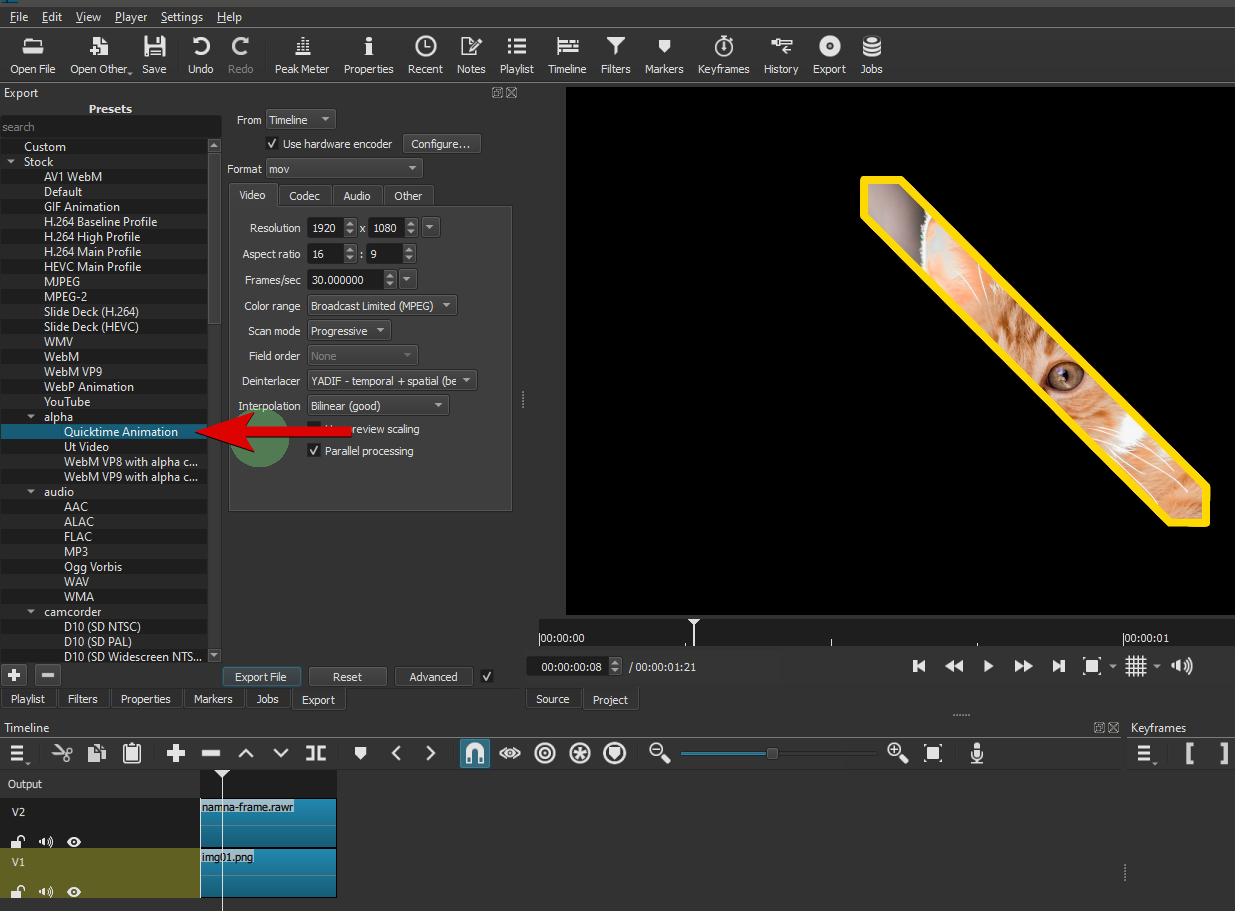
Export the project using the Quicktime Animation preset. This will create a clip where the transparent background around the image will also be transparent in the clip.
-
Import that clip in a new Shotcut project.
-
Use a Size, Position & Rotate filter to resize the clip, to move it to any position on the screen, and do the rotate animation.
-
Repeat all these steps for any additional image you want to add to the final project.
I can’t wait to see if @Namna used more or less the same method to create his video.
1 Like
Je n’ai pas mon ordi en ce moment, donc difficile de faire des copies d’écran.
J’ai procédé de manière très proche.
Premier projet:
Image de fond sur V1
Sur V2 la forme animée 1 sur fond transparent et couleur vert à l’intérieur. Filtre SPR pour déplacer à gauche et faire la rotation. Puis un crop rectangle sur la moitié gauche de l’écran.
Sur V3 idem pour le cadre de droite.
Export du projet en mp4 classique.
Second projet
Sur V1 image du candidat 1 avec SPR et Crop rectangle
Sur V2 image du candidat 2 avec SPR et Crop rectangle et saturation pour le N&B
Sur V3 et V4 fond gris avec des Crop rectangle et SPR pour l’animation de l’élimination
Sur V5, le mp4 du projet 1 avec un chroma key sur le vert.
I don’t have my computer right now, so it’s hard to take screenshots.
I proceeded in a very similar way.
First project:
Background image on V1
On V2 the animated shape 1 on transparent background and green color inside. SPR filter to move left and rotate. Then a crop rectangle on the left half of the screen.
On V3 the same for the right frame.
Export of the project in classic mp4.
Second project
On V1 image of candidate 1 with SPR and Crop rectangle
On V2 image of candidate 2 with SPR and Crop rectangle and saturation for B&W
On V3 and V4 gray background with Crop rectangle and SPR for the animation of the elimination
On V5, the mp4 of project 1 with a chroma key on green.
1 Like
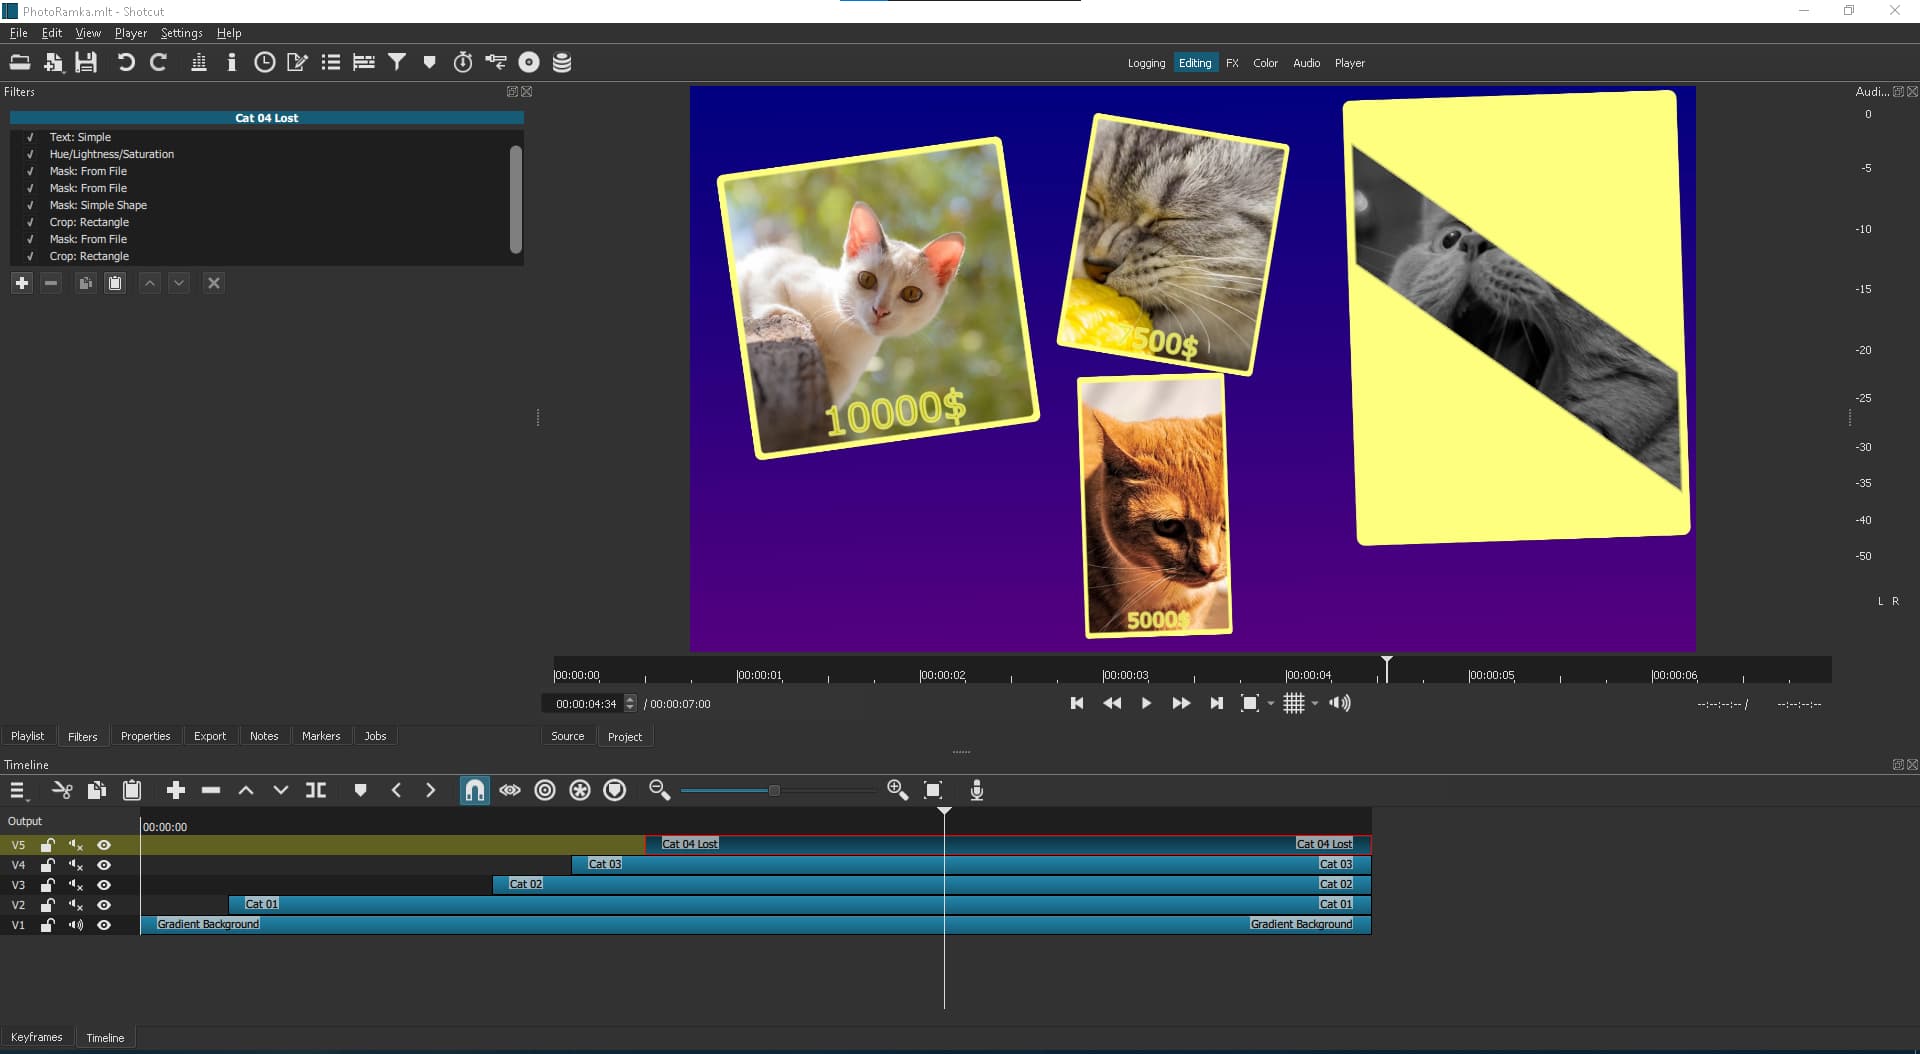
I want to tell now in detail how I did it.
My method was to use ONLY ONE track for each photo.
The list of filters is:
-Text:Simple - Appearing text with appearance animation.
-Mask: From File - unwrapping effect.
-Mask:Simple Shape - needed to slightly soften the borders of the “photo frame”.
-Crop: Rectangle - crop the image to a square state, background color - set the frame color.
-Mask: From File - unfolding effect, but already taking into account a piece of the background of the previous filter, to create a frame.
-Crop: Rectangle - crop the image to a square state, but slightly larger to touch the background of the previous mask a bit to simulate a frame.
-SRP - to correct the size and effect of entry.
The most recent image is a couple more filters larger to give a flipping effect and create a black and white image.
Now I can simply copy the list of filters that I used for animation from my project and paste it into any image in any project to make this effect where I need it without using additional tracks.
I will share my project with you so that you understand how I implemented it and why.
PhotoRamka.zip (757.5 KB)
2 Likes
Pas de soucis, les voici :
No worries, here you are:
Person panel.mlt (20.1 KB)
ShotCut Challenge.mlt (74.8 KB)
“Person panel.mlt” was exported to “Person panel Scholz.mp4”, “Person panel Biden.mp4” etc. and then imported into “ShotCut Challenge.mlt”. I hope that’s clear but if not, feel free to enquire further.
“Person panel.mlt” a été exporté vers “Person panel Scholz.mp4”, “Person panel Biden.mp4” etc. et ensuite importé dans “ShotCut Challenge.mlt”. J’espère que c’est clair, mais si ce n’est pas le cas, n’hésitez pas à demander plus de précision.
This topic was automatically closed 90 days after the last reply. New replies are no longer allowed.