When the speed is faster than 1.0, multiple clip frames can map to the same output time. The Image Mode allows the user to choose between selecting the nearest frame, or blending frames frames.
Can you explain in layman’s terms what “multiple clip frames can map to the same output time” means? And possibly show an example please?
If 30fps footage is sped up to 2x, it effectively becomes 60fps footage but with half the duration of the original.
In this example, the sped-up clip is twice the frame rate of the timeline. This means two frames of source fit into the duration of one timeline frame. The export engine has to choose what to do:
Choose a single source frame that is closest to the timestamp of the timeline (nearest mode).
Blend multiple source frames into one mash-up frame with averaging (blend mode).
I don’t think anyone was ignoring you. It’s just difficult to explain without an illustration, and it takes time to make one, even a hacky one like mine.
I don’t think you’re obsolete. That filter is just a lot different than any of the others in the toolbox.
What we need is comprehensive and detailed documentation from the ones who understand perfectly how it works. Otherwise that tool will remain at the bottom of the toolbox for many users.
Quick tip: “Blend” mode could be extremely useful for timelapse videos where the action needs to be sped up around 8x or more. Instead of seeing people or stars or whatever flickering between unpredictable positions on the screen, Blend mode would average their movements and create connective trails similar to extreme motion blur. This makes it much easier to track where people are moving and gives a much more relaxed and artsy vibe to the video. This also means not having to do a long-exposure photo sequence with your camera then stitch the photos into a video later to get the same effect… instead, it can be done as a single normal video, which can serve the dual purpose of extracting clips you care about in normal speed, but motion blurring the rest of it for a timelapse.
Here’s why it works:
Nearest mode is the same as the frame drop-or-dupe method that the timeline has used for years to handle frame rate mismatches. If someone puts 60fps video on a 30fps timeline, it drops every other frame of the 60fps video to scale it down to 30fps. It selected the “Nearest” frame to the 30fps cadence.
Extending that concept, if someone takes a 10-second clip and goes to Properties > Speed > 5x so that it becomes a 2-second clip, Shotcut accomplishes the speed-up by dropping (ignoring) four frames then displaying the fifth.
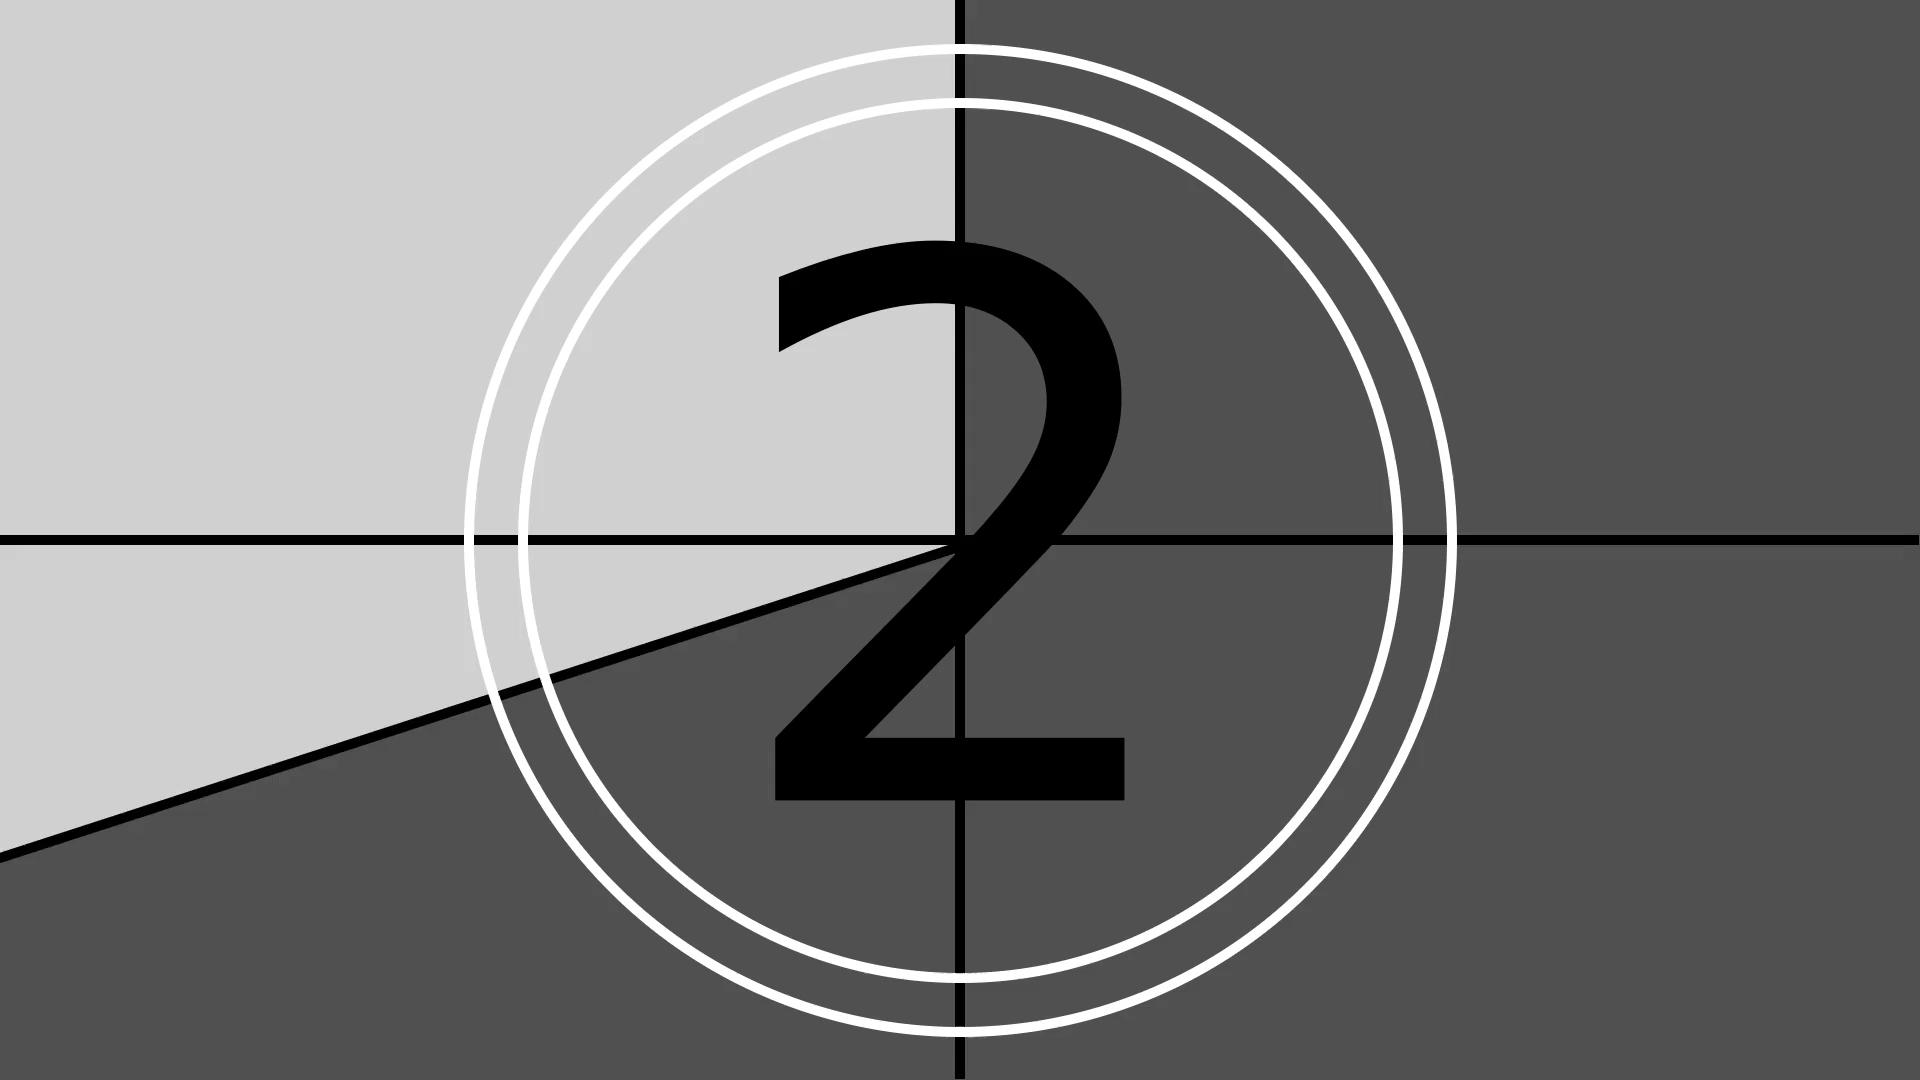
If the Time Remap filter is set to Nearest mode, then the usual dupe-or-drop method described above continues to be used. For the exported frame below, I took a 10-second countdown and did a Time Remap to 2 seconds in Nearest mode (same as Properties > Speed > 5x) then exported:
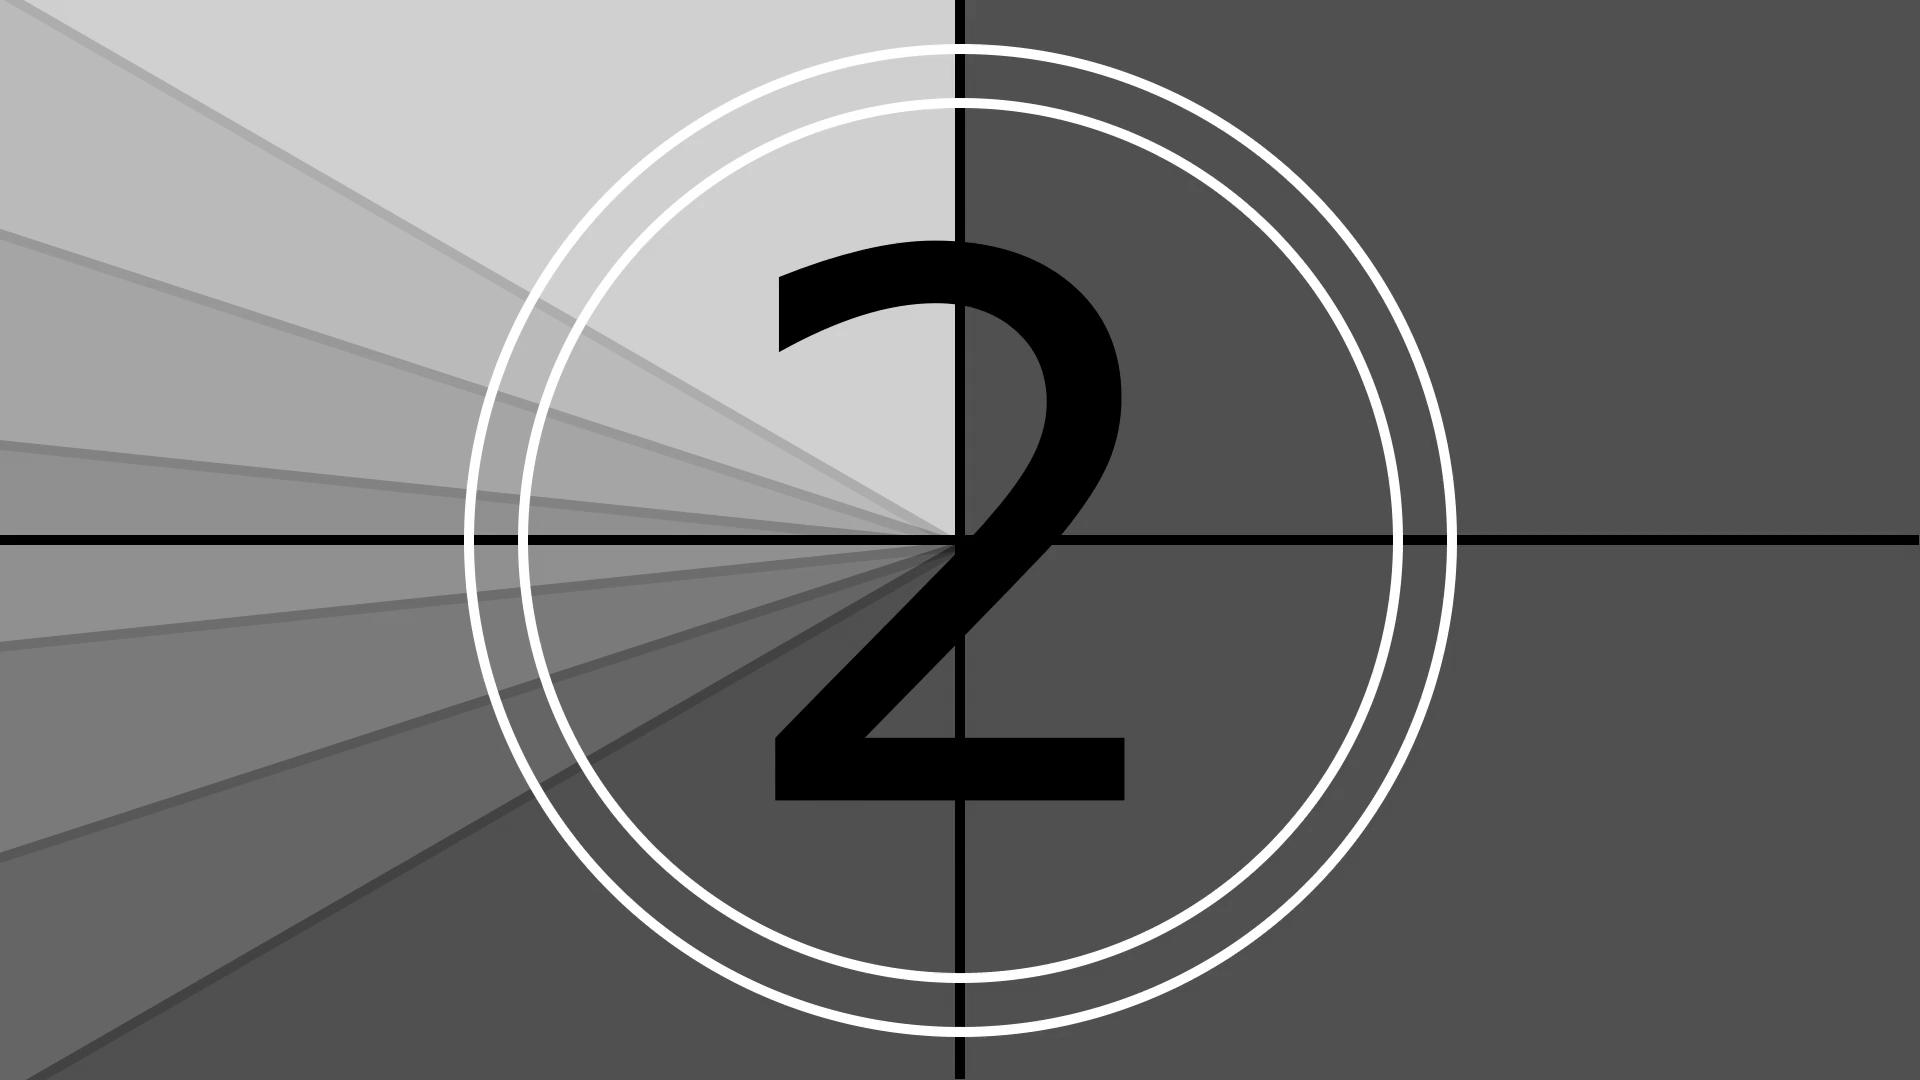
Instead of ignoring four frames and showing only the fifth, the five frames are now averaged together. This causes a gradient in the circular swipe pattern, because the dark bottom-left swipe was on the screen longer than the upper-left, therefore it went darker when averaged.
The faster the speed-up, the longer the motion blur trail will be.
I am still trying to understand this filter, but I find that it is not very intuitive for me.
After a few tries, I realized something that didn’t add up to my way of editing.
It is the waveform. The waveform stays the same even if the sound is forward or backward. Reconstructing the audio waveform does not work for this. Turning pitch compensation on/off doesn’t influence the waveform either.
So, in my case, I was looking at the wrong place (keyframe adjustment according to the audio waveform). This confused me for a while and so I was too focused on things that were not the right things.
I also note that keyframe editing must be in order as any intermediate additions or modifications modify from that point onwards the whole clip.
I suppose that is good. But it is consistent with all other behavior. If you apply a gain filter to a clip the waveform does not change to match the new gain.
Yes. It requires a new dimension of thinking. That is why I put this filter under the new “Time” category in the filter menu. I will probably add other time related filters in the future and they will have similar behaviors.
I will have to think about that idea. My first response is that it would not be necessary because each keyframe is an absolute mapping. So if you move a keyframe around, it only affects the frames between the preceding and following keyframes.
This is not a criticism, but to highlight some differences in concept with the other filters.
The example of the gain filter has part of similar behavior (it does not change the waveform), however in this filter there is no desynchronization at the visual level (in the interface) between audio, video and keyframes.
That is why it requires a different approach, a learning.
I believe that commenting on the behaviors and problems or situations that we face in the edition can be useful in order to create a documentation compiling the different experiences.
I don’t know if this is the place to comment on what I am discovering with the filter. They are behaviors that I suppose are by design, however it costs me nothing to share here.
Depending on the setting, the keyframe may disappear from the track. Surely there will come a time when this will not happen because I will no longer be in the “experimental” phase with the filter, but it happened to me (and maybe other users have the same problem).
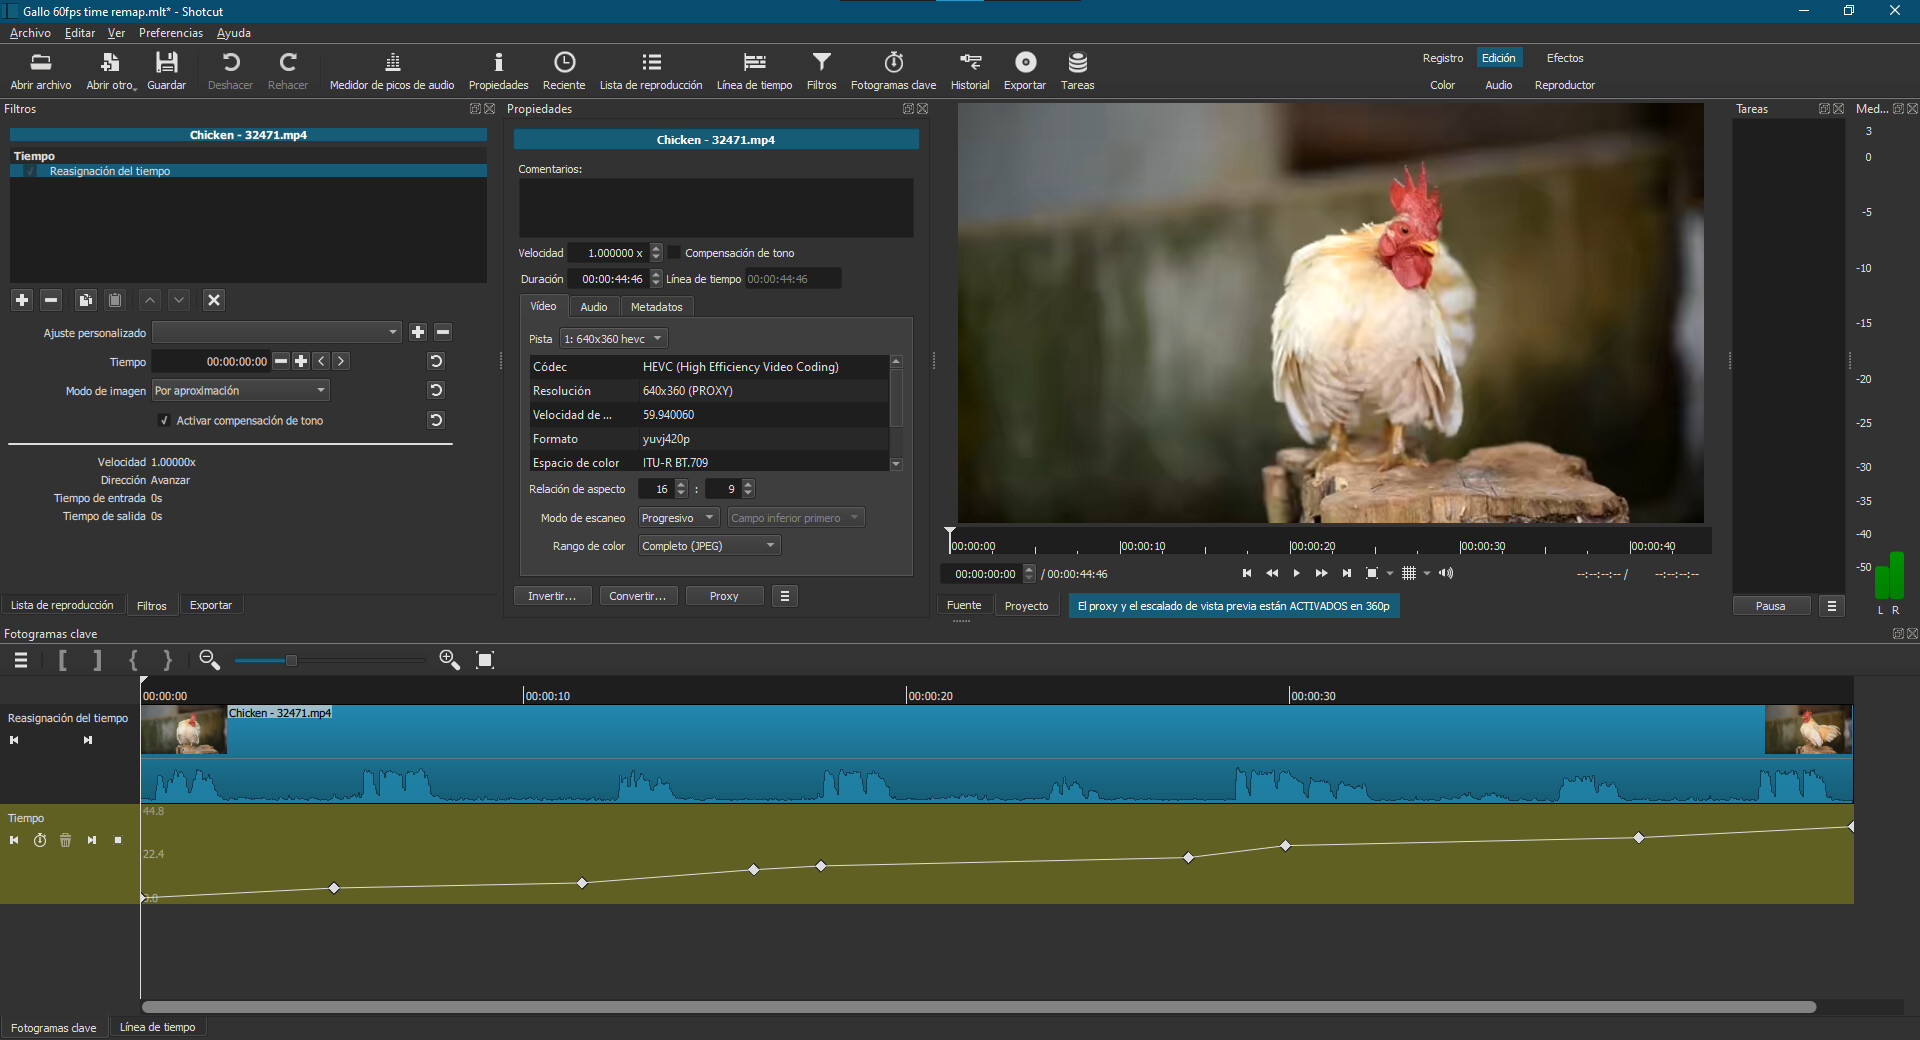
On the track, there is a vertical time scale with the detected value of the clip.
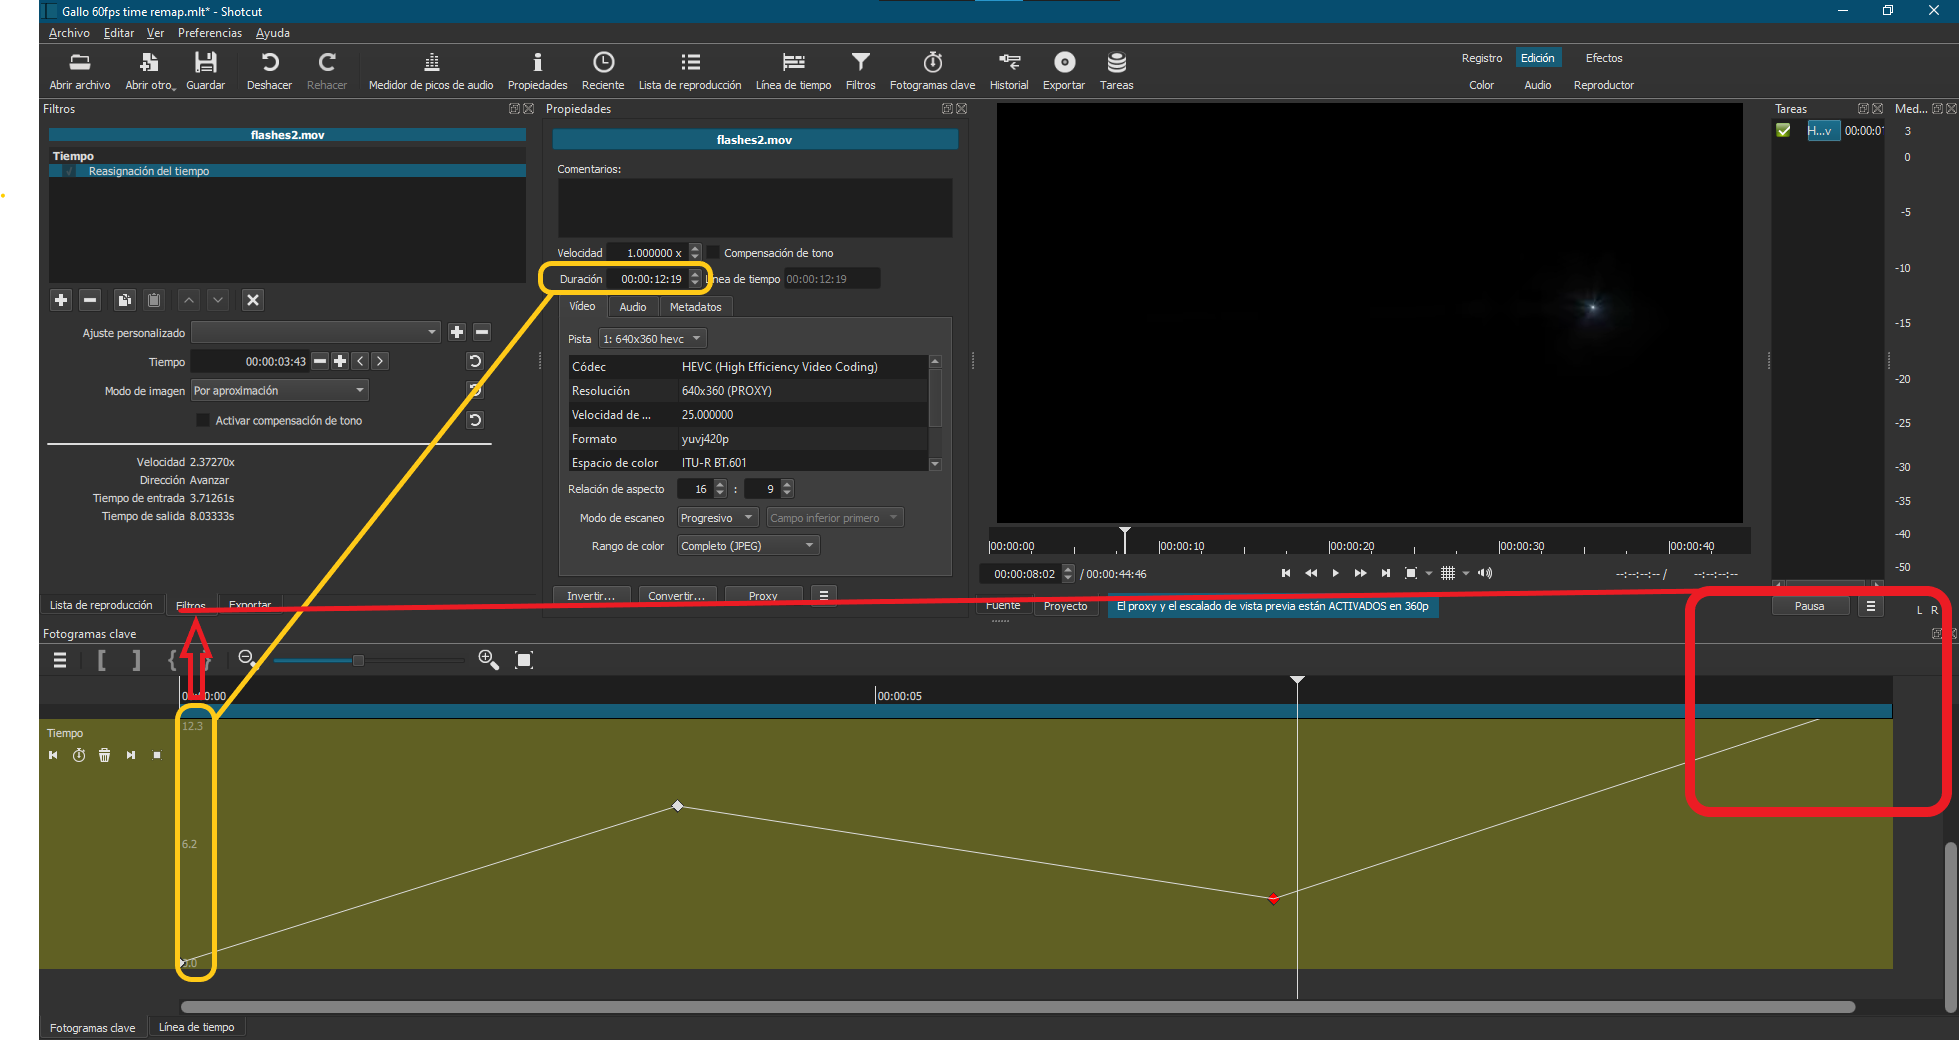
At the last keyframe, I adjusted the input time to set to 1.0 X before it (I used the arrow buttons next to the time value in the filter settings). Then the keyframe disappeared.
Lengthening the track height to the maximum did not help.
I guess this happens because I go out of the time range of the original clip (vertical scale on the left of the track marked with the yellow rectangle).
To avoid undoing everything, I used the next frame and delete button, red and yellow arrows. This way I recovered the line to modify it.
If other Time related filters are added, would it be feasible to create a keyframe timeline dedicated to those filters ? I’m thinking that this could allow you to modify and add back the Smooth keyframe type without interfering with the other filters. I suppose it could also have many other advantages.
Unless I misunderstand some mechanics, the absolute nature of the time curve is likely to be a common problem for any modification that specifically needs to lengthen or shorten the duration of the clip (such as highlighting a segment with slow-motion but returning to normal speed and finishing the entire clip).
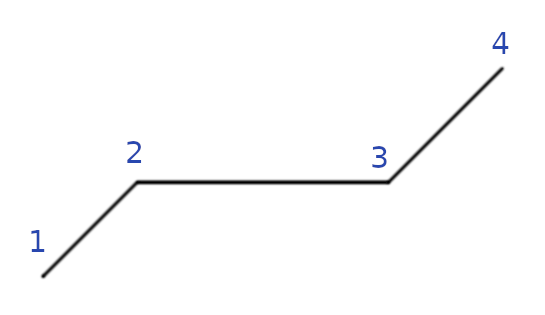
Example #1: A super-simple freeze frame
Let’s say I embedded a 3-second freeze frame between keyframes 2 and 3. It didn’t provide enough time for the viewers to read text on the screen, so I want to lengthen the freeze frame to 4 seconds (which lengthens the overall clip). If I move keyframe 3 down the timeline by a second but don’t ripple the movement to keyframe 4, then I implicitly speed up the video between 3 and 4, which is not the goal. It would be tedious to manually move every keyframe after 3 down the timeline by an additional second.
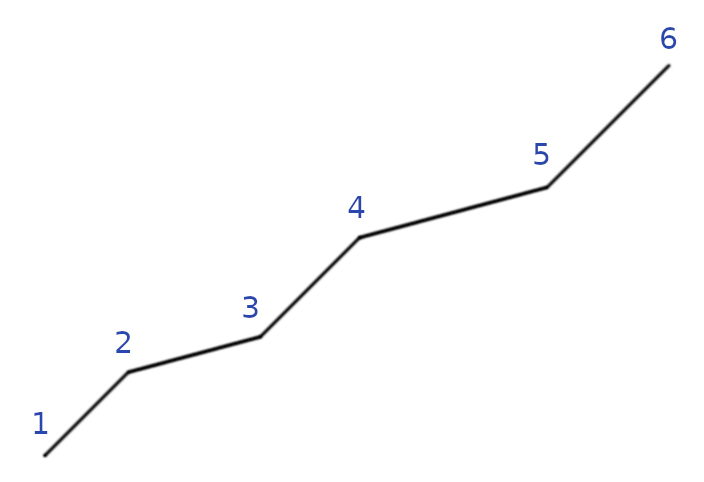
Example #2: A skateboarding video with two slow-motion segments
If the segment between 2 and 3 has the correct slow-mo in/out points but simply isn’t slow enough to showcase fancy footwork, then I need to move keyframe 3 down the timeline to make that segment slower. This has the implicit goal of lengthening the overall clip. However, if I move keyframe 3 but don’t ripple the shift to future keyframes, then the segment between 3 and 4 speeds up and is no longer real-time. So I have to scoot 4 to return the 3-4 segment to real-time, but now that speeds up 4-5… and on it goes.
Basically, ripple could be beneficial any time the user wants to affect a segment of the curve without altering the internal relative timings (speeds) of future segments. This is where a strictly absolute curve could be a hinderence.
Without ripple, a user has to work left-to-right and get it perfect on the first try, because going back to modify the curve would require manual ripple work.