I’m trying to shoot an overhead food recipe video with my mobile phone (resolution 1080x1920). My aim is to make a video simmilar to ‘tasty’, but every time I import the video to Shotcut I get a vertical orientation with a lot of black areas at the top and at the bottom. Rotating doesn’t help, it just rotates the video itself, but the black areas remain (top and bottom).
How do I make surethe whole editing window is filled with my video (no black areas)
It may seem obvious, but since you don’t give much information (a screen capture of your Shotcut window would be helpful), I’ll suggest this : Make sure you lock your camera app on landscape orientation mode. Lock your phone on landscape too. May not be needed, but it can’t hurt.
when you have black areas at the top and bottom you probably mean a horizontal orientation?
Otherwise the black areas would be left and right - or do i get something wrong?
You should always take your movies in horizontal orientation cause all screens are horizontally orientated. Anyway, you should be able to rotate the whole video with filters. Use the “crop source” filter to get rid of the black areas.
Amen to that. If God had wanted us to watch movies vertically, he would have put our eyes one on top of the other.
4 Likes
thanx guys
I do realize that horizontal orientation is the best - therefore I’m trying to achieve exactly that. The point is that I get this:
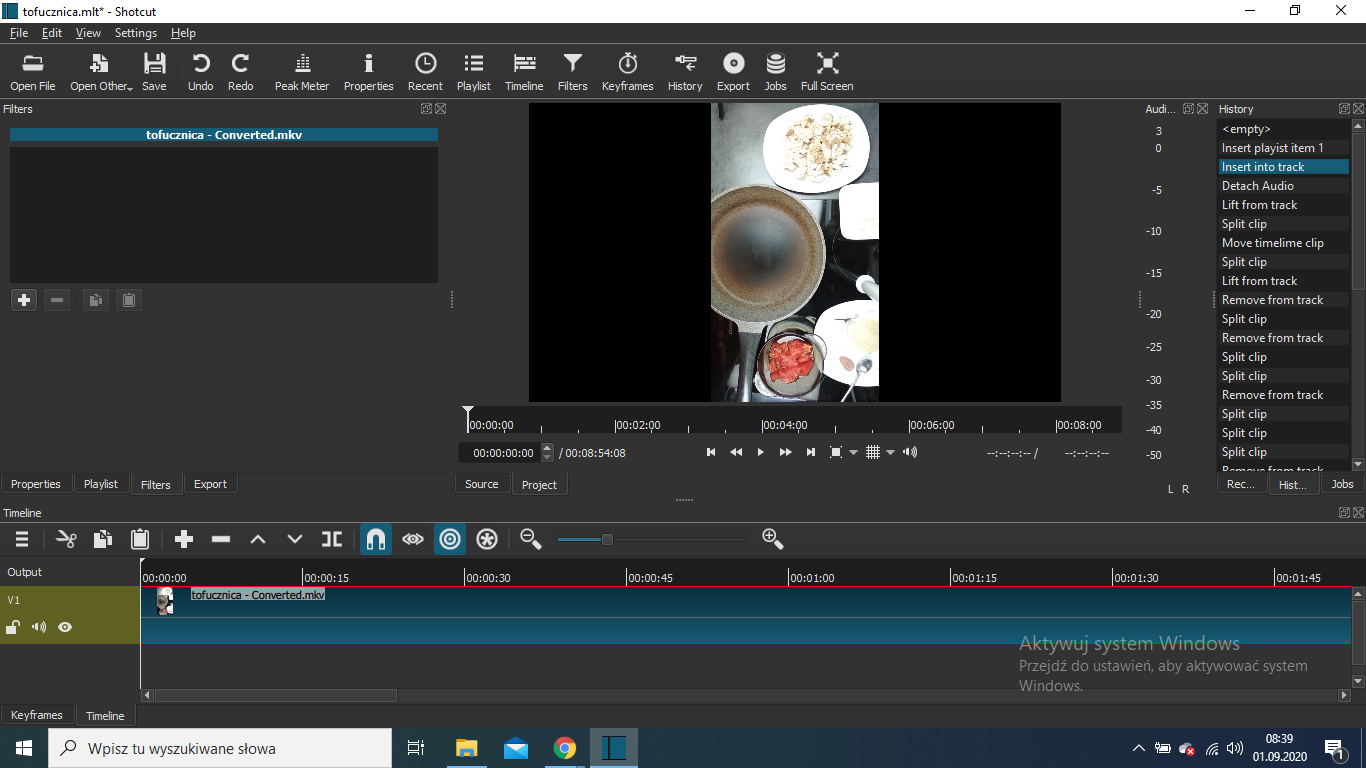
everytime I import the file.
I have no idea why my phone keeps recording in vertical orientation nor where to change it or how to lock it (the phone is Xiomi Redmi 4x) - I looked through the settings and can’t find it.
Rotation does this:
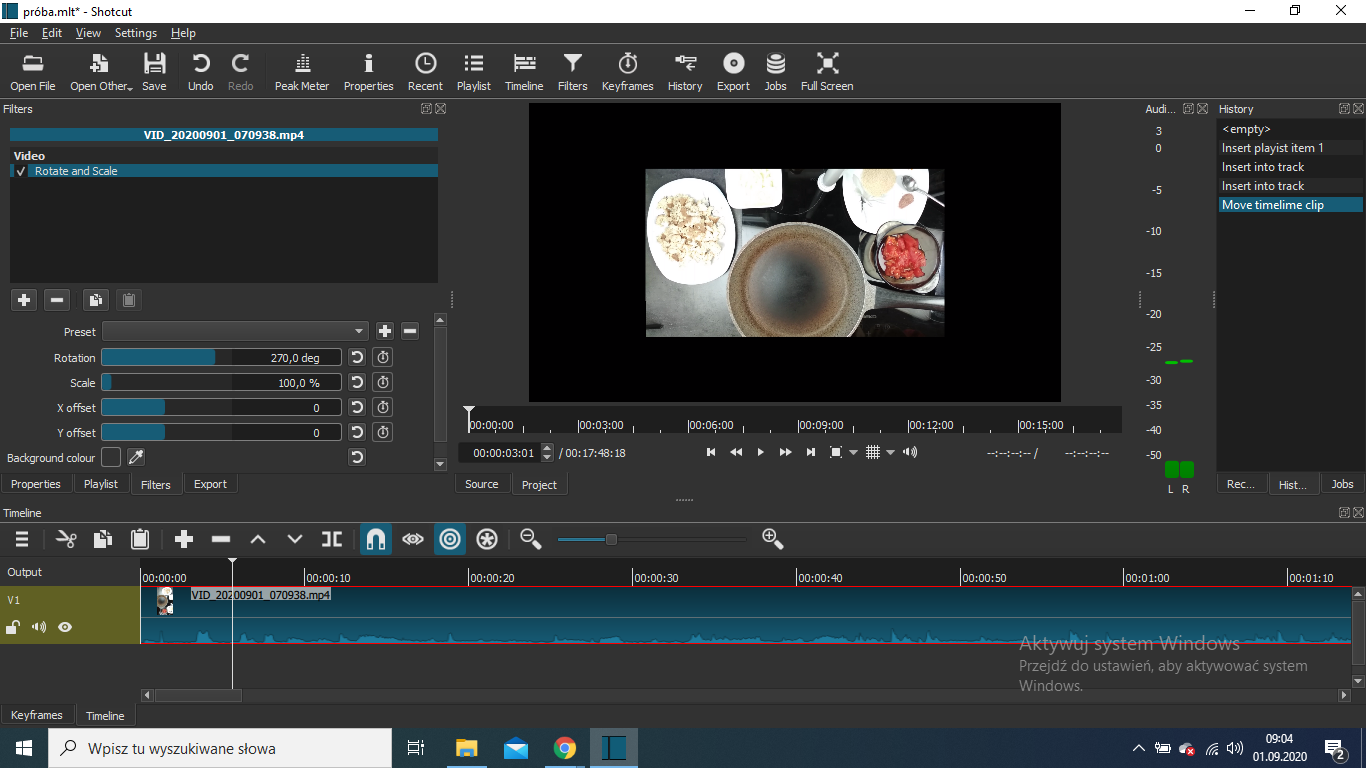
which is great,
then I scale it and finally I get what I want:
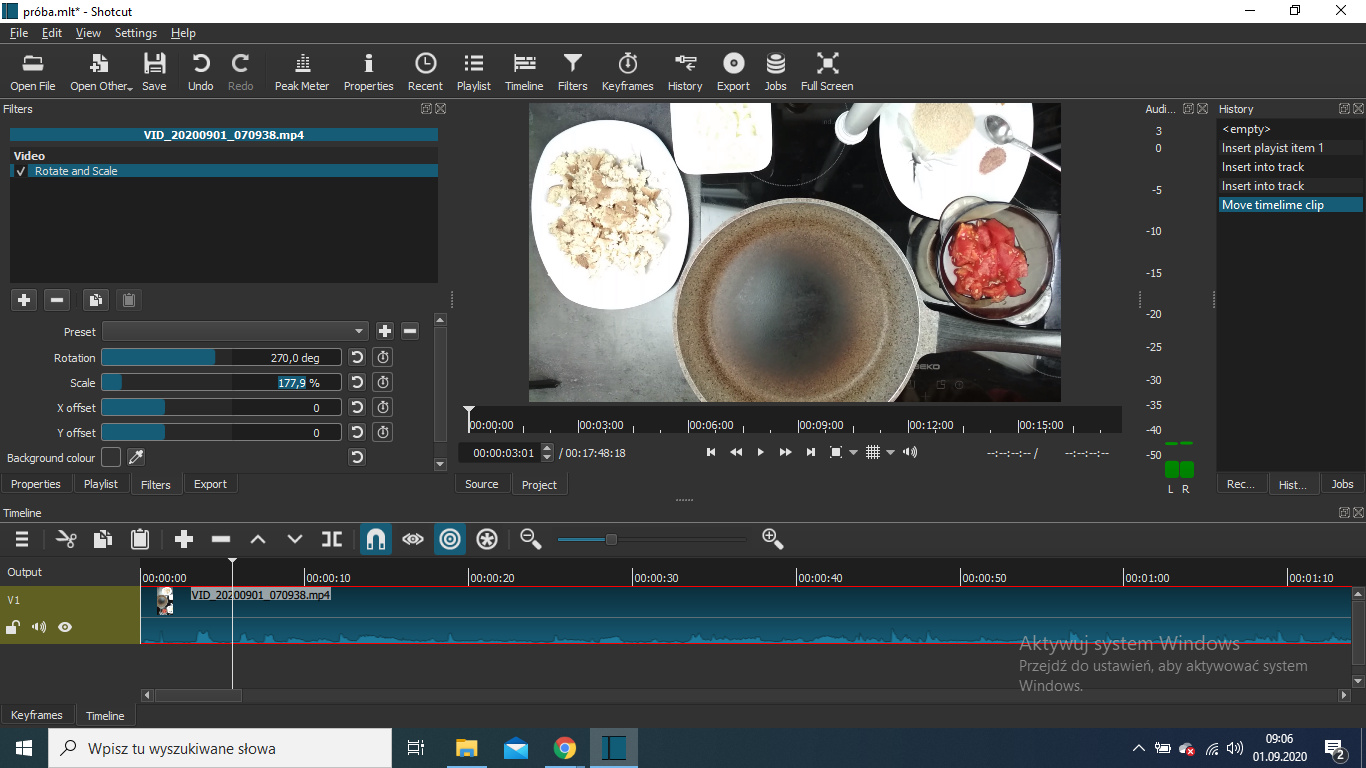
Notice that the scale is 177,9 % - no more, no less - I end up with this number purely experimentally.
My question is: How make the process less complicated and time-consuming?
One way to make sure Shotcut will use the same configuration as your videos : Next time you start a project, set the Video Mode to Automatic (Settings > Video Mode).
Shotcut will automatically adjust the video mode settings according to the dimensions and frame rate of the first video you import.
You can make a special preset of the filters to use each time you have this problem. You can add this set of filters to the track (V1) and save it as an empty mlt-file just with this filter preset.
The best would be to set your mobile to a horizontal orientation - no idea how it works on your model, sorry.
Et simplement le tenir horizontalement quand vous filmez ?
And just hold it horizontally when you’re filming?
Blockquote And just hold it horizontally when you’re filming? > Blockquote
I’m doing exactly this. As I said before. I’m trying to make an overhead shot (bird’s eye view)
Google is your friend, see here: https://www.hardreset.info/devices/xiaomi/xiaomi-redmi-4x/faq/faq/rotation-screen-xiaomi/
1 Like
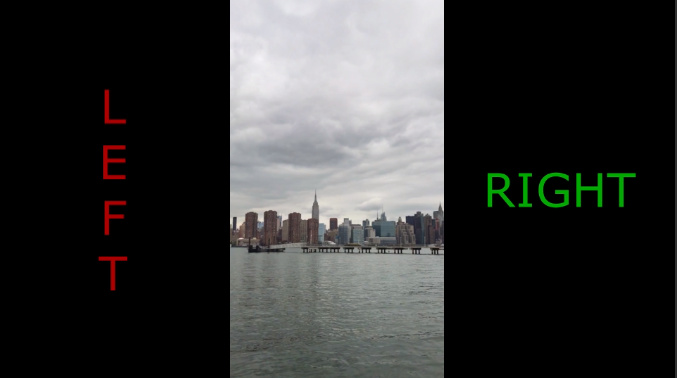
I want my video vertical but want to use the black spaces left and right for text
so far it happened accidentally and I can’t figure out how to duplicate that.
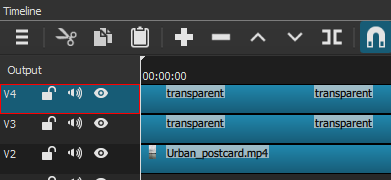
Set the video mode 1920X1080. Add the vertical video.
Create three tracks. Put the vertical video on the lowest track. Add transparent clips to the upper tracks.
Add Text Simple, or Text Rich (20.09 Beta) filters to the transparent clips. Position the text clips on the left and right sides of the vertical video.
8 Likes
There are multiple ways to apply text to video.
But to answer your question as to how to duplicate what you may have done, I came up with this.
If it’s just one continuous video with no splits/cuts, you don’t need the timeline. The following can also be used on the timeline, or via the playlist.
Set a Video Mode of 720p, 1080p of the FPS of your choosing. (Settings - Video Mode)
If left in Automatic, it will use take on the video’s resolution/fps as it’s video mode, thus not able to put text on either side.
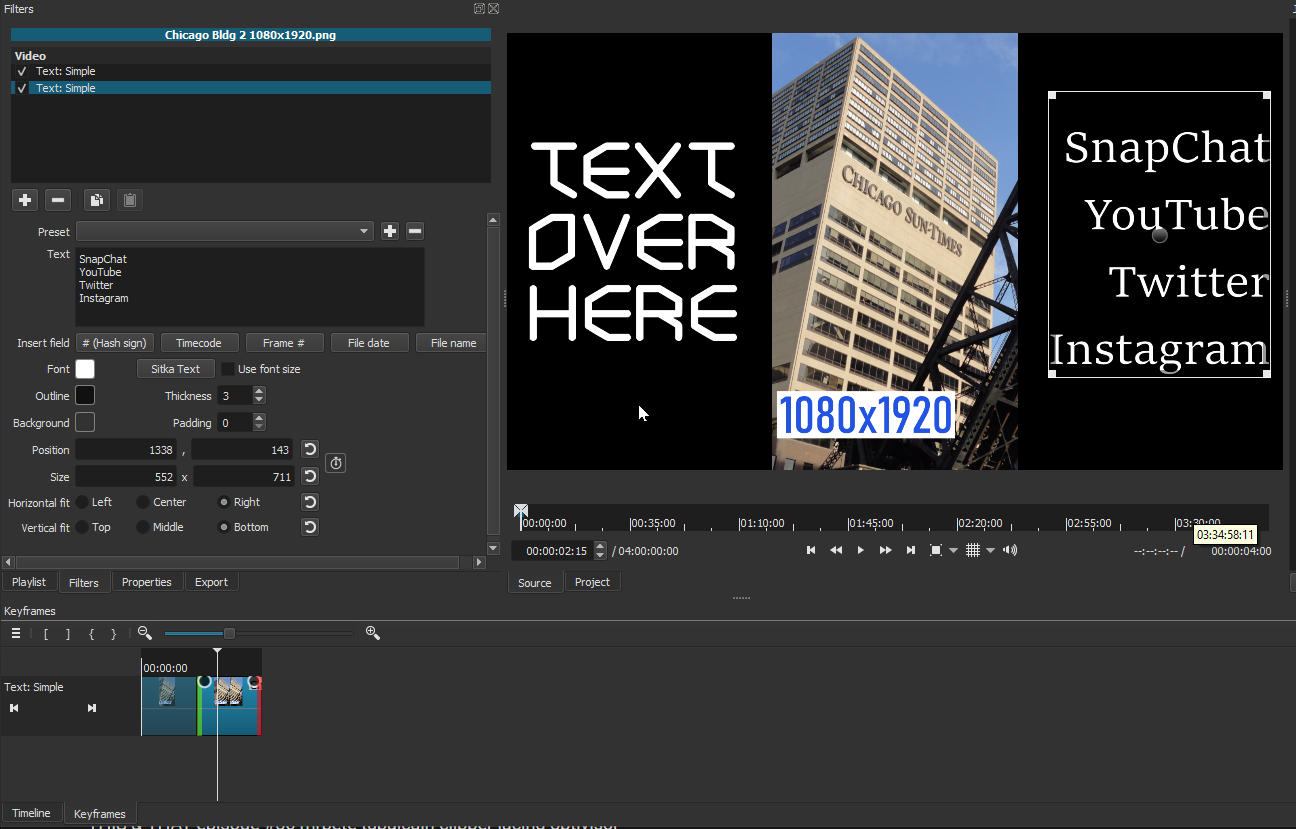
Use at least 2 Text:Simple filters, and adjust each filter used to each side of the video.
You can also trim each filter to start/end. In this example I have the right side text to start 1/2 way through the clip.
Even with the main video in the Source tab, you’re able to use Keyframes for each text filter.
1 Like
I discovered what worked when I accidentally achieved the use of the black areas beside the vertical video for text. When I put the vertical clip on the timeline FIRST, the text filter area is confined to the vertical clip and cannot be moved to the black areas left and right. The text disappears when moved out of the clip in the center.
The time it worked I had put a ‘landscape’ oriented still on the timeline FIRST. This set the area open to the text as the whole screen. I then added the vertical vid clip which occupied center screen with the left and right areas appearing darker black and allowing the text to be placed over those areas. It was simple. Thanks for the other approaches also useful to know.
Set your Video Mode from Automatic to 1080p or 720p.
This gives you the black areas on either side of your vertical clip.
If you leave your Video Mode left in Automatic, it will just conform to your vertical clip, with no black areas.
You can apply the text filters in the Source viewer. A timeline is not needed for text filters. Editing on the timeline is essential for certain aspects, but just for adding text filters, it’s not needed, and comes down to personal choice.
Example of having text filters in Source, nothing in Timeline.
You can still do Keyframes and filter trimming with text filters with just the Source

This topic was automatically closed after 90 days. New replies are no longer allowed.