I was wondering if Shotcut has features that makes the image beats/pumps just like a beating/pumping heart. If there is, how?
Thank you in advanced!
I was wondering if Shotcut has features that makes the image beats/pumps just like a beating/pumping heart. If there is, how?
Thank you in advanced!
I tried it but it’s not beating. Should there be an adjustment? I followed what is on your screenshot and it was the same with the default upon adding the filter with just some minor adjustments.
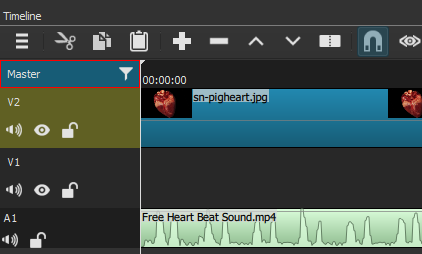
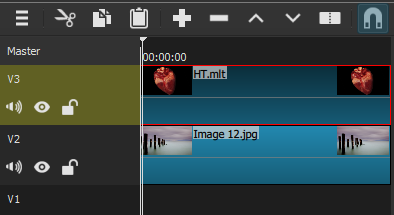
I used 2 tracks for the demo. Audio on A1, image on V2.
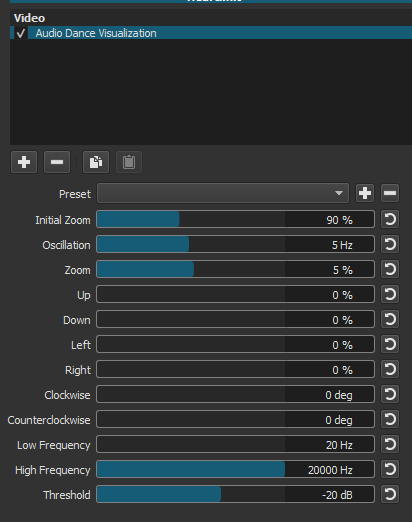
The ADv filter is applied to the master track.
I tried it but I was actually wanting that the pumping image is on the bottom right and not the whole video pumping like what happened with the one you told me. I’m currently trying to figure how to do it.
To do that you need to put your audio and video/image in a project without the ADV filter. Trim and edit the audio and video/image. Save the project.
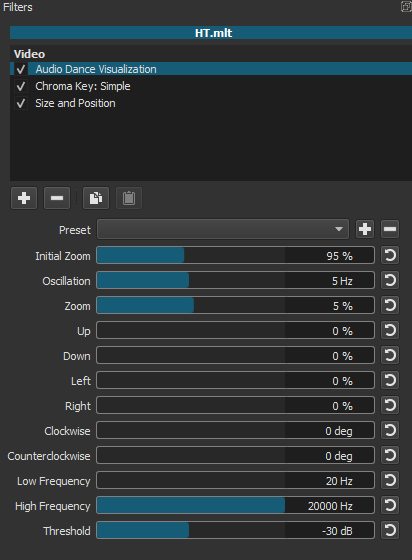
Then create a new project. Use file> Open MLT XML as Clip and open the saved project. Put the clip in the playlist, not necessary but useful. Create video tracks as needed. Put the clip on a track. Use SP filter to position it. Add the ADV filter to the clip. Put a clip on a lower track if you need a background. Save the project and export.
I used chroma key to key out the black.
Based on what I understand of what you said. Create a project with the audio and video/image without the ADV filter then save it. Open that project via “Open MLT XML as Clip” and the clip will be put on the V2 track then the video/image/background will be on the V1 track. Add ADV filter at the V2 track. I did this but it doesn’t beat or pump.
So what I did was (or this was the one you were trying to say), create a project with the audio and video/image with ADV filter then save it. Open that project via “Open MLT XML as Clip” and the clip will be put on the V2 track then the video/image/background will be on the V1 track. After doing this, the image is pumping/beating.
Thank you very much for your assistance! I was able to do it.
Now, when you mentioned about the Chroma, I wanted to have the pumping/beating image have like a shadow around it to make it more look good and that shadow looks like the sound waves of the audio. How to do that?
Don’t know why this didn’t work for you. It worked for me.
If this worked I guess you can use this system for other projects.![]()
This one’s a bit tricky. Have to think about it. Might not be doable.
Me too.
I’ll be using it and kudos to you 
I really appreciate your effort for helping me. I hope it can be doable. I’m also experimenting it.
Just a reference for what I’m wanting. Please refer at the bottom right.
This is the best I could do.
Used two projects.
The first one has a color clip and a video on an audio track.
Dream Theatre.mlt (12.0 KB)
The second project is the main project with the ADV filter and the masks to create the effect.
Dream Theater ADV.mlt (36.0 KB)
You’ll need to provide your own media for the projects. Open the projects and look at the filters I used. Maybe you can improve the effect.
Well, that’s pretty good @sauron ![]() …
…
That’s what I wanted!!! I also want that it doesn’t block the video and it blends in.
What do you mean by color clip? You meant the clip should be colored and not just gray or white and it’s the clip you want to be on the video? And also, you meant the actual video (the one you want to put the pumping image with) should be placed in an audio track?
So this is where I add the ADV filter? How do you mask to create the effect? Can you elaborate?
I do have my own medias. I will not be able to see your mlt because I don’t have your files.
P.S. Thank you again for your effort in helping me and you totally got what I wanted
I had to use 2 projects for this. The first project has a white color clip on V2 equal to the length of the video. I put the video on an audio track because ADV needs audio for the beat. The color clip is the video. Saved the project as Dream Theater.mlt with no filters. You can export the project as a video and use it but I prefer using the MLT. Saves disk space and encoding time.
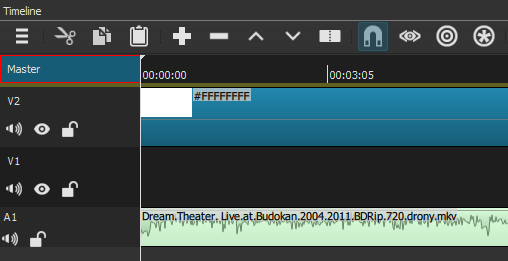
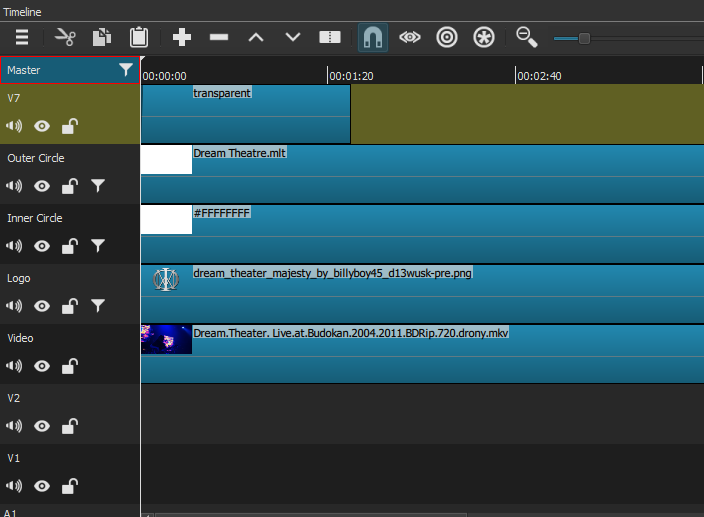
Then I created a new project Dream Theater ADV.mlt, opened MLT XML as clip, the Dream Theater.mlt. added it to the playlist and put it on track outer circle on the timeline. Opened a new white color clip, put that on track inner circle. Next put the logo on track logo. All the clips are the same length.
Applied 2 masks, ADV, and opacity to the clip on outer circle. The masks create the circle that beats.
Applied 2 masks, and opacity to the clip on inner circle. The masks create the circle that is static.
Applied opacity to the clip on logo.
Then set up the circles using the mask filters. All done at 1:1 scale. Once everything looked OK, added an RS and SP filter to each of the 3 tracks. Used RS to scale the circles and logo. The SP filters to position them.
Finally put the video on track video.
You need to download and open my project files to see how the mask filters were used. Hope this explanation isn’t too confusing
Thanks @introvert.23 for this interesting thread.
The 2nd to the last part was confusing. The mask filters you were mentioning to apply (the 2 masks you mentioned and setting up the circles using the mask filters) are “Mask:Apply” and to have the circle “Mask:From File” (which I used and I chose the “Iris Circle” to create the circle), right? When I applied the RS and SP filters, it doesn’t provide me to scale the circles maybe because I’m doing the wrong mask filters.
I also noticed that you have several blank tracks. Are those necessary?
I really want to open your files for reference but I’m having instability issues. My laptop can’t handle audio tracks and video tracks even if it’s just seconds.
Thank you too for helping me solve this interesting thread.
No. Each circle is made using 2 mask simple shape filters applied to the clip. The first uses write on clear the second uses subtract operation.
I applied the RS and SP filters to the track not the clip.
No. I usually create more tracks than I use.
Here’s the project with no video or audio. This has the color clips and the masks. You can open it and look at the filters and the parameters.
Dream Theater ADV.mlt (26.4 KB)
Like this (done using the Text: HTML filter)?
This topic was automatically closed after 90 days. New replies are no longer allowed.