I think there is a better way. I have a screenshot of my windows 10 pictures window for a course I’m building. The lecture shares a strategy of categorizing the pictures by overlaying each picture with a transparent icons of either an X, a check mark or an exclamation mark. (Only the lecture would be doing these overlays – not the students)
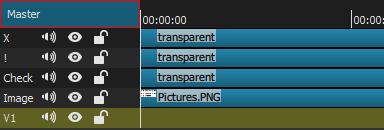
I envision two options, both of which seem cumbersome. The attached shows the beginnings of my project creating a track each time I want to add an icon on my background of 50 pictures.
If I continue, I’d end up with 53 tracks: The background track, 50 icon tracks and two audio tracks.
My second thought is to create multiple mp4s of, say, 10 tracks each where the first generates an mp4 from the first 10 icons. The second imports that mp4 to add 10 more icon tracks and generate anmp4. The third to import the second’s mp4 and so on.
Seems like there should be a better way without having to generate HTML or resorting to animation software.
@Hudson555x. Pretty slick. I lost GIMP with my last laptop replacement. I’m rather suspect that my paint.net is up to the challenge. If I am looking at your one image example, it seems you are concatenating 21 separate “.pngs” to simulate the animation. So I would need 50.
Your alternative with the master image and the transparent overlays is the option I pursued. The issue I ran up against is that each of the transparencies apparently needs it’s own track. And I thought that perhaps there was a way to use “split” or some other tool to allow me to accumulate overlays on the same track. In any case, I did try five MLTs with 10 tracks each exported into its own mp4. Then combined the generated mp4s into one final mp4. The result was almost what I’d planned. But then the final mp4 repeated from the beginning and went about half way through.
Think I will pursue your multiple .pngs instead of trying to debug my approach. And, as @shotcut pointed out, Shotcut is a video editor not intended as an animation tool.
This is one way of doing what you want without using any external application.
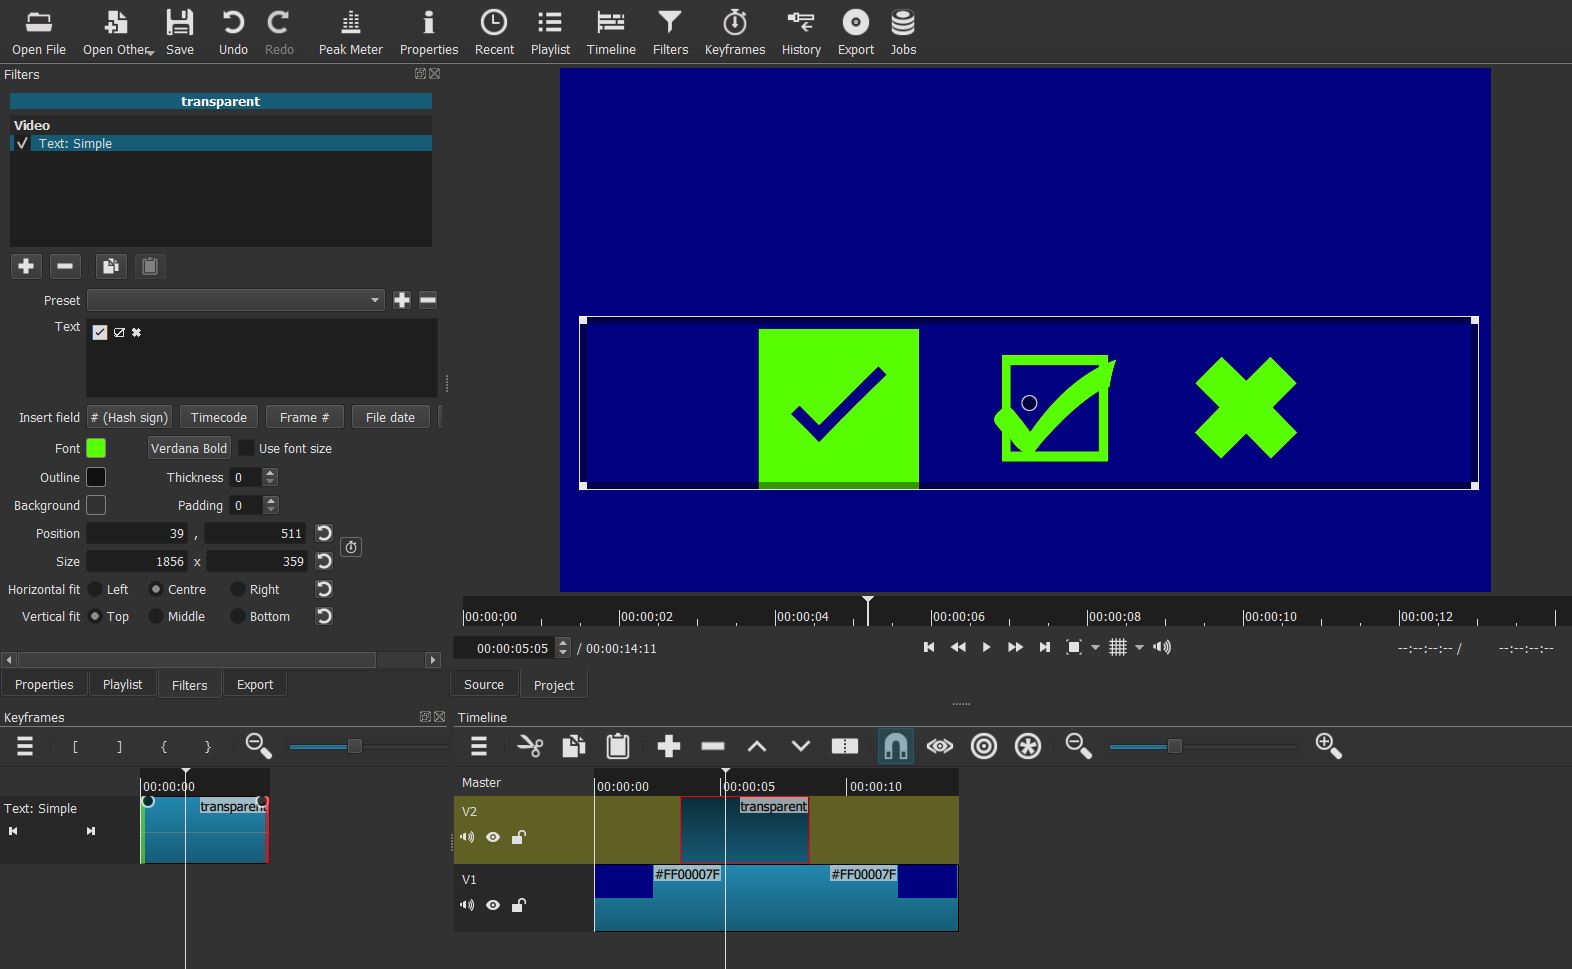
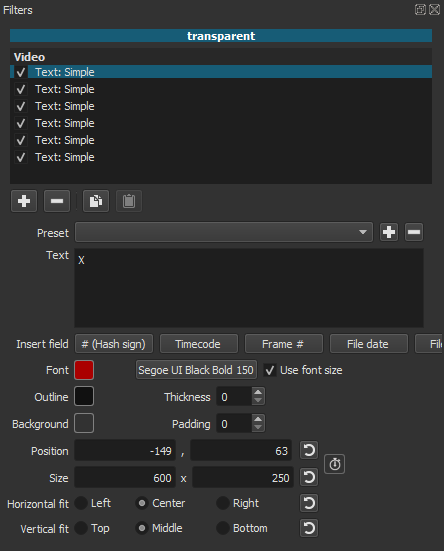
Using text instead of images/icons. It can be done using 4 tracks. One for the image, 3 tracks for the marks. Each track is used for a symbol. You can put multiple text filters on each track. Use rectangle control; to position the text and filter trimming to control the animation.
Shotcut can be used for animation. Just need to think outside the box.
Here’s the project, replaced the image with a color clip. If you want to look at it to see how it can be done.
Clever stuff @sauron! I notice you used the webdings font for the tick. Cool!
Just to add: you could visit https://fsymbols.com/signs/tick/ , copy one of the symbols, then paste into the text filter panel. Just tried it in SC - it works!
Oh my, @sauron I’m just too new to this. I hate to pester, but if you are up to pointing me to the relevant tutorial…
I just don’t understand how you populated the Playlist with the text and webdings. And then on the track, did you split and create a source duplicating what was already on that track then adding the new text? If so, is there a way to copy the source?
Open other text. Typed X in the text box. Click OK. That opens a transparent clip with text in the in the source viewer. Changed the font and font size. Set the X to center middle, positioned the X in the center of the screen. Added the X to the playlist.
Copied the X back to the SV. Changed the X to !. Added it to the playlist. Copied the X to the SV again, changed the font to webdings, Typed an a for the check symbol. Added it to the playlist. You can also use the link @jonray provided to copy and paste symbols into the text box.
Now there are 3 symbols in the PL
.
Created 4 video tracks. Named the tracks Image, check, ! and X. Added the image to the Image track. Used open other color to open a transparent clip in the SV. Copied the clip to the 3 tracks above the Image.
Opened the X clip in the SV, Copied the filter, selected the X track, pasted the filter. You can paste the filter multiple times. They will stack.
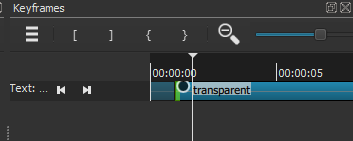
Selected the first filter, positioned the X with the rectangle control over the image, then selected the next filter positioned it, and so on and so forth. Once the text is positioned used the key frames panel to trim each filter.
I’m pretty much stuck at the beginning of your response.
But I do think this is rather important for me to master this concept. Not so much for this project, but because my lecture introductions list the topics of the lectures as my headshot mentions them. I’ve been creating a track for each text line.
So here’s how I am stuck.
There are four options for text. The filter provides, as I recall, Text Html, Text Simple and Text 3D. Choosing Text Simple does not appear to allow me to have the Source Tab (which is what I gather you mean by “SV”: Source View?) show me anything except the underlying “.png” background. The only way I get a text in the SV by itself is to use “Open Other”>“Text”. Which is what I prefer to do anyway. Is that the option you intend?
But I don’t understand how I get it from the SV directly to the PL (playlist?). The only way I know is to create a video track on the timeline (TL?) and load that track with the SV then load the PL from the TL track…
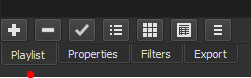
I did find a posting suggesting moving directly from the SV to the PL, but it seemed to describe a “plus” icon that I don’t see on my version19.12.31.
With all due respect, I think you are making things too complex for yourself… no need to think of SVs and playlists etc … it’s more straightforward than you think!
I just made this short tutorial to explain the principles of how to do it. I didn’t have time to do a spoken commentary but I hope it guides you through the process. Good luck!
Best viewed on Youtube (full screen), settings: 1080p HD,
@jonray, you are clearly correct – way too complicated. It never occurred to me to pull the next “simple text” from the filter window instead of “Open Other” > “Text”. The remaining issue is my total keyframe illiteracy. (I’ll be looking for a tutorial).
Along the lines of “too complicated”, this is not a new phenomenon. Back in 1973 or so, my colleagues and I would share riddles over lunch. One of those riddles was: You have 4 apples in a bag and four people. How do you give each person an apple and still have one in the bag? The obvious solution is to give three people an apple and give the fourth person the bag with the apple in it. My solution differed. I gave each person an apple and stuffed the fourth person with his apple in the bag.
As a my wedding present, my colleagues gave me four apples in a bag. Chaos ensued.