Je commence à comprendre. SVG c’est bon, Intaglio que j’utilise pour les dessins 2D le gère Créer un mp4 à partir de l’écran c’est bon aussi. Il me reste à comprendre votre code pour mettre en page tout cela (pt, px, mm, couleurs, délais etc…) Avec cette technique on doit pouvoir faire des choses intéressantes…
I am beginning to understand.
SVG is good, Intaglio that I use for 2D drawings manages it.
Creating an mp4 from the screen is good too.
I still have to understand your code to layout all this (pt, px, mm, colors, delays etc…)
With this technique we should be able to do interesting things…
Well done in understanding the reasoning behind the code, which is “exposed” to the user in the set of parameters. I would have loved to have had this technique available for when my wife and I toured New Zealand. I may even go back and do one to add the report on my website.
I am currently working on a “helper” application, since there can be quite a bit of re-arranging of the paths (e.g. the order, the timing, the colour, the thickness etc.) if you have multiple ones. I should have something to try tomorrow.
I downloaded your mlt file, even tried it with another map. It worked but only because the route I used was compatible - I have no idea how or why it worked. I understand the rectangle and I generally understand keyframes, but putting the two together is beyond me. Can you or someone else point me to a tutorial describing how to move the mask around as the video progresses?
Well done - it looks like it may have ben a Herculean effort to do this. I have been thinking for some time about doing something similar, but using the HTML canvas element and running the video and just clicking at points where I want the red dot to travel between (a mouse click is a whole lot easier than keyframing). I may knock up some “proof of concept” code once I’ve titdies up the projects I’m working on at present
1/ Ouvrez à nouveau le projet mlt avec Shotcut. 2/ Sélectionnez le clip “Carte.png” sur la timeline. 3/ Dans la fenêtre “Filtres” sélectionnez “Mask: Simple shape” 4/ Modifiez le Mode de “Ajouter” à “Soustraire” Le rectangle du masque apparait en rouge. Mettez le clip en lecture pour observer le défilement du masque. Au début du clip le masque cache complètement l’itinéraire, puis il se déplace vers la droite jusqu’à le découvrir complètement. 2 images clés suffisent, une au début, l’autre à la fin. Pour ajuster la vitesse, il faut allonger ou diminuer la longueur du clip.
1/ Open again the mlt project with Shotcut.
2/ Select the clip “Carte.png” on the timeline.
3/ In the “Filters” window select “Mask: Simple shape”.
4/ Change the Mode from “Add” to “Subtract”.
The rectangle of the mask appears in red. Play the clip to observe the mask scrolling. At the beginning of the clip the mask hides the route completely, then it moves to the right until it is completely uncovered. 2 key frames are enough, one at the beginning, the other at the end. To adjust the speed, you have to lengthen or shorten the length of the clip.
@Namna you are brilliant, I tried your idea and it worked perfectly. It took me a while to find where in the screen was it as I couldn’t see the layer moving. Is there any way to add a border while working on it to identify it then take the border out?
Also, a quick question regarding the image. Not sure if I should open another topic. Imported image png and jpg, the quality degrades a lot. Very much pixelated. Any tricks for when importing images to shotcut?
Thank you so much for your hard work, amazing and simple.
Pour le premier point, c’est facile. Le temps du réglage, mettez le mode du masque sur “Soustraire” au lieu de “Ajouter”, vous voyez alors le cadre en rouge. (voir post ci-dessus)
Pour png vs jpg je ne suis pas spécialiste, mais je sais que png accepte la “couleur” transparente et pas jpg
Pour la pixellisation, si vous obtenez l’image par capture d’écran cela dépend de la résolution de l’écran et de la taille de l’image. Il existe certainement d’autres possibilités pour télécharger l’image, mais j’avoue que je ne me suis jamais penché sur la question. D’autres membres vont bien certainement nous éclairer.
For the first point, it’s easy. During the adjustment, put the mode of the mask on “Subtract” instead of “Add”, you then see the frame in red. (see post above)
For png vs jpg I’m not a specialist, but I know that png accepts transparent “color” and not jpg.
For the pixelization, if you get the image by screen capture it depends on the screen resolution and the image size. There are certainly other possibilities to download the image, but I must admit that I never thought about it.
Other members will certainly enlighten us.
Changing it to “subtract” makes it make sense. I did it with my sample. “Subtract” to make it easy to set up, then change it to “Add” for the final version.
I do aviation videos, so you can just imagine where this will work!
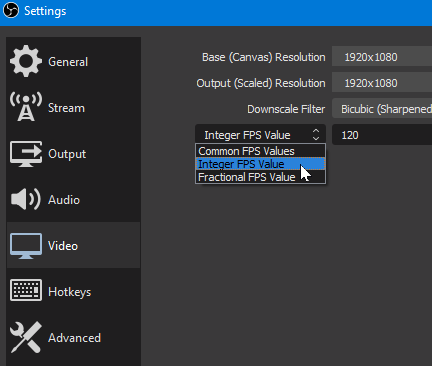
Nouveau problème! Avec mon matériel (pas très récent je l’avoue) je ne peux pas enregistrer l’écran en 1280x720 à plus de 8ips. Après import et conversion par Shotcut en 30 ips, le résultat final est très saccadé.
New problem!
With my hardware (not very recent I admit it) I can’t record the screen in 1280x720 at more than 8ips. After import and conversion by Shotcut in 30 fps, the final result is very jerky.
Is that using OBS as the screen recorder? I get 60fps for most of the animations I’ve tried. I am looking at a better way of animating the lines using SMIL (https://en.wikipedia.org/wiki/SVG_animation) instead of Javascript CSS transforms. That may speed the processing up a bit, but not 8 times as fast.
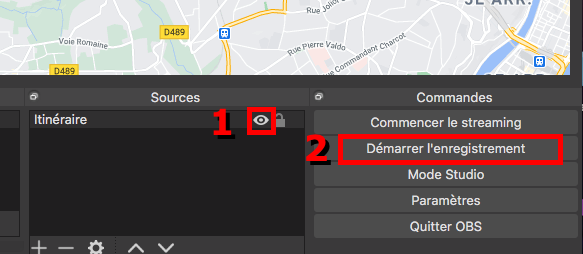
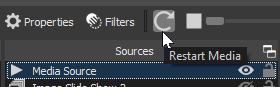
Merci encore @Elusien, il m’a fallu quelques heures pour comprendre OBS. J’ai perdu beaucoup de temps à chercher le bouton “Refresh” que vous montrez dans votre démo afin de faire démarrer l’animation. Sur Mac il semble que ce soit légèrement différent. Il faut: 1/ cliquer sur l’œil 1 pour effacer l’écran 2/ cliquer sur 2 "démarrer l’enregistrement 3/ cliquer sur l’œil 1 à nouveau pour démarrer la lecture. Au final, j’obtiens bien une vidéo 1280x720 à 30 ips, problème réglé.
Thanks again @Elusien, it took me a few hours to understand OBS. I wasted a lot of time looking for the “Refresh” button that you show in your demo to start the animation.
On the Mac it seems to be slightly different.
It has to be:
1/ click on eye 1 to clear the screen
2/ click on 2 "start recording
3/ click on eye 1 again to start reading.
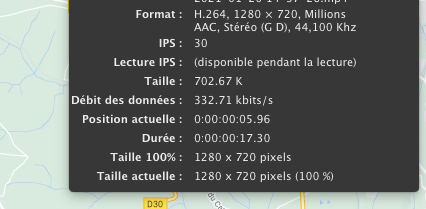
In the end, I do get a 1280x720 video at 30 fps, problem solved.
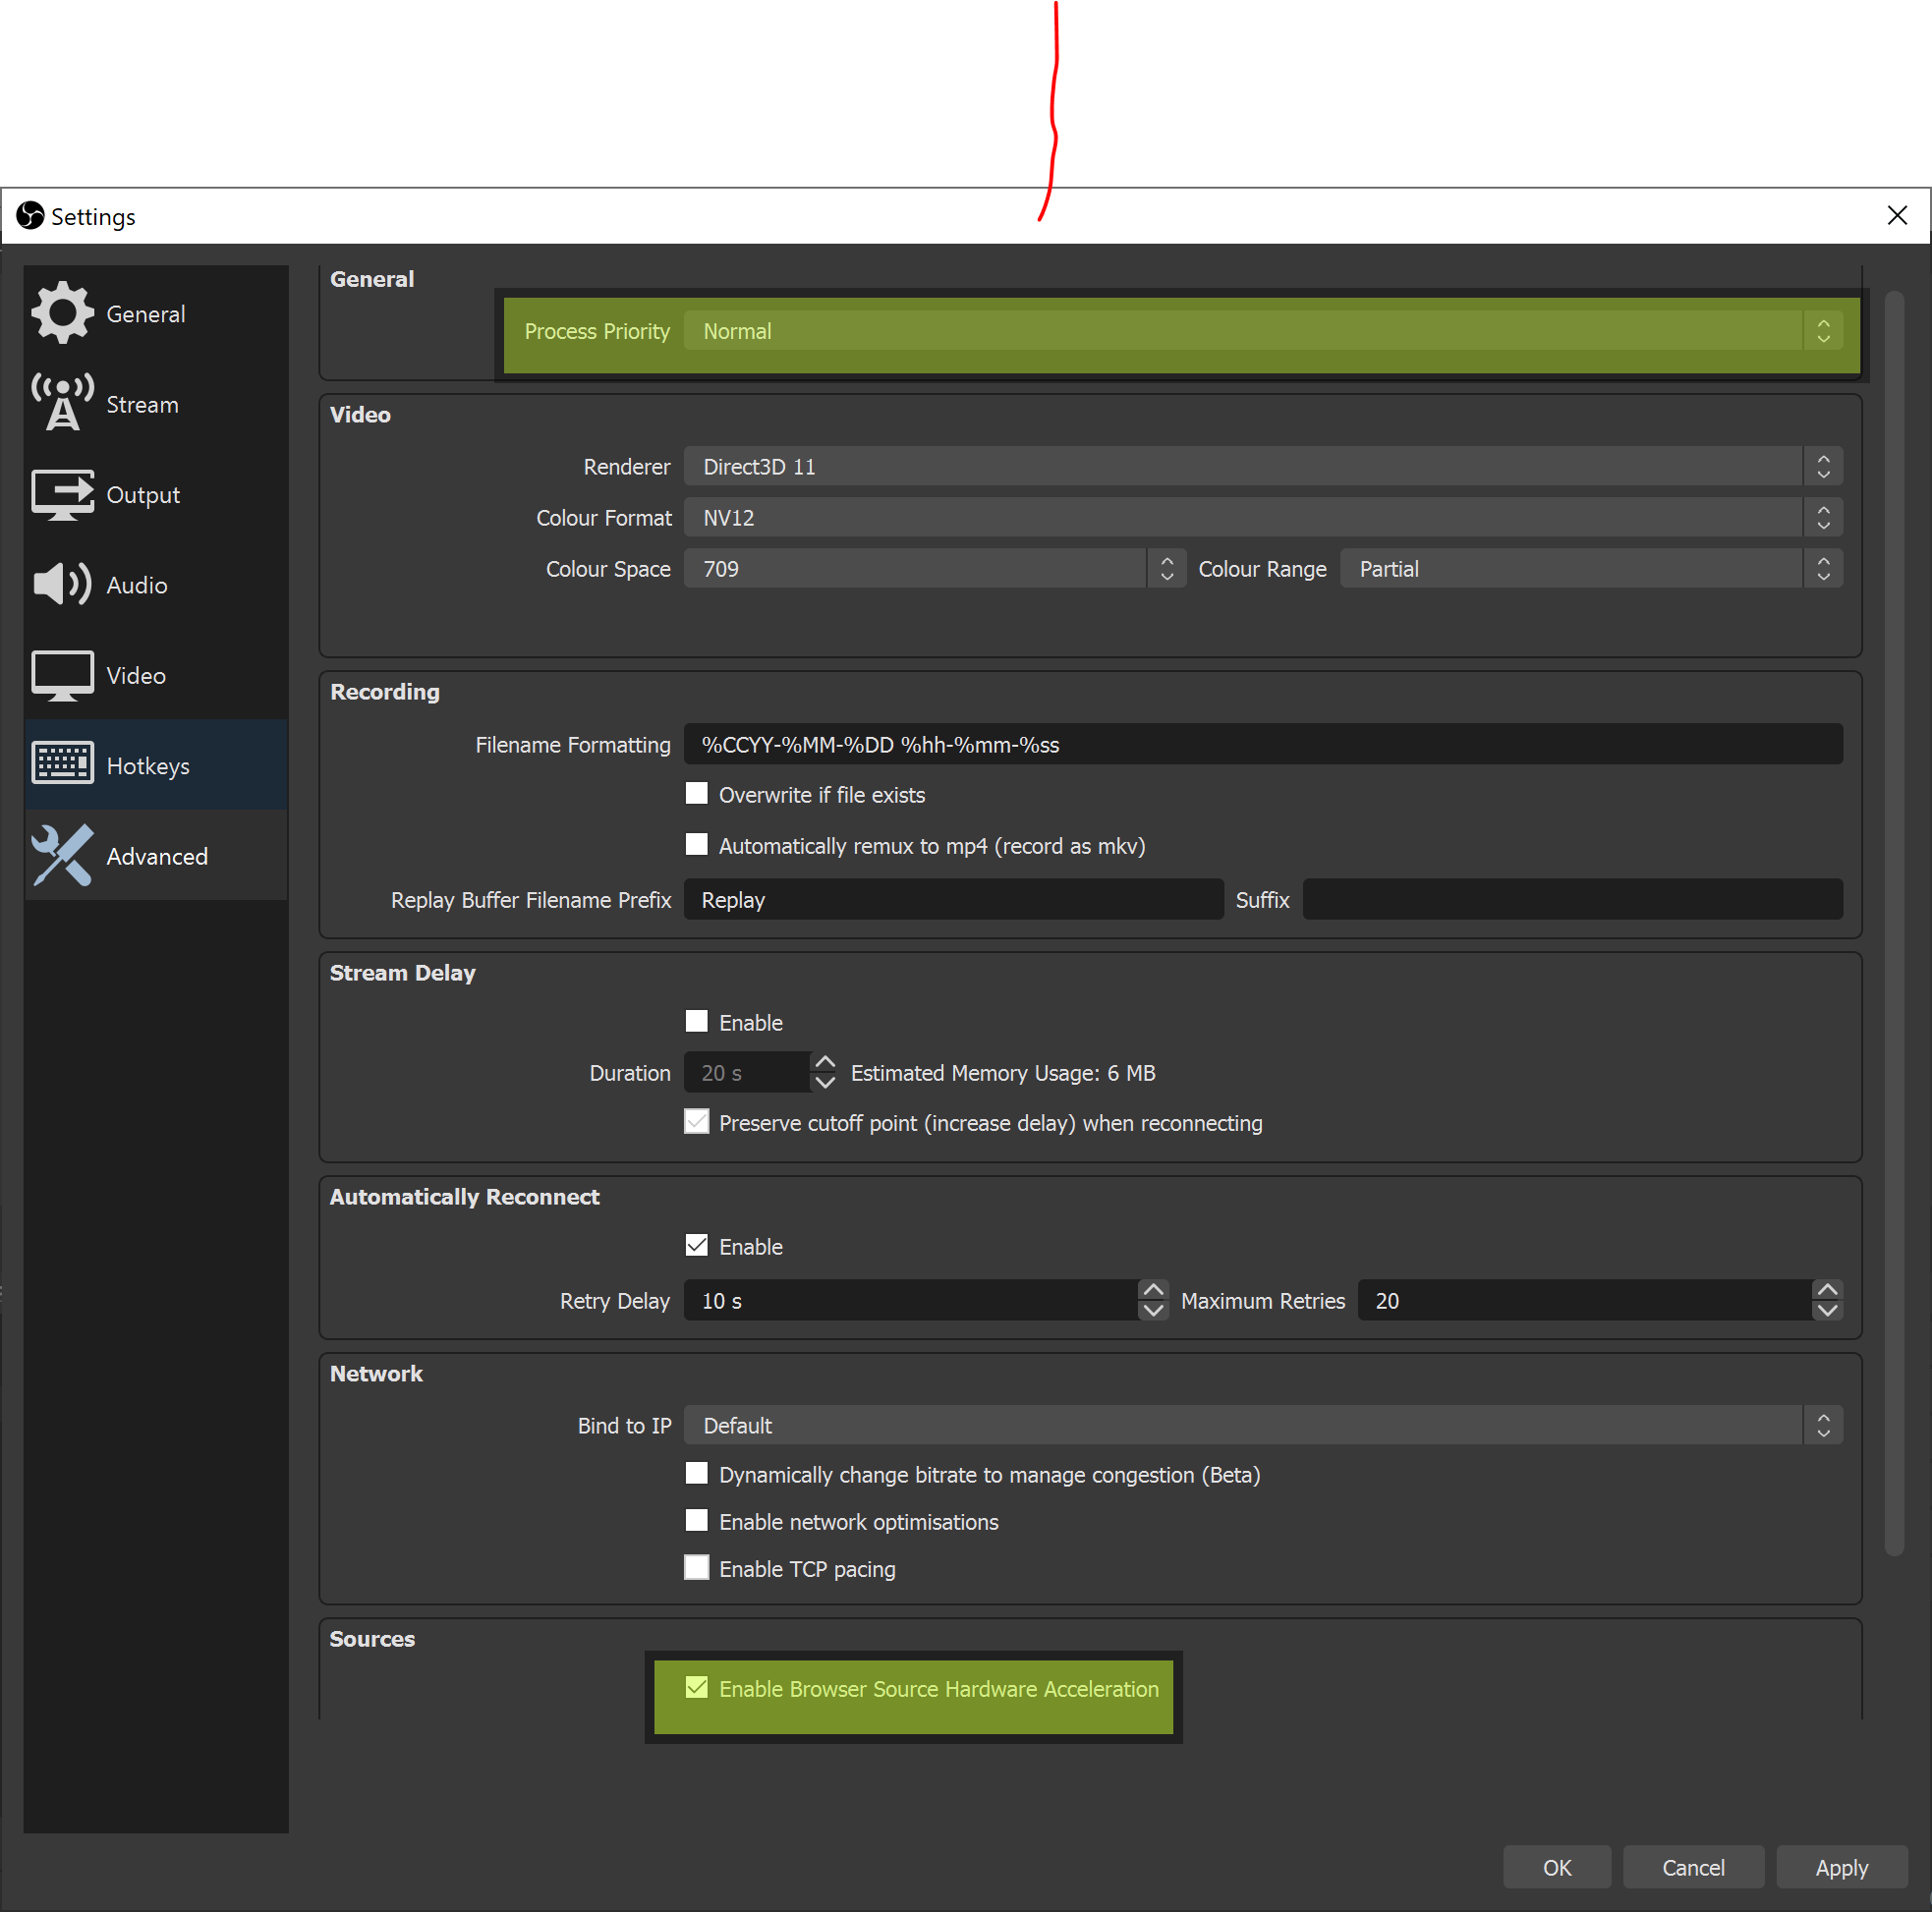
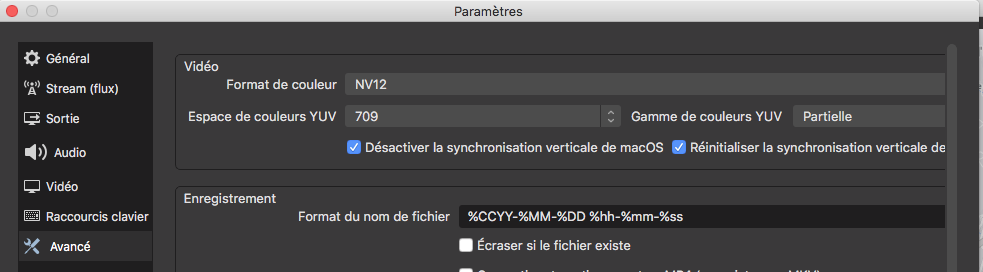
Glad to see you got it working. Just 1 more point though, under “Settings -> Advanced” there are a couple more options you can set. The process priority - you can set it to “High” and the option to “Enable Browser Source Hardware Acceleration”.
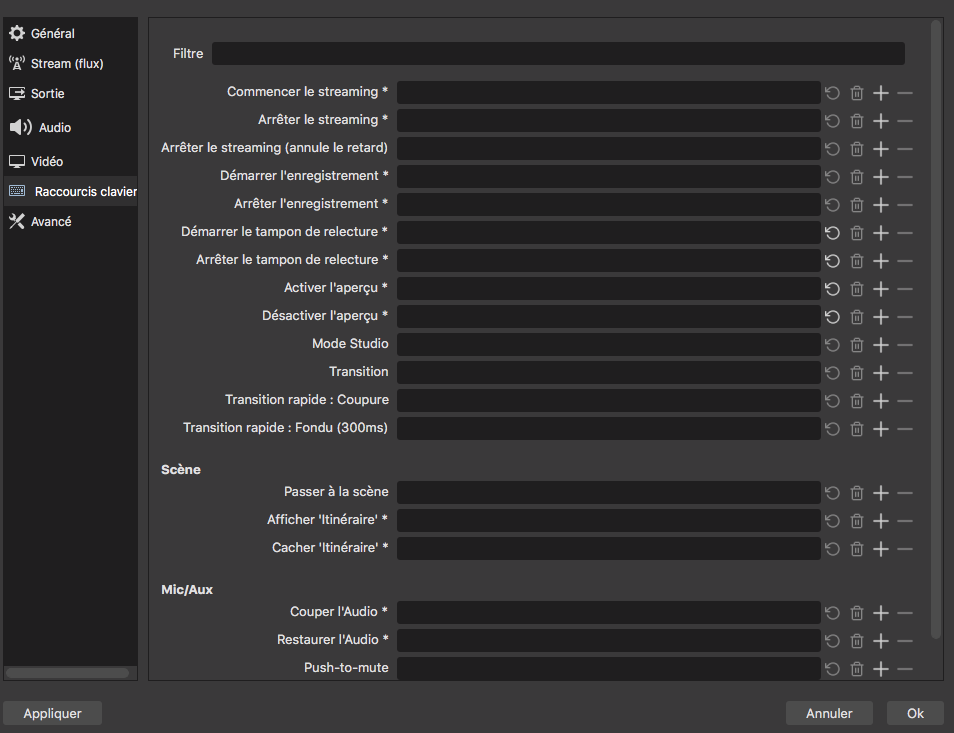
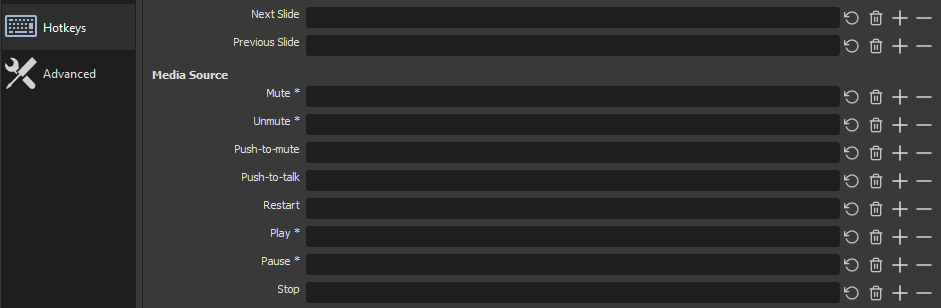
This is where I wish I could read French, but it appears you don’t have the Media source activated.
If you don’t have “Media Source” as a source, there will not be any hotkey to set.
Then in the Hotkey’s there will be all of these option.
If you rename “Media Source” to some other name, the name transfers to the hotkey section as well.
I’m running version 26.1.1 (64-bit)
OBS has a very active support forum, and there is a support section for Mac users.
I am not familiar with the Mac version unfortunately.
Je suis limité à la version 23.2.1 (64bits) pour la même raison (OSX 10.11) que je suis limité à Shotcut 20.09.27. Le Père Noël ne m’a pas apporté un nouveau Mac
J’ai trouvé pour les raccourcis, merci @Hudson555x
I am limited to version 23.2.1 (64bits) for the same reason (OSX 10.11) that I am limited to Shotcut 20.09.27. Santa Claus didn’t bring me a new Mac
I found for shortcuts, thanks @Hudson555x