Stinger Transition #1
A stinger transition (also called stream transition) is an animation that you insert above the intersection of two clips. At one point, the content of the animation covers the entire screen, hiding the abrupt transition between the two clips.
I saw the one I’m sharing today in a YouTube video and I reproduced it as best as I could with Glaxnimate.
Stinger01.zip (9.6 KB)
The ZIP contains 2 files:
-
stinger01_30fps.rawr
That one was made for 30fps projects, but can be used in projects with frame rates of 23.98fps, 24fps, 25fps and 29.97fps. The speed of the animation will be slightly slower when used in 23.98fps, 24fps, and 25fps projects. -
stinger01_60fps.rawr
That one was made for 60fps projects, but can be used in projects with frame rates of 50fps and 59.94fps. The speed of the animation will be slightly slower when used in 50fps projects.
How to use:
- Insert the .rawr file on the track above your two clips
- Align the middle of the .rawr clip with the intersection of the two clips that are on the track below.
How to edit the colors
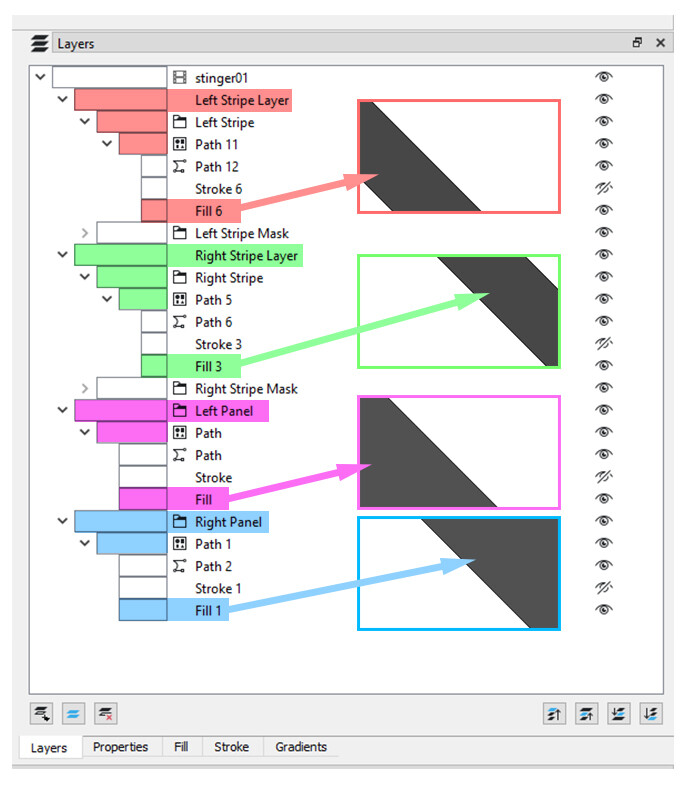
The stinger transition is made with 4 elements in Glaxnimate. Two dark grey stripes (left and right) and two grey panels. If you don’t like those neutral colors, you can change them.
- In Shotcut, select the rawr clip.
- Go to the Properties panel and click on the Edit button.
- In Glaxnimate, go to the Layers panel.
- Deploy each element and find its Fill layer.
- Go to the Fill panel and edit the color.
Example: Editing the color of the left stripe:
- Deploy Left Stripe Layer
- Deploy Left Stripe
- Deploy Path 11
- Select Fill 6
- Go to the Fill panel and edit the color.
Don’t forget the save the changes.
If you don’t want to overwrite the grey animation, save under a different name (for example: stinger01_blue_red_30fps.rawr). Then, in Shotcut, use the new rawr file instead of the original one.
All the Fill layers you need to edit: