The New Project view is the primary screen shown when Shotcut is launched. It serves as an optional starting point for work, ensuring that your project is organized and that the technical foundation (resolution and frame rate) is correctly established before media is added.
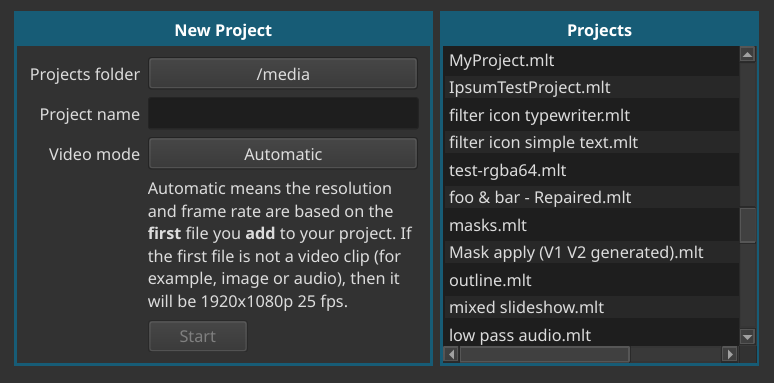
To start a new project, you must complete the three primary fields in the center of the application window. If you are already working in a project, you can return to this screen via File > New or Ctrl+N (Cmd+N on macOS).
1. Projects Folder
This is the parent directory on your computer where Shotcut will save your project folders.
- How to set: Click the text or the folder icon to browse your system.
- Best Practice: Choose a dedicated folder for video editing so all your projects are kept in one location.
2. Project Name
Enter a descriptive name for your current work (e.g., “Summer_Vacation_2024”).
- Behavior: When you click Start, Shotcut creates a sub-folder with this name inside your Projects folder and creates an empty
.mltproject file within it. - Storage: You can optionally to store all the media (video, audio, and images) you plan to use inside this specific project folder to avoid “missing file” errors later.
- Generated files: Shotcut can generate files for certain tasks such as Stabilization or generating an image from HTML. When using this feature to make a project folder, Shotcut automatically saves them to this folder instead of asking you every time where to put it! This only works if you press the Start button, simply entering a name here does nothing in and of itself.
3. Video Mode
The Video Mode is the most critical setting. it defines the resolution (e.g., 1080p), the aspect ratio (e.g., 16:9), and the frame rate (e.g., 30 fps) of your project.
- Automatic (Default): Shotcut will leave the settings blank and automatically set the Video Mode based on the properties of the first file you drag onto the Timeline or Playlist. Not the first file at any later point in time as you make changes. Literally, the first time you add something, the video mode is set and locked in until you change it with Settings > Video Mode.
- Manual Selection: You can click the drop-down to choose from various presets (HD, 4K, Vertical/Social Media).
- Important: It is best to set this manually if you know your final delivery requirements. Changing the Video Mode mid-project can occasionally cause filters or transitions to misalign.
- This does not change Settings > Video Mode if you start a project without clicking the Start button!!
Starting the Project
Once these fields are filled, click the Start button.
- The Timeline, Playlist, and Player will be initialized according to your Video Mode.
- The window title bar will now display your project name followed by an asterisk (*) if there are unsaved changes.
Recent Projects List
On the right side of the New Project view, Shotcut maintains a list of recent Projects.
- Quick Access: Simply click a project name in this list to immediately reload that work.
- Search: Use the search bar at the top of the Recent panel to find older projects by name.
- Removal: To remove a project from the list, right-click it and choose Remove.
Removal only removes the project from this list; it does not remove any files. Use your operating system’s or preferred file manager, such as Explorer on Windows or Finder on macOS, to manage files.
See also Project Management, Settings > Video Mode, View > Recent