Hi folks, haven’t posted for a while - I’ve been making tons of flute videos ![]() (well, three or four)…
(well, three or four)… ![]()
Thought I’d post about my latest one, though, and mention a few techniques I used, to maybe help some SC users with a few techniques.
So - after composing the music, sequencing the backing track in Cubase, recording my live flute, typesetting the music in MuseScore (and exporting the flute part as a PNG)… I set to work on the video. I searched for suitable dancing clips on YT and did my best to synchronise them with the music …
Here’s the final video (target audience: flute players/teachers):
 by Jon Raybould")
TRANSITIONS
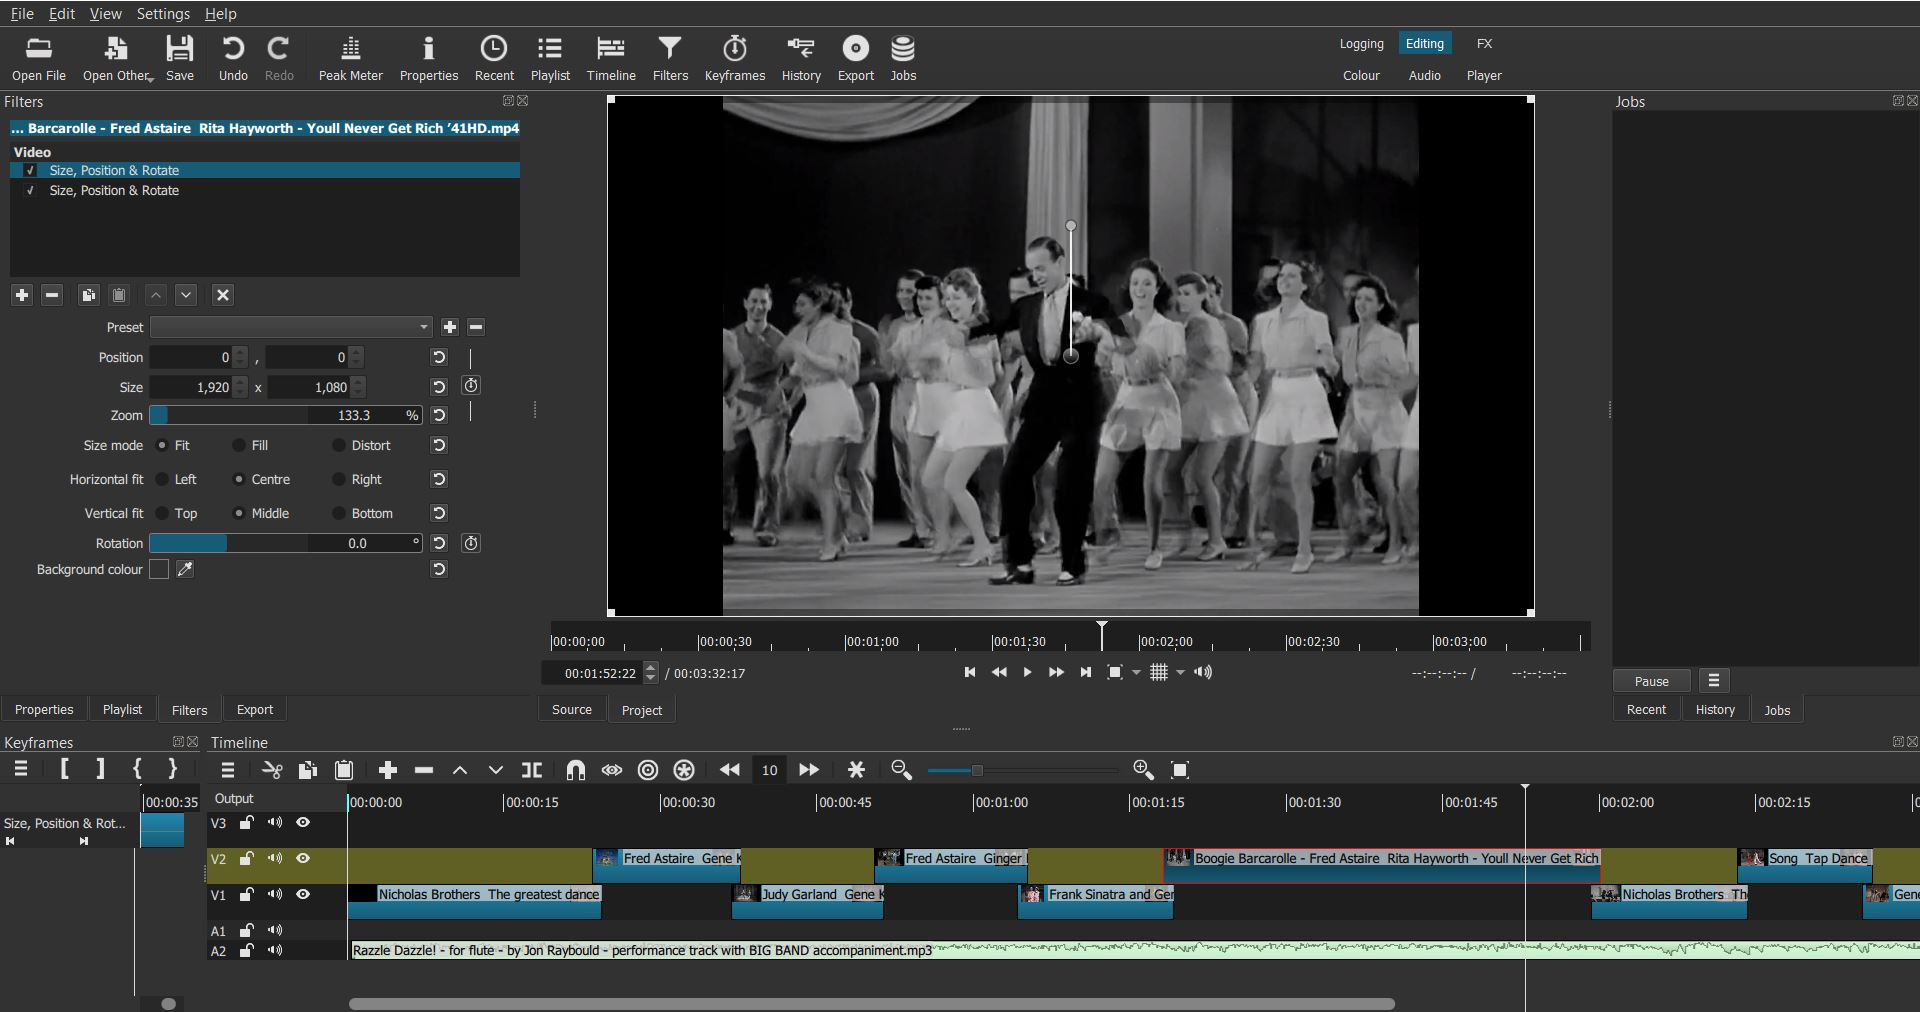
The slide in/out effect between each clip was created by adding two SPR filters to each clip, then selecting the presets “Slide in from left” on SPR filter 1 and “Slide Out Right” on SPR filter 2, then overlapping the clips like so:
THE TEXT
The text wasn’t created using the Text:Simple or Text:Rich filters! Instead I discovered a seriously cool site called COOLTEXT.COM, which generates free png text designs with transparent backgrounds. The pre-set style “Gold Trim” was ideal for the effect I wanted. So each text line is a png image generated from the site.
THE SCROLLING MUSIC
The white background page for the sheet music is a white colour clip, sized with a SPR filter and an Opacity filter applied. On top of that on another track is the sheet music PNG exported from MuseScore (with transparent background selected as an option in MuseScore). Again, 2 SPR filters applied: 1) to resize and 2) to keyframe the scrolling. Also a Mask:Simple shape filter to cut off and hide the top of the sheet music as it moves upwards.
THE SPINNING IMAGES (END CREDITS)
(Since the end credits won’t be seen by most people unless they have watched the whole video, here’s just the end credits section):

I used “Export Frame” to capture 12 PNG images of each clip. Then I used a white colour clip and the SPR filter to make the background borders of each image. The images were positioned on a track higher than the white clip using the grid (snapping on), leaving 20 pixels around each image. I added a green background to the edges and again exported these as 12 more images.
Then imported them back into SC…
Then I chromakeyed out the green background, and the rotated of each image- SPR filter, first 0-359 degrees, then a “hold” (discrete) keyframe, then 90-350 or so degrees (varying each one slightly. For some I ended at 359 degrees then added a keyframe of between 2 and 10 degrees to get the image to rotate a little further, past the 360 degree point).
I also applied a zoom in for each image in addition to the rotation, and also applied another SPR filter to each track just to move each image left or right to achieve a visually satisfying result.
Here’s my timeline for this:
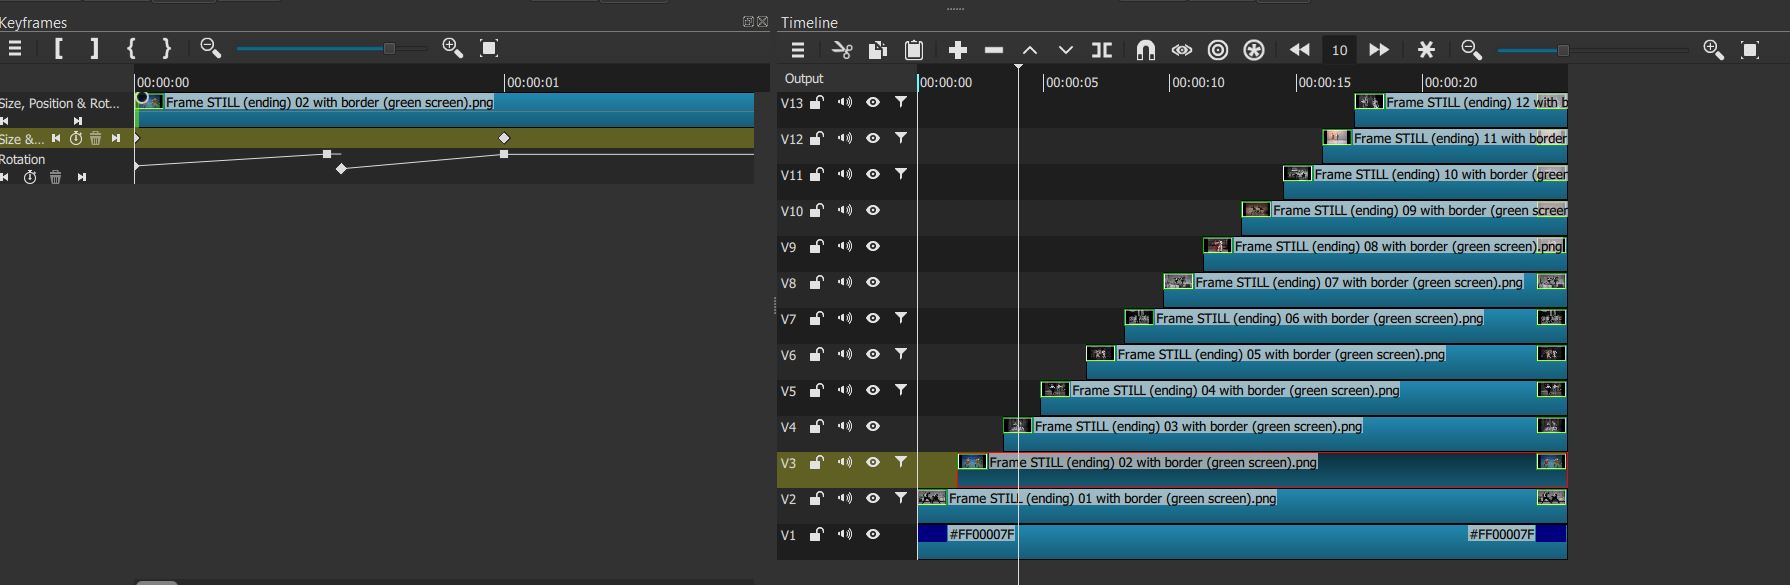
Then I exported this as an MP4, re-imported into a new SC project - and finally it was just a case of adding the text (more PNGs from COOLTEXT.COM), and adding fade ins/outs.
DONE! (Easy really!)
Seriously, it’s not easy. Who said video editing was easy??? I’ll kill 'em ![]()
PS it’s also not easy to read this long post, so if you have made it to the end, congratulations ![]()


 I certainly enjoyed creating it!!