Dang… i should have waited a bit before ordering a Phantom II
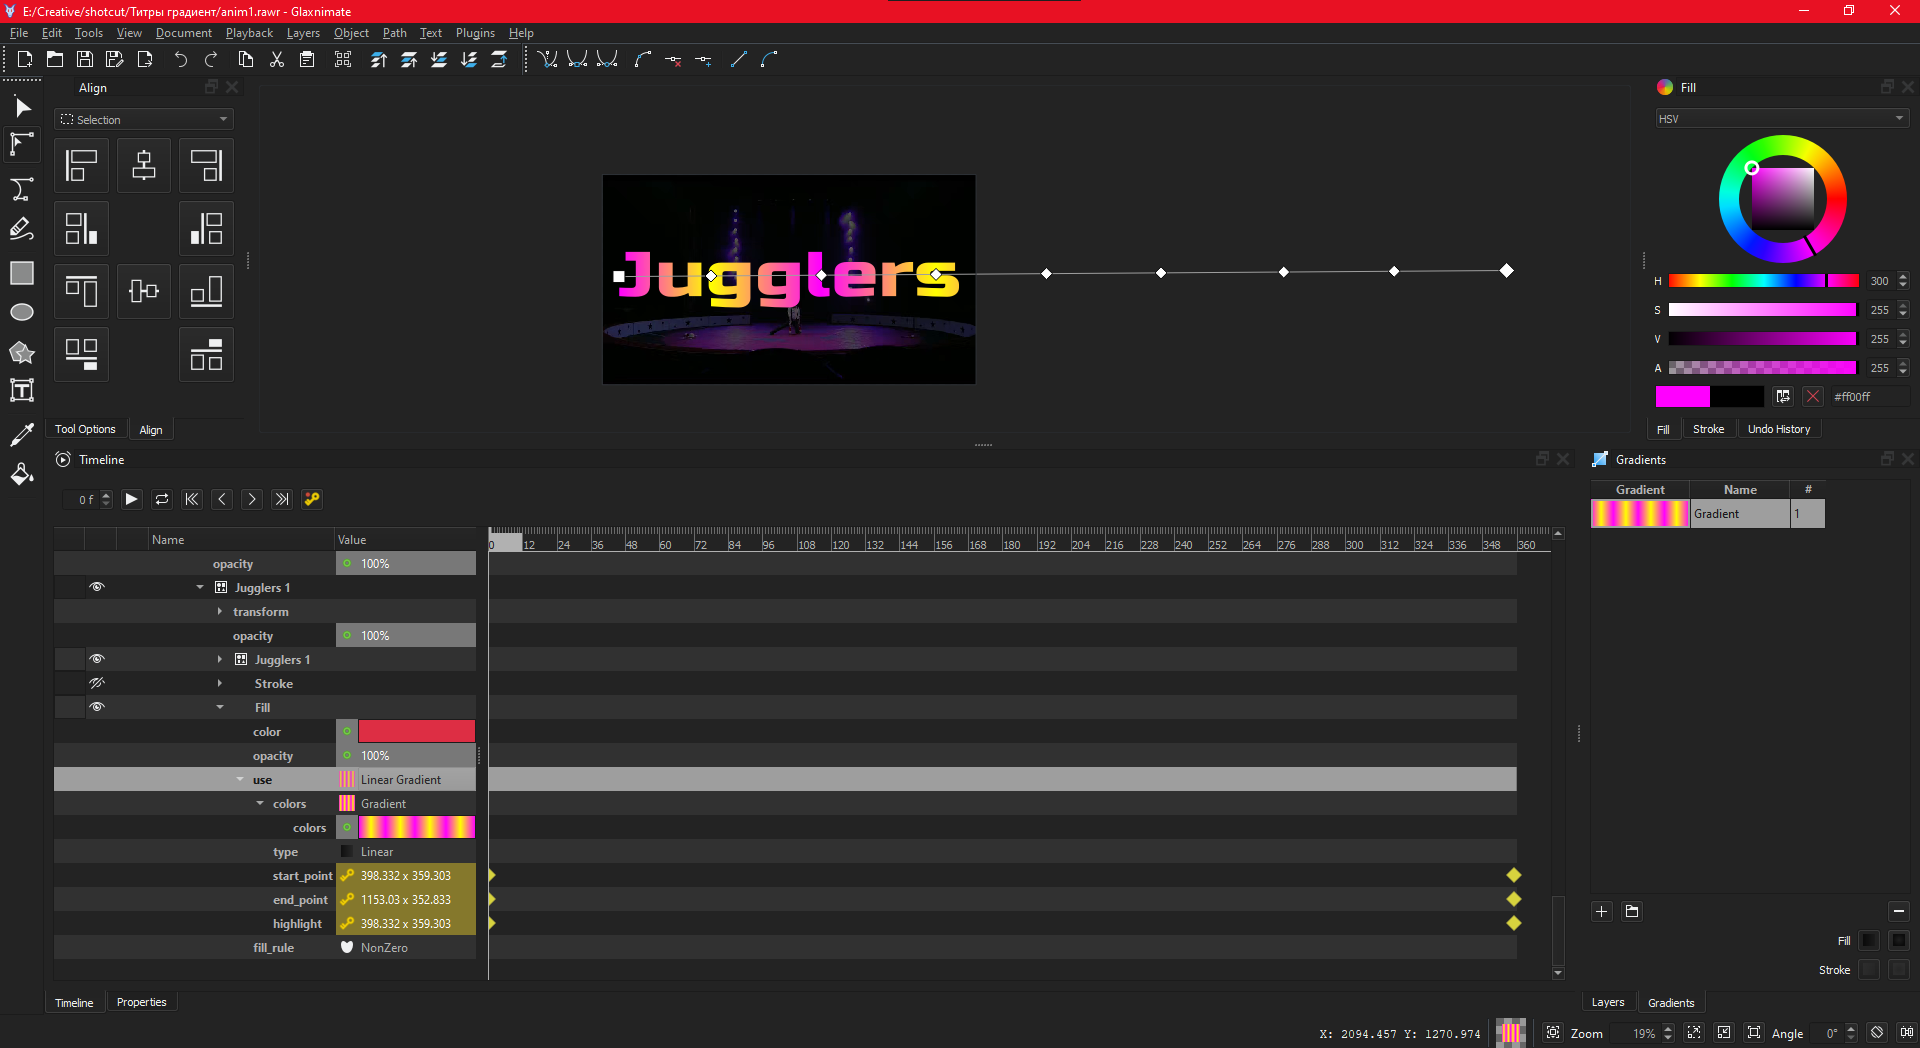
I just animated the gradient overlay line.
Attached is the glaxnimate animation file.
anim1.zip (9.2 KB)
1 Like
Cool, @elusien. Oh lord, seems I may need to sell my house to fund this challenge then ![]()
Maybe some more feathering could be applied to your pink stripe … but yes, I did use the gradient filter. I’m coming close to posting my “how I did it” video.
Brilliant, @dimadjdocent , thank you for the screenshot and for the Glaxinmate file. Hugely interesting.
Bravo pour cette animation, merci d’avoir partagé la façon de la réaliser avec Glaxnimate.
Je constate que ce logiciel à d’énormes possibilités, malheureusement il n’est pas facile de comprendre son fonctionnement.
Pour la simplicité, évidemment votre solution parait la plus simple, seulement 2 pistes et 1 seul filtre Glaxnimate.
Bravo for this animation, thank you for sharing the way to realize it with Glaxnimate.
I see that this software has enormous possibilities, unfortunately it is not easy to understand how it works.
For the simplicity, obviously your solution seems the simplest, only 2 tracks and only 1 Glaxnimate filter.
Pour compliquer un peu les choses, voyons comment cela se passe si on ajoute d’autres couleurs, disons Jaune, vert, cyan, bleu, magenta, rouge.
Cela ne doit pas poser de problèmes @dimadjdocent avec la solution Glaxnimate, mais est-ce que les solutions de @jonray , @MusicalBox , et @Elusien fonctionnent toujours?
L’ancienne version de Shotcut permet de le faire sans rajouter de pistes ni de filtres.
V1 toujours 2 filtres. (si les fade sont sur la sortie)
V2 toujours 2 filtres.
To complicate things a bit, let’s see how it goes if we add other colors, for example Yellow, Green, Cyan, Blue, Magenta, Red.
This should not be a problem @dimadjdocent with the Glaxnimate solution, but do the solutions of @jonray , @MusicalBox , and @Elusien still work?
The old version of Shotcut allows to do it without adding tracks or filters.
V1 always 2 filters (if the fade is on the output)
V2 always 2 filters.

2 Likes
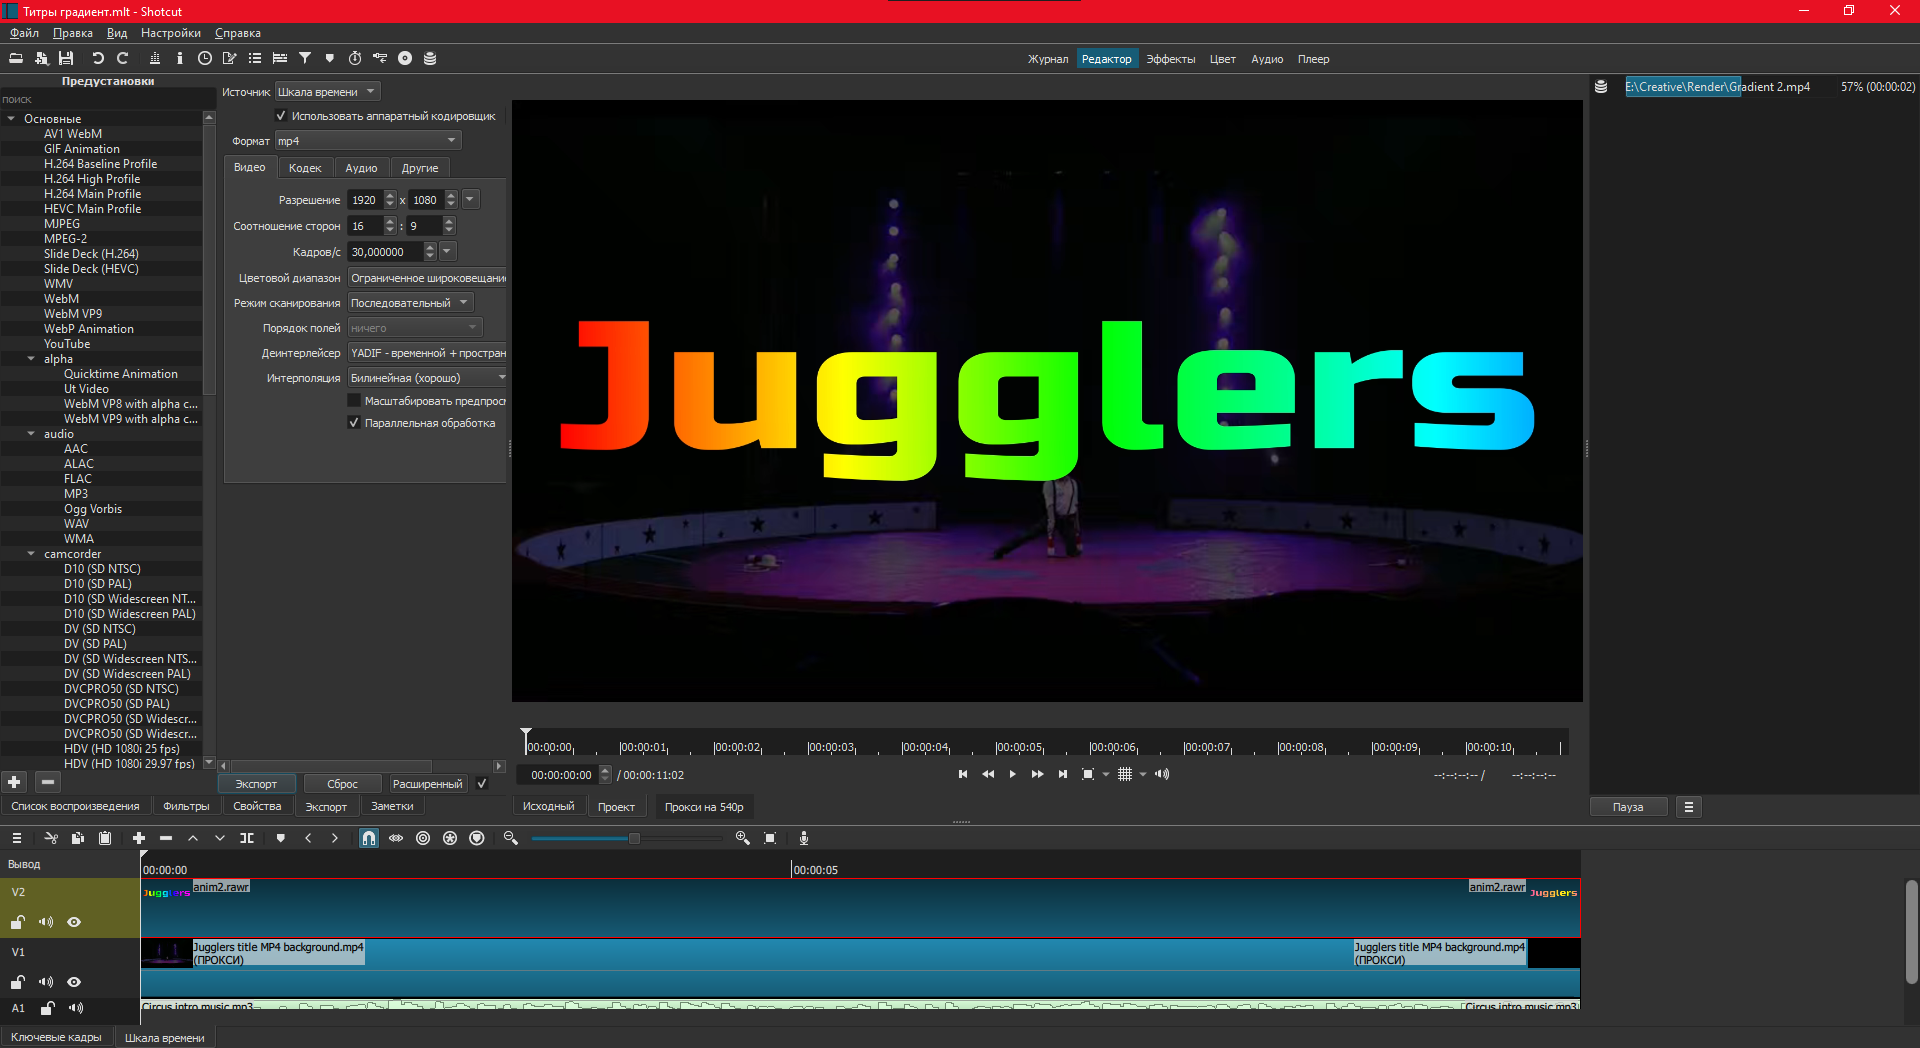
Not mine. it relies on the gradient filter and in Shotcut this is quite simple: you have one colour at one end and another at the other end. Unlike gradients in CSS you cannot have intermediate colour stops, so basically you are limited to using only 2 colours.
Pas le mien. il s’appuie sur le filtre gradient et dans Shotcut c’est assez simple : vous avez une couleur à une extrémité et une autre à l’autre extrémité. Contrairement aux dégradés en CSS, vous ne pouvez pas avoir d’arrêts de couleur intermédiaires, vous êtes donc limité à l’utilisation de seulement 2 couleurs.
This is very nice @Namna 
I didn’t check, but I’m not quite sure this would be easy to do with Glaxnimate. I think the gradient tool only allows to use 2 colors. Same in recent versions of Shotcut (without the special filters)
C’est super @Namna !
Je n’ai pas vérifié, mais je ne suis pas tout à fait sûr que ce serait facile à faire avec Glaxnimate. Je pense que l’outil dégradé ne permet d’utiliser que 2 couleurs. Idem dans les versions récentes de Shotcut (sans les filtres spéciaux)

Etes-vous limité en nombre de couleurs?
C’est à dire si vous accélérez le défilement par 3 pouvez-vous mettre 18 couleurs ou devez-vous répéter l’animation 3 fois?
Are you limited in the number of colors?
I.e. if you speed up the scrolling by 3 can you put 18 colors or do you have to repeat the animation 3 times?
Dans la V20 vous pouvez utiliser jusqu’à 10 couleurs.
In V20 you can use up to 10 colors.
I just tried the Gradient filter in v20.07.11 and could only choose 2 colours. How do you get more?
Je viens d’essayer le filtre Dégradé dans la v20.07.11 et je ne pouvais choisir que 2 couleurs. Comment en obtenir plus ?
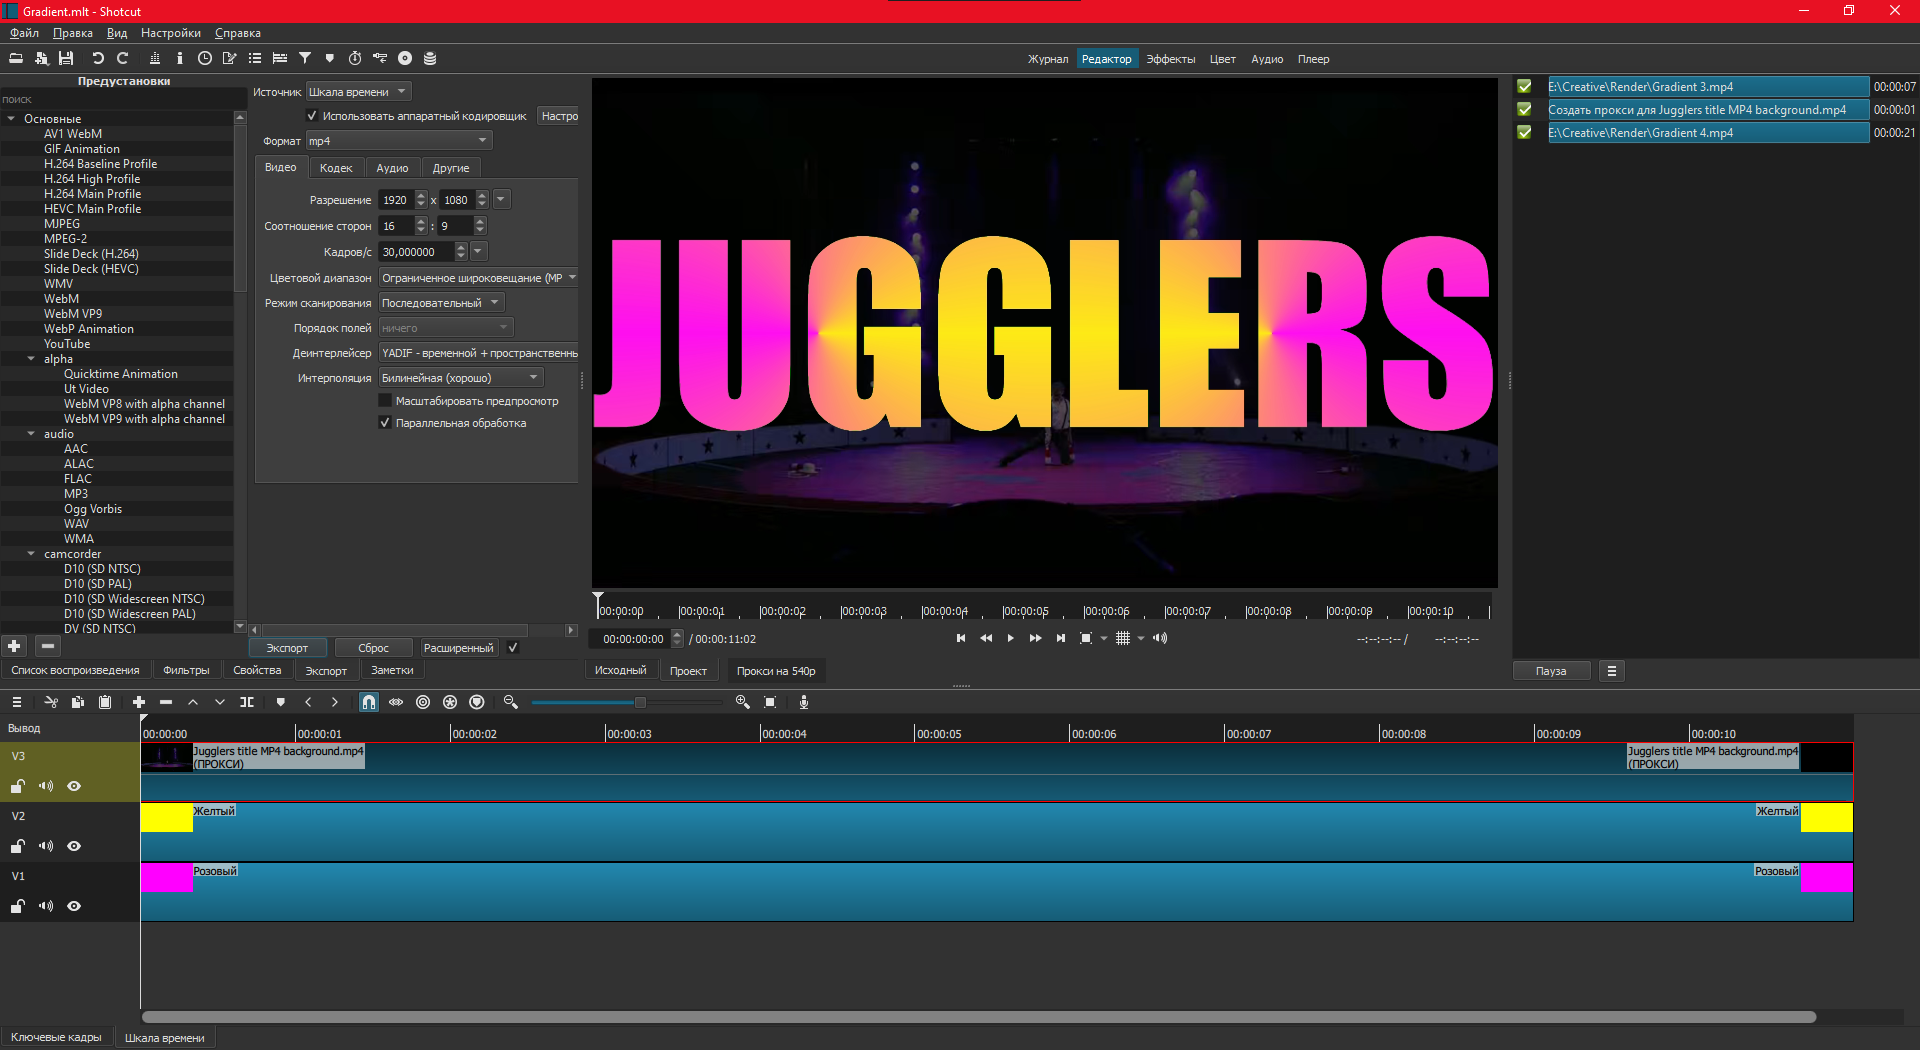
Glaxnimate allows you to animate the gradient strip in X and Y, getting some pretty fun animations. But on my potato laptop it works very slowly)
1 Like
Dans le dossier filtres il y a un filtre nommé “Rectangle”.
Mais peut-être que dans son fichier meta le paramètre “Hidden” est sur true.
In the filters folder there is a filter named “Rectangle”.
But maybe in its meta file the parameter “Hidden” is set to true.
@Namna , @MusicalBox , @Elusien , @dimadjdocent and @Austin - OK, time to show my tutorial of how I did it. However, having seen all your fantastic efforts, I now realise my method is laughably complex, and I feel a little embarrassed!!! ![]()
Anyway I hope it gives you some entertainment!! ![]()
Since you are all experienced Shotcutters, I sped up the action a LOT!. Hope you can follow… even if not, I’ve given you some lovely Clementi piano music to listen to…
Many thanks to all who contributed to this challenge. Look forward to seeing @namna and @musicalbox’s MLTs!

Ah yes! I thought you were talking about the “Gradient” filter, but I can see the “Rectangle” filter in the filters folder for v20.07.11, but it is set to “isHidden: true” since it used WebVfx. Thanks for the information.
Ah oui! Je pensais que vous parliez du filtre “Gradient”, mais je peux voir le filtre “Rectangle” dans le dossier des filtres pour la v20.07.11, mais il est défini sur “isHidden : true” car il utilise WebVfx. Merci pour l’information.
By experimenting with the built-in filters, I got some interesting animations without using glaxnimate.
3 Likes
It is a bit complicated, yes, but elegant ![]()
Here’s mine. I removed the 45° rotation on the effect from my original effort to make it look more like your own animation @jonray
The files: jugular-animation.zip (1.1 MB)
- Red clip on V1
- No filter
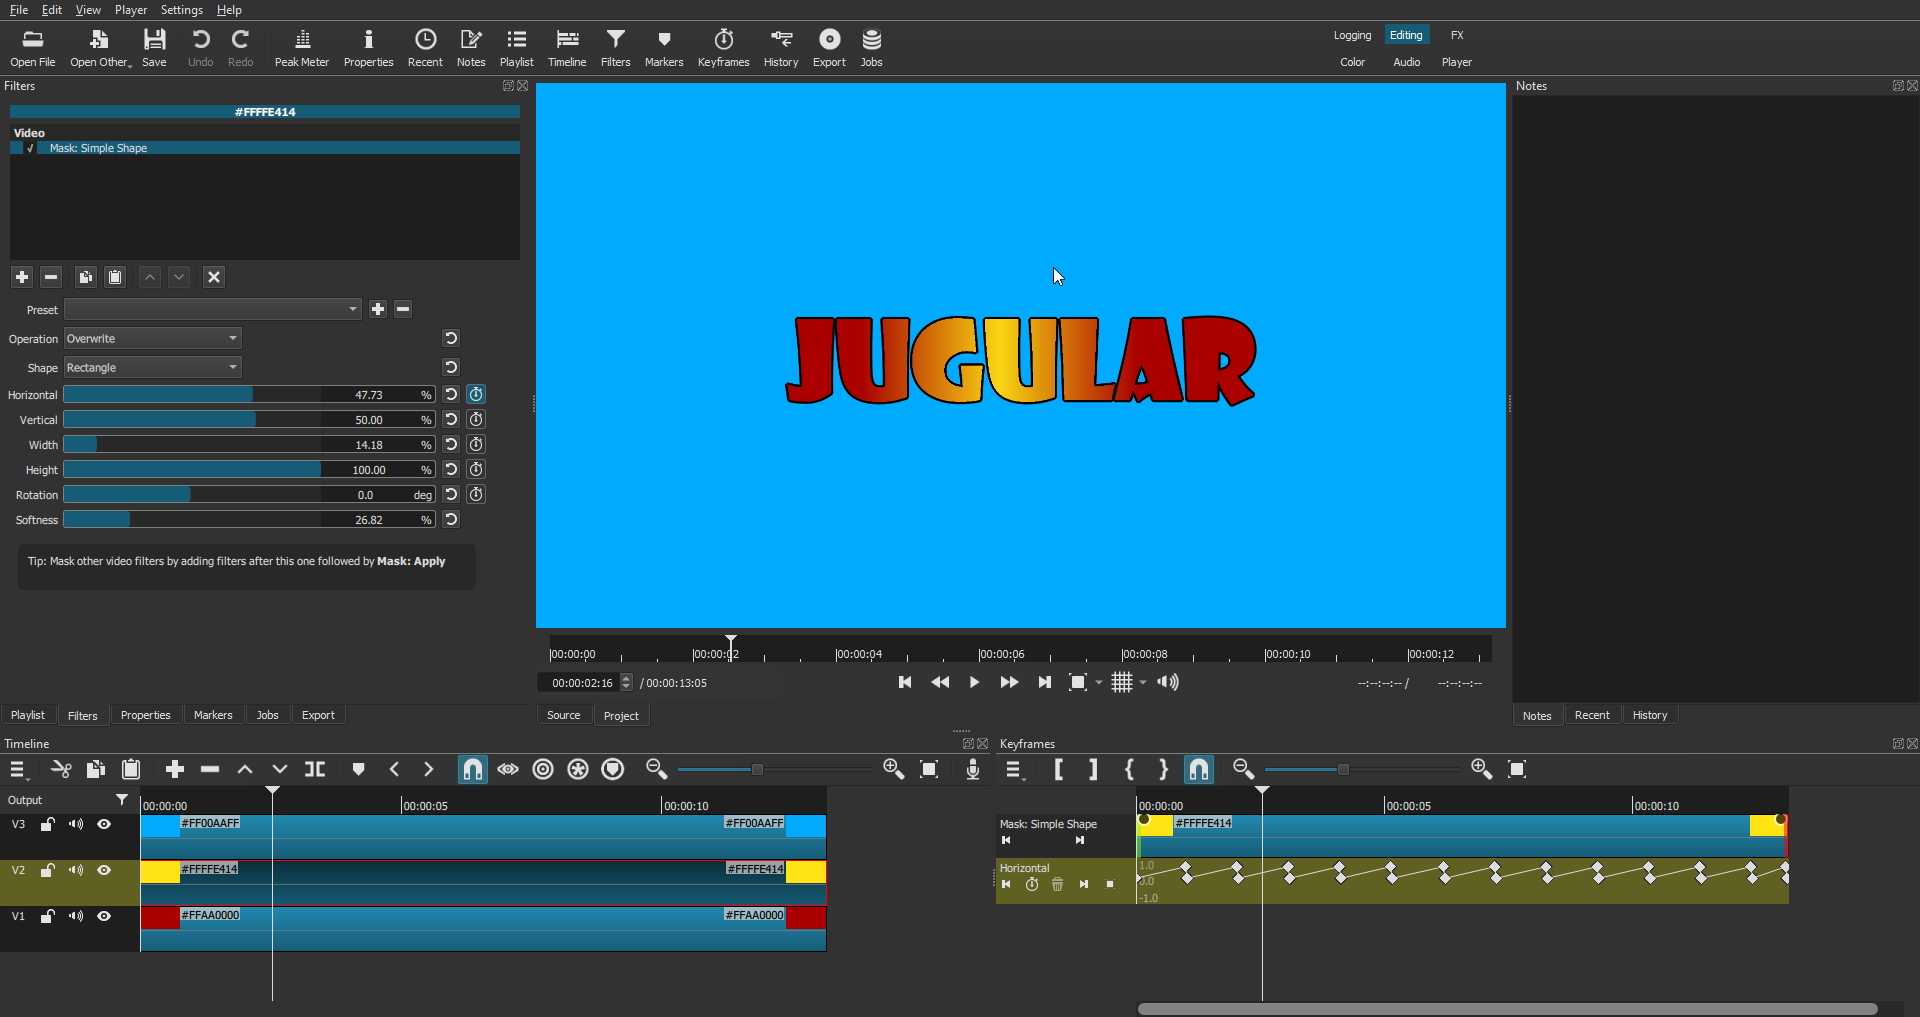
- Yellow clip on V2. This is the yellow gradient created with the Mask: Simple Shape filter.
- Mask: Simple shape. With keyframes (see screen capture) on the Horizontal parameter to repeatedly move it from left to right.
- Blue clip on V3 (replace it with the background video or image)
- Text: Simple filter used to create a mask for the Mask: From File filter. I left the text filter active for the outline to be visible.
- Mask: From File filter used to cut the text from the background image/video
- Fade-in + Fade-out filters on the Output. Applies the fades to all layers.
2 Likes
The advantage of your method @jonray is that you can easily add the zoom-in effect to the entire thing with only one SP&R filter. With my method, I’d probably need to add the SP&R on 2 tracks.
Wow, that’s pretty amazing! Well done and thank you. What exact filters did you use for that?
Brilliant! Dammit, I never thought of creating the gradient with the mask:simple shape. ingenious! Thanks!
Granted, but you could always just mixdown your final result as an Mp4 and re-import, then zoom, and apply a chroma-key, like I did. So your method is still better than mine ![]()
![]()
1 Like
V1 - nothing
V2 - Mask from file, 360: Transform
V3 - Text simple, Chroma Key Simple
Gradient.zip (1.6 KB)
3 Likes