Tired of paying for LUTs or endlessly searching for free ones? In this tutorial, you’ll learn how to create your own professional-quality LUTs for Shotcut—completely free—using the newly free Affinity Photo software. But here’s the game-changer: I’m not just showing you how to build LUTs from scratch; I’m revealing how to “steal” the exact color grade from ANY video or image you love (think orange-and-teal cinematic looks, your favorite director’s style, anything) and convert it into a custom LUT in minutes. No expensive software, no complicated workflows—just a simple process using free tools that’ll transform your Shotcut videos with professional color grading you designed yourself, and I’m walking you through every single step.
Yes! This is a great tutorial.
This gradient map technique is very interesting.
I use Photoshop to create LUTs but I don’t think my version has the option to automatically create a swatch from an image. I guess I’ll have to give Affinity a go.
Hey might as well download it, it’s free! I was actually going to use GIMP using a different technique but Affinity seems to have nearly the same functionalities as Photoshop.
Let me know how you like it. Honestly, I barely know how Affinity works. I literally downloaded it right before the tutorial. LOL
I never tried it in Gimp. I seem to remember that you need to install the G’MIC plugin.
Might be worth a try also. Lots of people use Gimp.
especially the weird Linux people
Thank you so much, @bentacular, for yet another fantastic tutorial to help us Shotcut fanatics! I used Affinity’s predecessor, DrawPlus, and also the brilliant PagePlus, produced by the British company Serif, for many years. Still use PagePlus - which I purchased in 2009 (!!) - in fact I’m using it today.
Affinity is well worth downloading.
Your tutorial is, as usual, brilliantly presented and paced. Please keep them coming!
Sir, as usual I appreciate the comment! I have been using Photoshop to make my LUTs but I thought having a free way of making it would help the community.
Nice one Ben. I use GIMP and have just done a quick Grok alternative if anyone is interested. I haven’t tested yet
Alternative Process Flow Using GIMP (Free & Open-Source)GIMP (with the G’MIC plugin) offers a powerful, free alternative to Affinity Photo for creating .cube LUTs. G’MIC provides dedicated tools to generate accurate 3D color lookup tables by comparing a “before” (neutral) layer to an “after” (graded) layer. This method is commonly recommended in Shotcut communities and works well for video grading.
Install the G’MIC plugin (free from gmic.eu; follow GIMP-specific instructions — often placed in the plugins folder, then restart GIMP; G’MIC-Qt integrates filters).
Step-by-Step Process Flow
Prepare a neutral base image:
Open GIMP and create/open a representative image (ideally a photo frame from your video footage or a standard neutral color grid/chart for accurate color mapping).
Recommended: Download or create a neutral LUT test chart (search for “neutral 3D LUT grid PNG” or generate a multi-color ramp/gradient image covering a wide RGB range). A good starting size is 512×512 or larger.
Set up Before and After layers:
Duplicate the base layer (Layer > Duplicate Layer).
Name the bottom layer “Before” (keep it neutral/original).
Name the top layer “After”.
Apply color grading to the “After” layer:
Select the “After” layer.
Use GIMP’s built-in tools under Colors menu:
Curves (for contrast/S-curve).
Levels.
Hue-Saturation.
Color Balance (highlights/midtones/shadows).
White Balance or Brightness-Contrast.
Experiment to achieve your desired look (e.g., cinematic teal-orange, vintage film, warm/cool tones). Keep edits subtle and versatile for broader applicability. Non-destructive: Use layer masks or adjustment layers if needed, but flatten/merge visibility for G’MIC input if required.
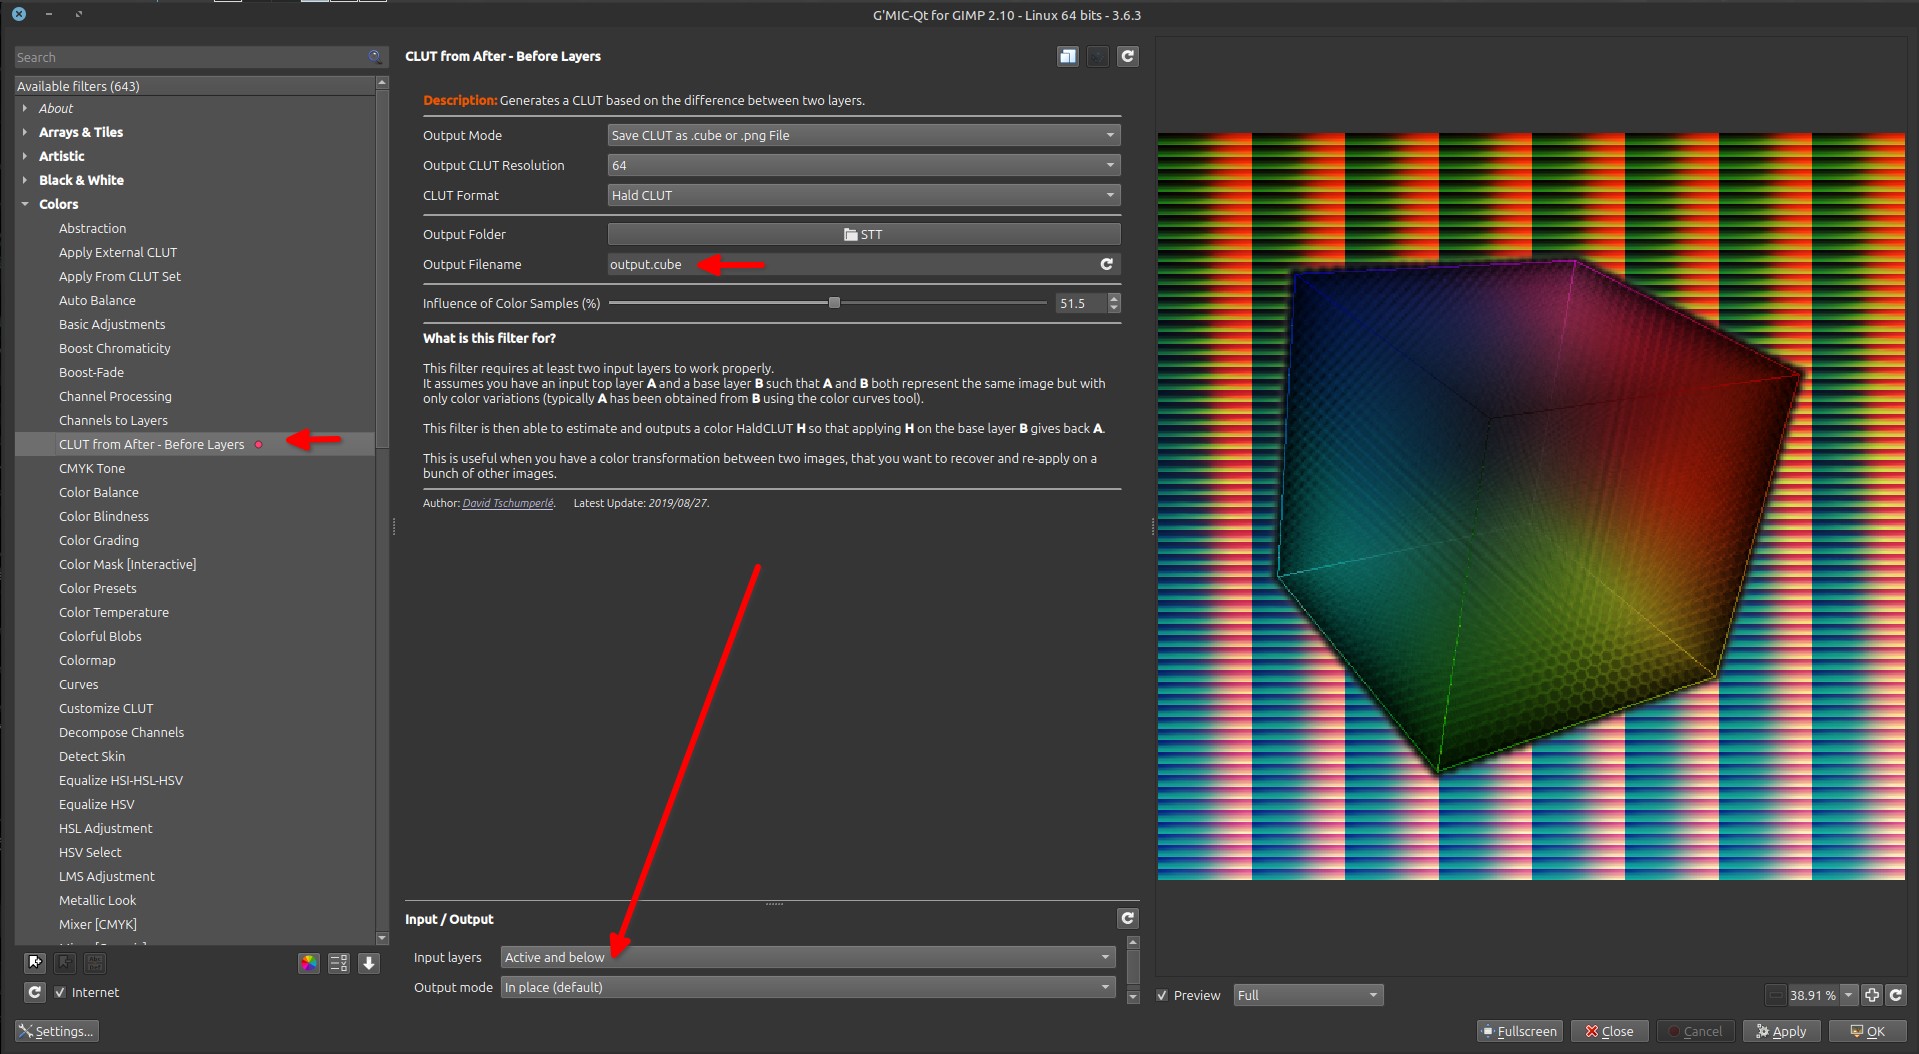
Generate the LUT with G’MIC:
Go to Filters > G’MIC-Qt… (or wherever G’MIC appears after installation).
Navigate to Colors category (search or browse for “CLUT”, “Create CLUT”, “3D LUT”, or specifically “CLUT from Before and After Layer” / similar exact name like “Create CLUT (Before/After)” — common in G’MIC).
Select:
Before layer: The neutral one.
After layer: The graded one.
Set parameters:
Grid resolution/size (e.g., 16×16×16 for smaller/faster files, 32×32×32 or 64³ for higher accuracy — higher values create larger files but better precision).
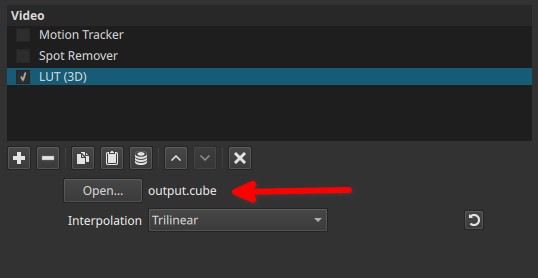
Output format: .cube (standard for Shotcut and most editors).
Choose output folder and filename (e.g., my_custom_lut.cube).
Preview if available, then generate/apply. G’MIC computes the 3D color mapping and saves the .cube file.
Apply and preview on your footage. Adjust strength/opacity if needed.
Test on multiple clips/frames and iterate back in GIMP if the mapping needs refinement (e.g., stronger/weaker adjustments).
Tips and Notes
Accuracy: Using a photo frame from your actual footage as the base ensures the LUT matches your content well. A broad color chart/grid prevents clipping or poor mapping in out-of-gamut areas.
File size/quality: Start with 32³ or 64³; very high grids (e.g., 128) can be slow/large.
Alternatives in GIMP without G’MIC: Possible but more manual/complex (e.g., scripting color transforms or using other plugins); G’MIC is the recommended, easiest route for .cube export.
Resources: Check YouTube tutorials like “Make Your Own LUTs in GIMP for Streaming & Video Editing [GIMP, G’MIC, OBS]” or the Shotcut forum thread for visuals/screenshots of the exact G’MIC filter interface.
Shotcut compatibility: .cube files work natively; no extra conversion needed.
This GIMP + G’MIC workflow produces comparable results to the Affinity method in the video but stays entirely free and open-source. Experiment with different gradings to build your own LUT library! If you run into plugin installation issues or need help with a specific look (e.g., “cinematic”), provide more details.
Indeed you need G’MIC, and the steps are way simpler than with affinity, which is NOT free(*), and there is no Linux version.
Get the color grading from another photo/video (quick example)
Export a frame from shotcut
open that frame in GIMP, and duplicate it
Drag and drop a photo you want the LUT in the same opened image (now you got 3 layers) it should be selected by default in the layers tab, if not select it.
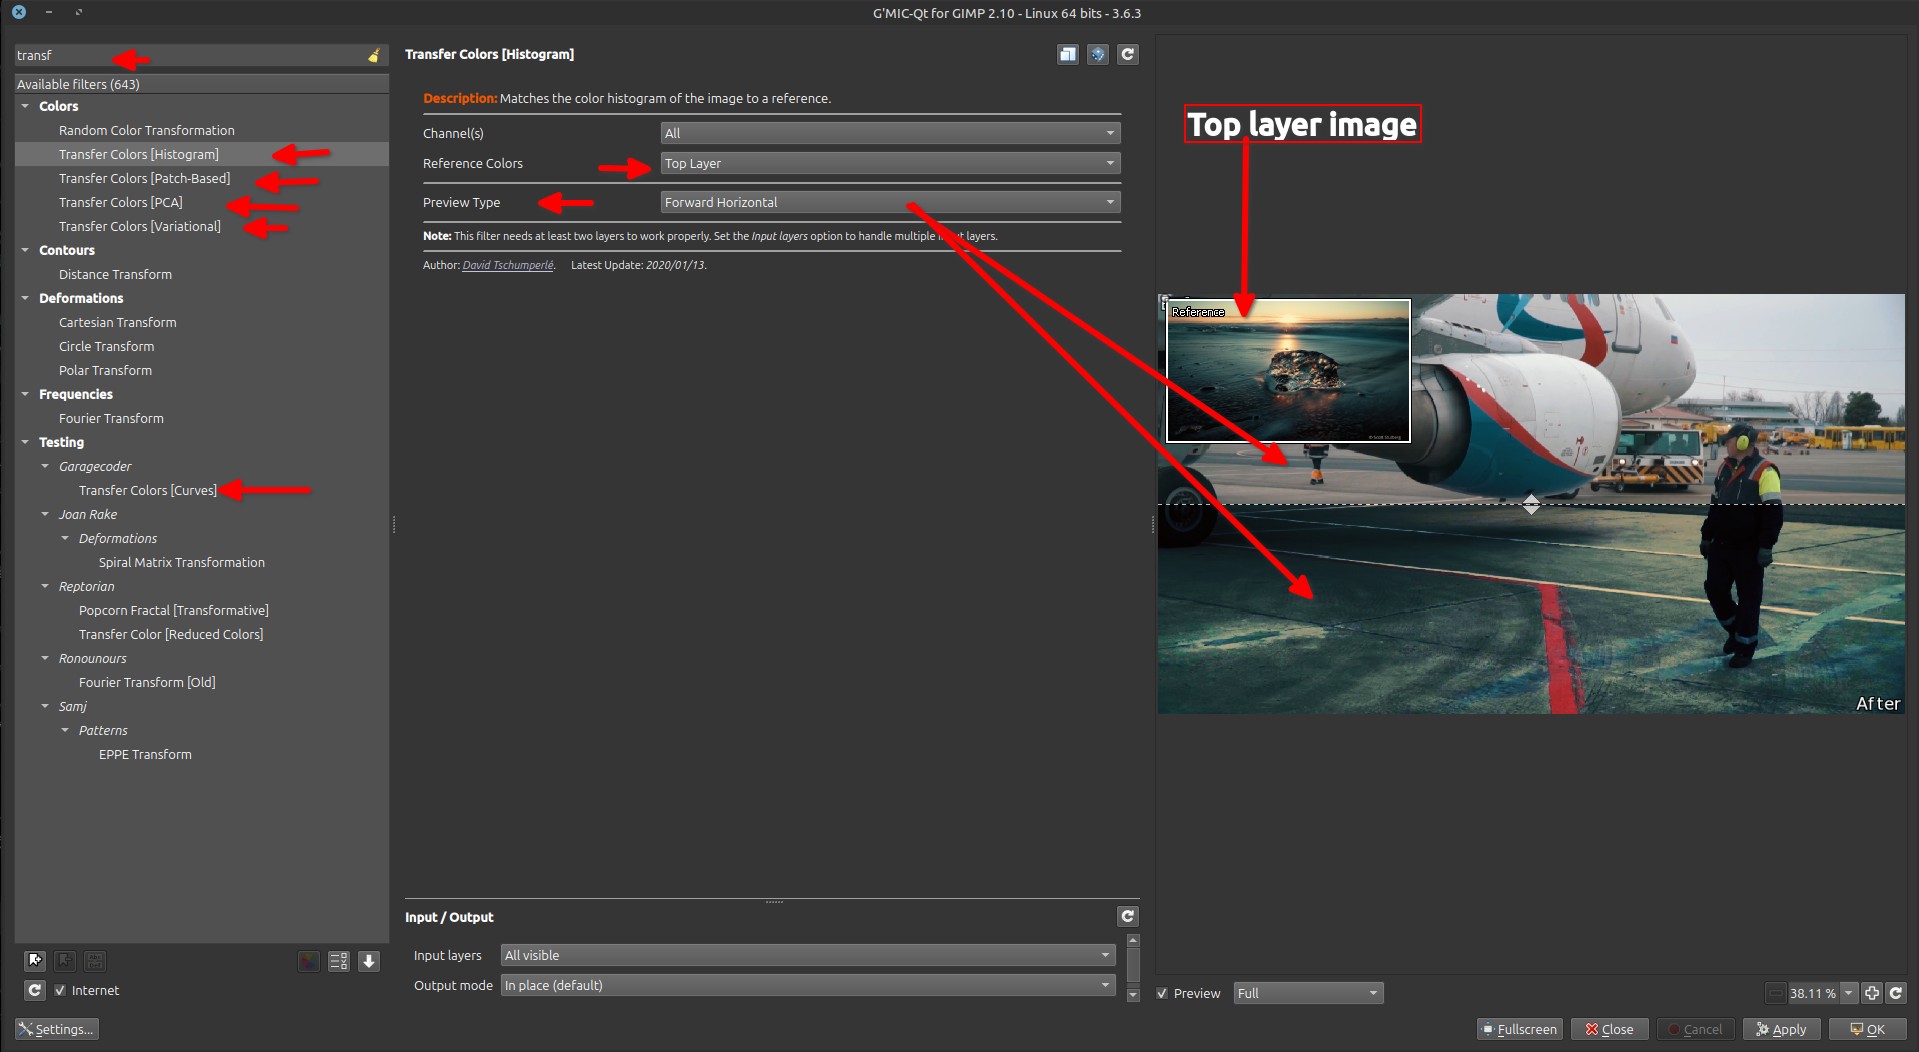
Go to Filters > G’MIC, G’MIC opens with the photo you want to get the LUT selected
Go to “Transfer Colors”, choose one type (I like Histogram for its simplicity)
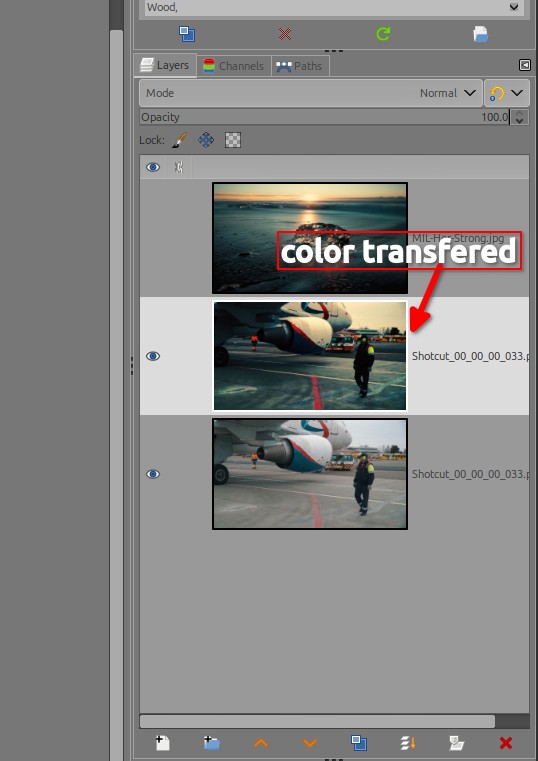
Once it’s done untick the layer visibility/delete the layer you used to transfert the color and keep only the 2 layers (one with transfered color and the original from Shotcut
Just to let you know, if you have an Android phone or a so called “smartTV”, you’re weird as well… Because their kernel is Linux
(*) When you trade something to get something (they ask to register → give your data), it cannot be called “Free”, it is a transaction or an exchange where your data acts as a currency.