3 tracks! That’s 2 more than usual.. ![]() The MLT would be gratefully received if you posted it, hint hint…
The MLT would be gratefully received if you posted it, hint hint… ![]()
This is exactly what I was talking about earlier.
Thanks @dimadjdocent for making it ![]()
1 Like
Thanks to all of you! I’ve been working hard on just my Banner/Image, with the pie sliced SS, for the last day or so! Initially, I was working on the video cuts, and after I cut 6 different video clips, I went through each with my Kaleidoscope over top, and grabbed 6 different SS… it was a task for sure!
I now have the 6 clips, and the SS with all 6 images collided together on my kaleidoscope! I even added a picture of myself faded in front of it with my YT channel logo and discord name on top of the image, as a separate save file. Did all that in last 2 days!
NOW? To put it all together!
Jon Jay, I do appreciate the effort. I like the circle option as it did solve my initial inquiry! HOWEVER… I fell in love with the complete pie slice idea when I seen that! I’m going to try and make those Pie slices come to life!! I just have to figure out what the easiest step by step process is.
As of now, since I started this thread, I’ve played around with the Key frames a little bit, and found the Mask Draw Glaxinamate (If I said that correctly) option. I just have to figure out what you guys were talking about. That method (I think the @shotcut guy said it) seemed like the easiest process… I’ll have to read through it again, but now I think I have the image and videos to work with, I should be able to figure it out! I hope!
Another variation, quickly done:


This Timeline… IS It really going to get THAT complicated?? WOW!!
I don’t know if I’ve ever gone past 6 layers on a video!! ![]()
![]()
![]()
BUT i’ll figure it out!! ![]()
![]()
Looks great!! Thanks for posting.
BTW, I know you want to stick with the 6 pie slices, but just one last demo, maybe to give you an idea of what’s possible, here’s my demo with photos replacing the colour blocks:

2 Likes
Beautiful animation, I like it ![]()
1 Like
OK…
This where I’m at!! Lost like a Jedi Master on the Star Trek Enterprise and can’t find the Force!! ![]()
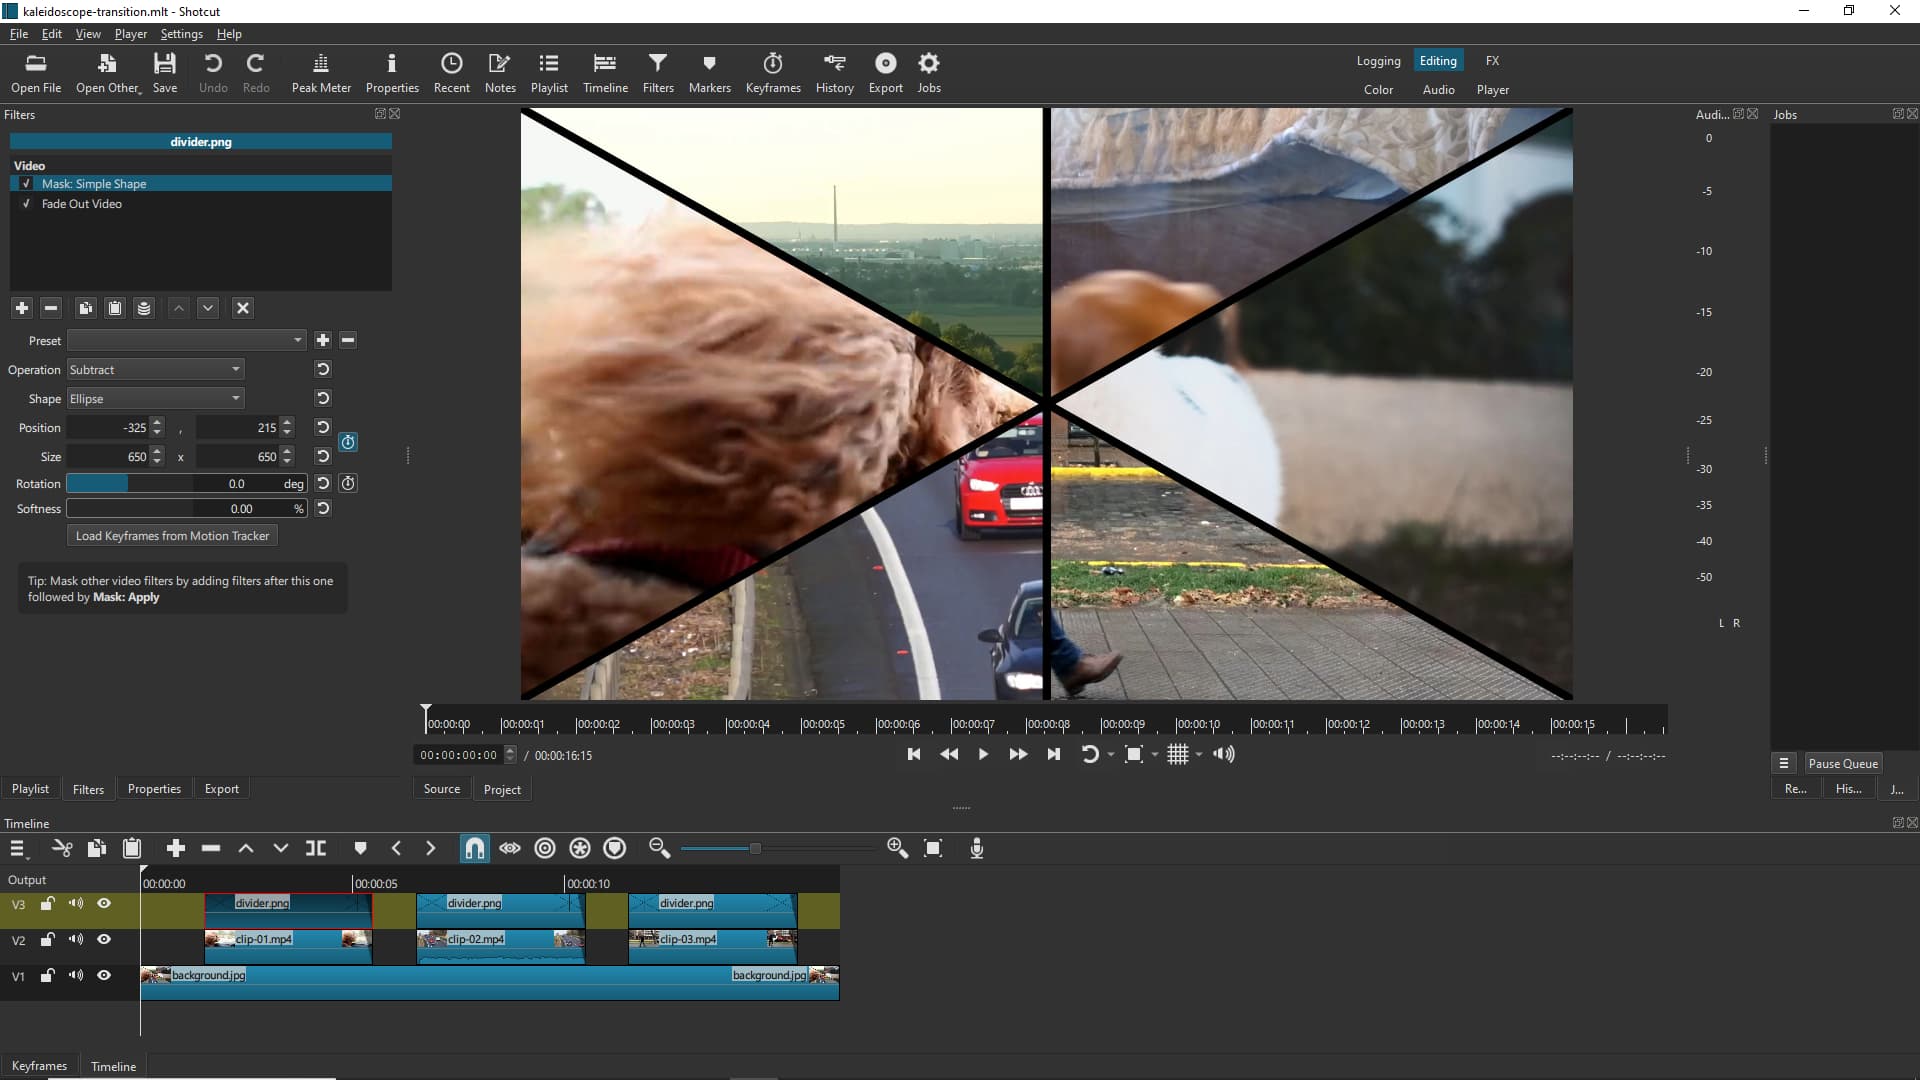
Actually! I thought I was gaining ground! Actually, initially I couldn’t figure out how to duplicate the steps you did in the project file (I downloaded, Extracted, and opened your sample project in my Shotcut). BUT THAN I had this brilliant idea and thought “Damn I’m clever”!! I Saved the filter sets on your project png and clips as “filter sets” to reload for future use, as “pie Slice divider” & pie “pie slice clip”, and than reloaded my project and just attached Filter sets named above… AND It worked…
EXCEPT! Your sliced pie is bigger than mine? BUT I was surprised it even loaded the saved Glaxnmimate settings under those saved filter sets!
I just need to figure out how to Edit, Save, or Extract, or all, the filter to match the size I want?? SS shown below of my progress!
Just… I’m almost there… just… push me over the edge!! ![]()
![]()
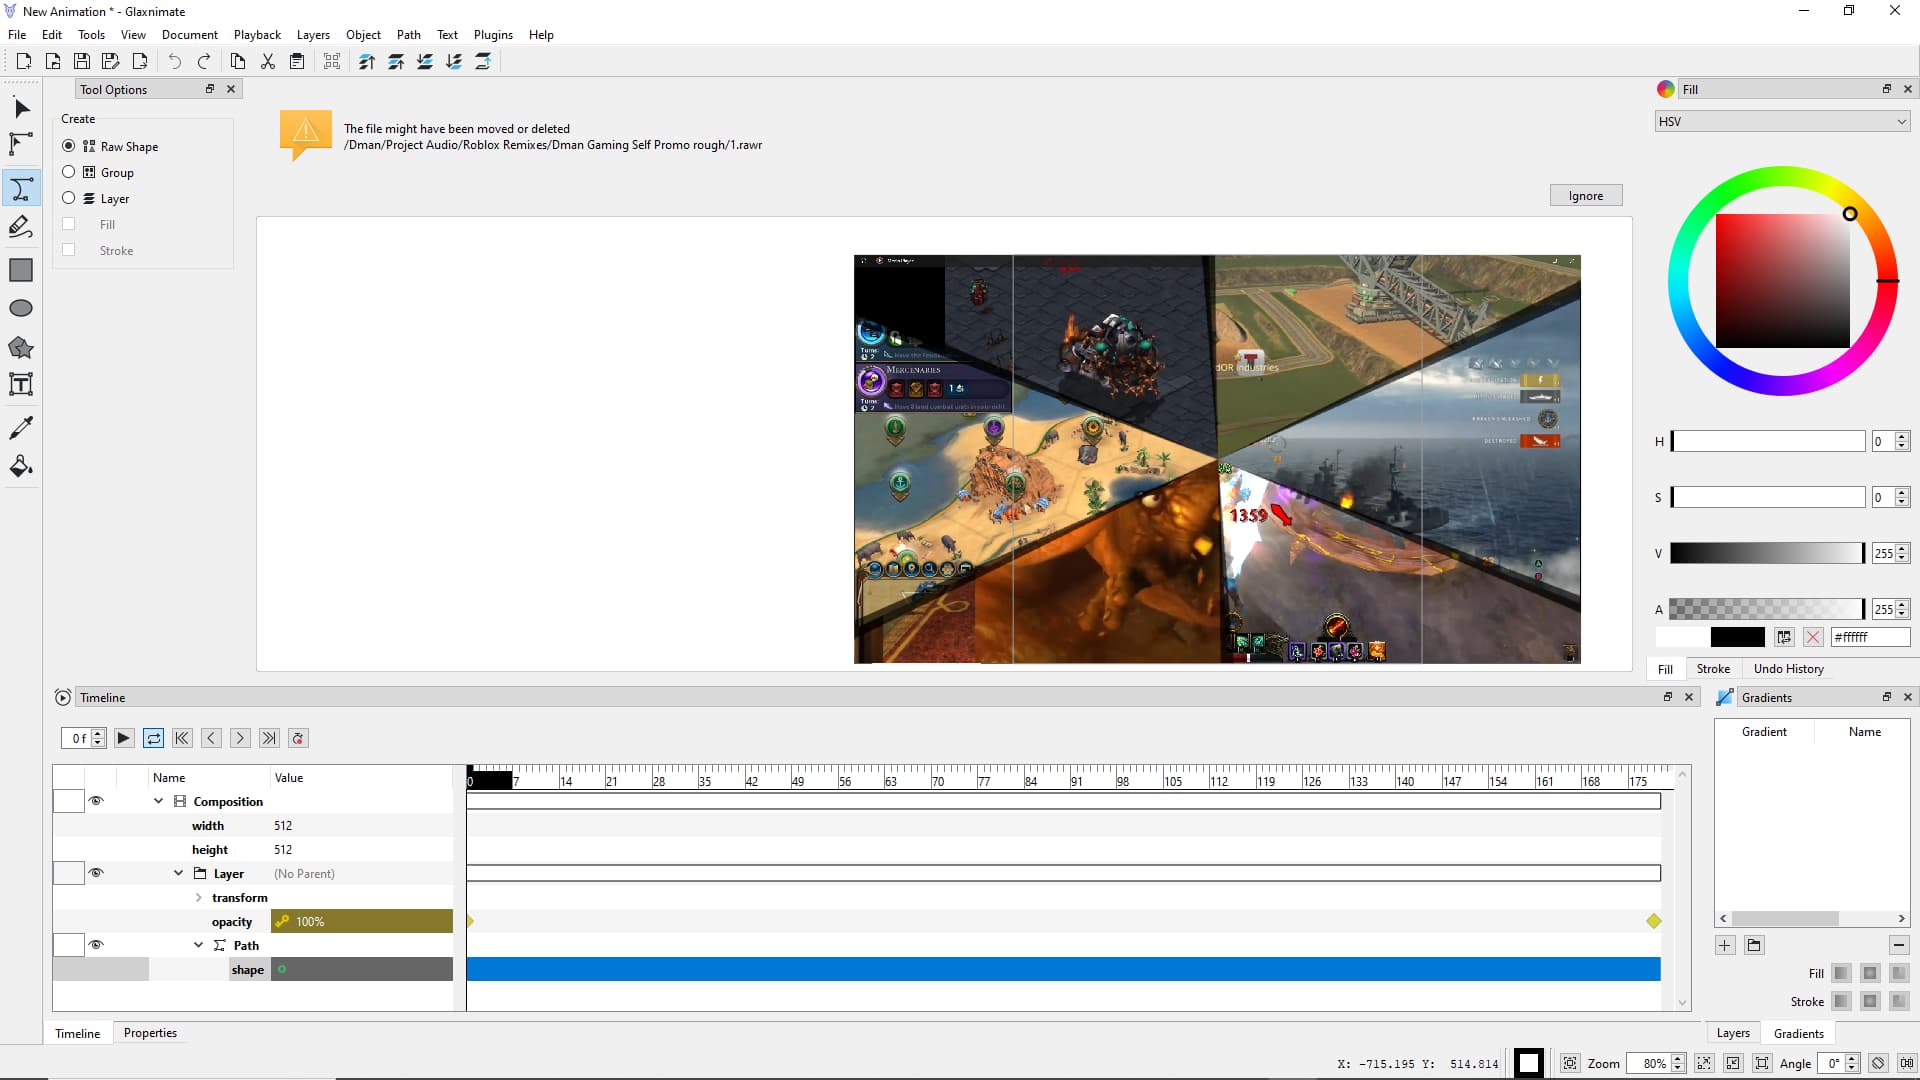


The first two I THINK were me messing with Glax before I downloaded and extracted your sample project. If those look out of place, they are. But i got as far as figuring out how to draw the Mask shape there… i just couldn’t figure out how to load that back into Shotcut from Glax(nimate)?
Hence, I realized you had given me the sample project, and upon loading that?
I discovered I could use the filters you created…
Which I discovered is slightly too big? Brought me back to the last SS, trying to figure out what to do with Glax after I edited the filter.
1 Like
Sorry for the delay Jon.
Here’s the project folder: Round-thumbnails.zip (2.7 MB)
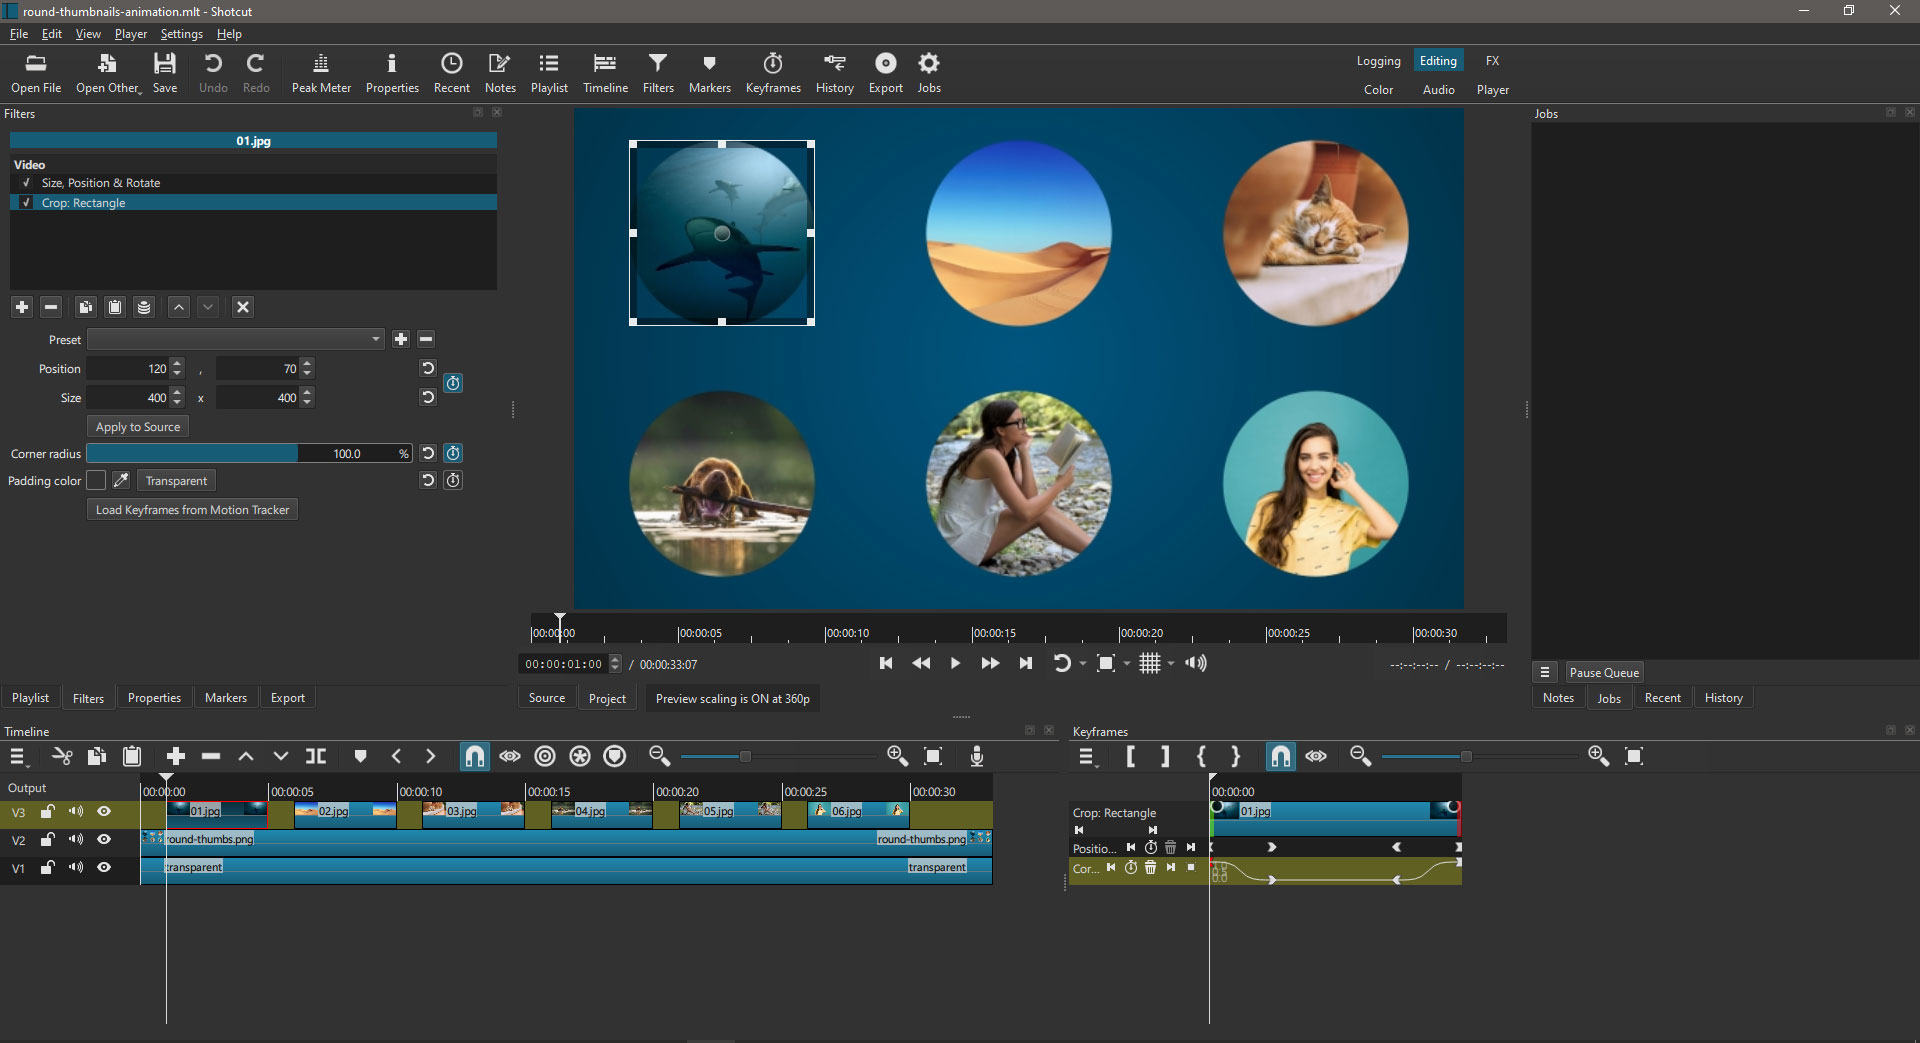
And here’s a quick description of what I did:
Step 1
- Import all the 6 images in the Timeline, each one on its own track.
- Add a SP&R filter to all the images to resize them and position them on the screen.
- Use a Crop: Rectangle filter on all the images to give them a square shape, AND to make them round (Corner radius: 100%).
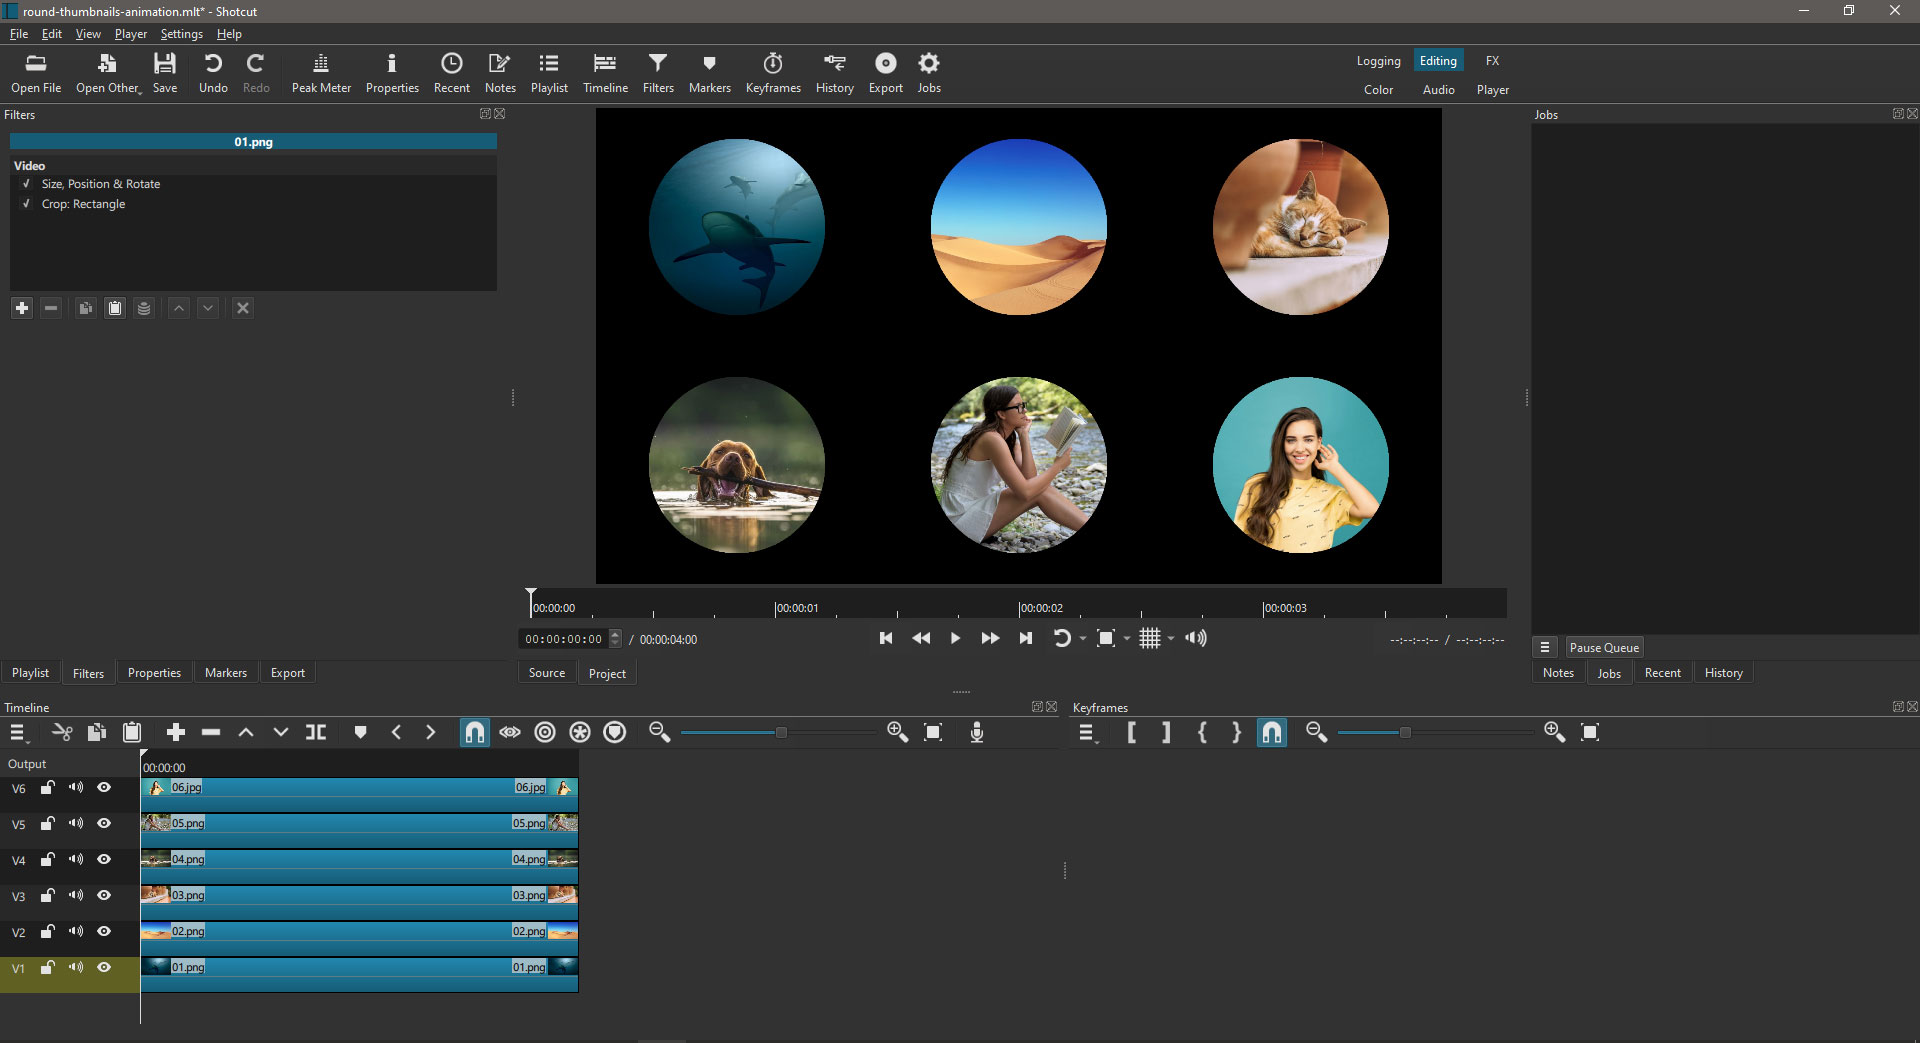
Now that all the images are properly laid out, export a capture of the screen (File > Export > Frame…).
Make sure you export as a PNG to get a transparent background around the thumbnails.
Step 2
- Move all the image clips side by side on track V3. Respect their original order.
- On track V2, import the PNG capture of the thumbnails.
- On track V1, add the background of your choice (mine is a 2-color gradient).
Finally, use keyframes on both filters of each clip to animate them.
Open my project file to see the keyframes parameters I used.
You’re getting there @DaddyDman ![]()
May the Schwartz be with you!
1 Like
Ah, yes! That was the key to reducing the number of tracks! Genius. ![]()
1 Like
Thanks, @dimadjdocent - I’m going to use it in a future project of my own one day…
1 Like
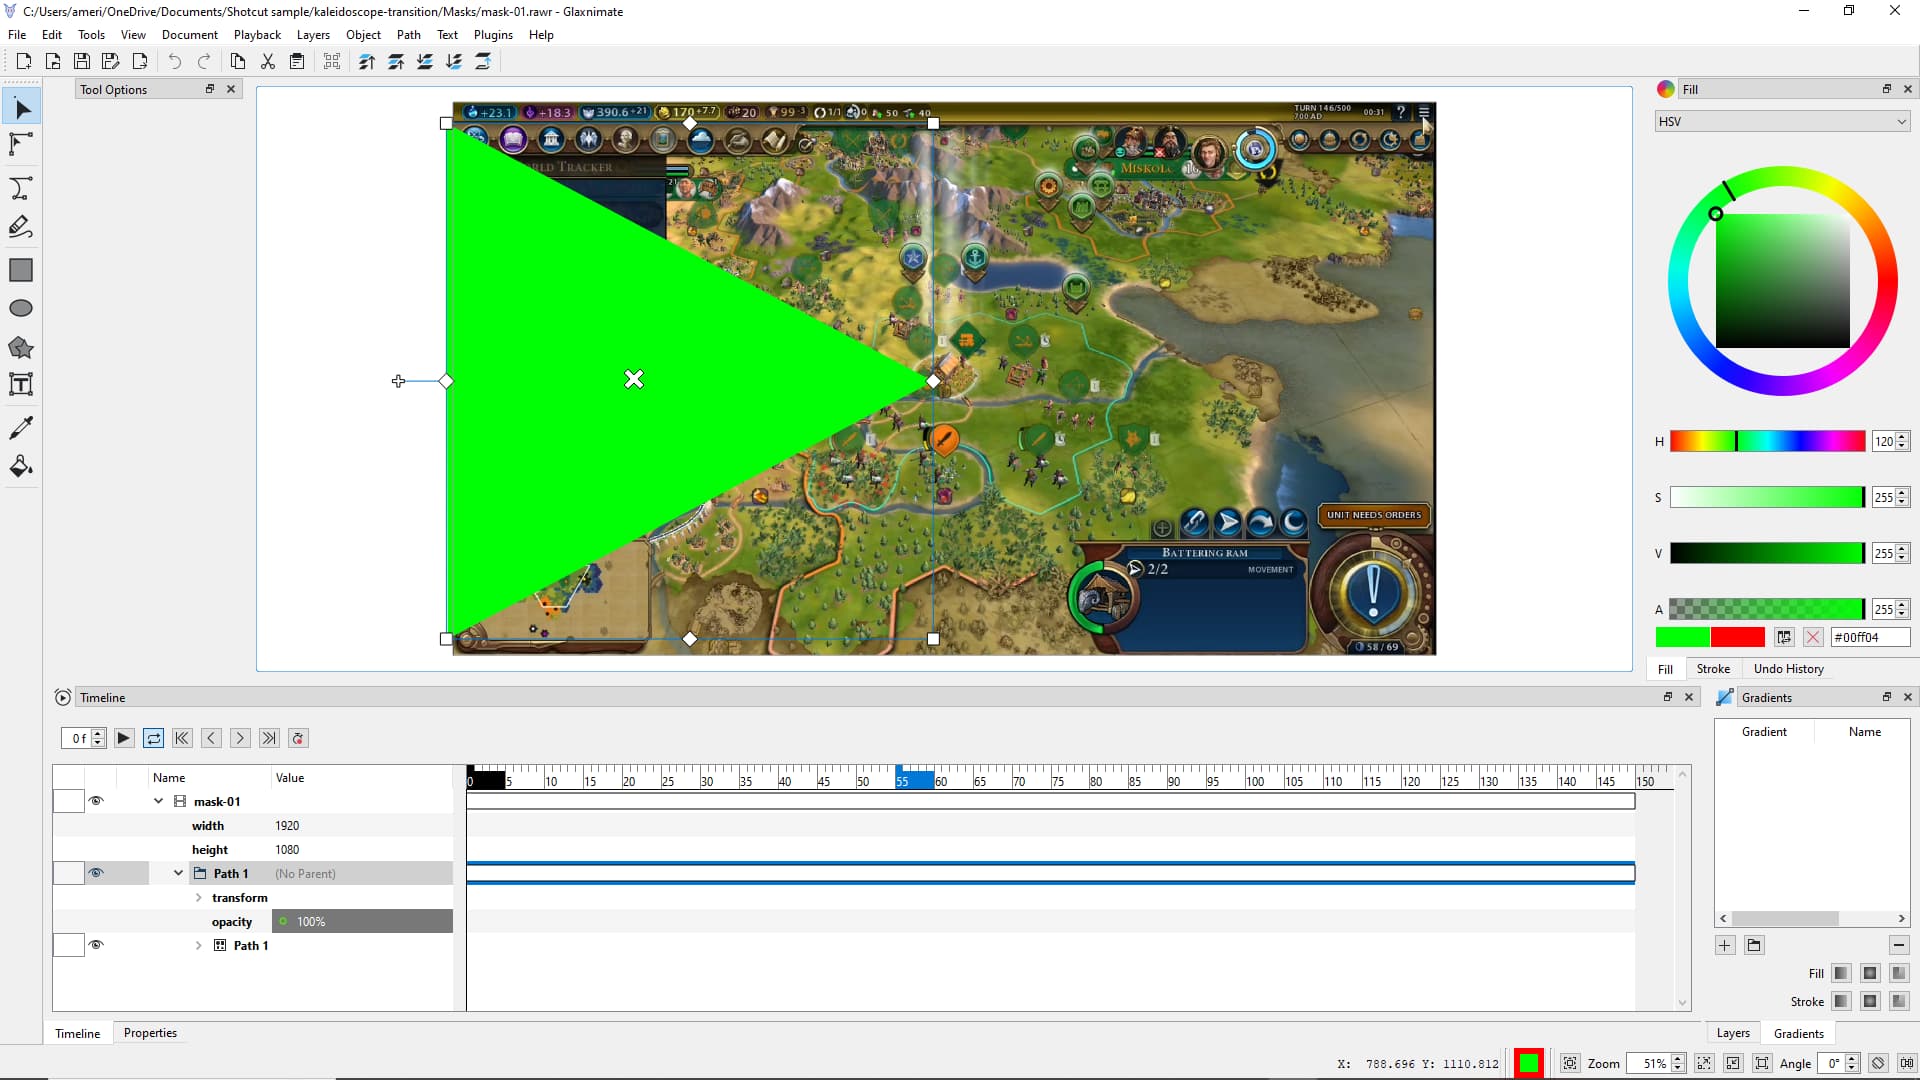
This took me hours and hours of trial and error as seen from my previous SS’!
Shown here… I think I’ve figured it out. It wasn’t quite the same, but I think who ever shared that file was showing me something different. Trying to change things in Glax was my struggle, as I’ve never used it before. After watching a few Glax how to videos online, something finally clicked.
@MusicalBox I didn’t realize you had a YT channel on shotcut. I saw a few videos, but it seems you don’t have any voiceovers? Or maybe my audio was messed up on those, Idk. I found a video or two of you demonstrating Glaxnimate, but when I started them, they were silent. I find it difficult to watch a how to silent. I do appreciate your effort though. If your not explaining things in a voice over, may I suggest future videos using voice? Just a thought. If you were, I apologize, it must of been a mistiming with my headset!
Anyway. Just an update on how my project is going. Now that I figured out a rythm I’ll repeat this for the others, bridge it together with the same still image, create an intro as well… and Hopefully tomorrow I’ll have the final!
1 Like
Many of my Tutorials have voiceovers. Some of them (mostly the older ones) have text instructions. I also use text instructions for my Resource videos.
Since my native language is French and I’m very bad at speaking English, I use a text to speech application to create the voiceovers. And that takes a lot of time.
Anyways… that Glaxnimate video you’re talking about was not intended as a tutorial. It was just a live recording of me testing and showing some Glaxnimate features for the first time.
1 Like
To everyone! Thank you for your efforts! Here is the finishing project! I completed this about a week ago, or longer! There seemed to be some block on this forum, something about the threat of a scammer, or hacker! I wasn’t sure what was going on, but for a few days or so, I couldn’t mark the solution or post a message! Glad to see it was resolved!
Multiple conversations took place here, and multiple comments helped me out! I learned a few new skills, not just the one I sought after!
Although I’d definitely like to see more viewers’ on my channel, I’m not sharing for that intention. I figured you all might like to see the finish project I was working towards! Of which I was asking about, trying to learn. You can also comment on video, or here, and let me know your thoughts on the video editing aspect, if you wish! If you choose to Like, Sub, Follow my channel, that’s an added bonus for the both of us!

Meanwhile… I have another issue that came up, making another video… So I’m sure I’ll see some of you on the next comment I post!
Hi @DaddyDman
Since I watched your video on my phone and the connection here is quite slow, I didn’t play the entire video. Nevertheless, I do have a few comments.
First, congratulations about learning the skills needed to achieve the effect(s) we all discussed in this thread. The result seems to look like what you asked in your original post.
However, maybe it’s just me, but I find that your background music is way too loud. Many times I could hardly understand what you were saying. It also doesn’t help that after a few seconds into the video you sped up your voice.
Also, if its purpose is to promote your channel, in my opinion the video is too long. I feel that you should trim it down to about two minutes. Even if I was comfortably sitting at home watching it on my big monitor screen, I wouldn’t watch the entire 9-minute version, especially when I can’t clearly hear the voiceover.
Thank you for your honesty.
For the 9 min length, i was trying to encapsulate short segments of each of the 6 categories mentioned. I was looking for the most curious, or creative content, or catchy content I found of each category. but none the less, your suggestion is noted.
as for the sound, I’ve had some on a few videos comment about my voice over music, or video sound effects in the past. When I’m editing and creating the video, with headset on, my pc volume is at 70%, and my voiceover audio files are at +5 db, while music audio, or background music is usually -20, and sound effects are usually at -15, all using the audio gain filter. Idk what else to use to adjust each, so they’re at a balance.
Either way, it’s never sound too loud for me on my headset, or when done and rendered, and I sample my own project after, it’s always sounded just fine to me. but again, not the first time I’ve seen this comment, so Idk what else I can do.
Any suggested solutions would be great.
Thanks again.
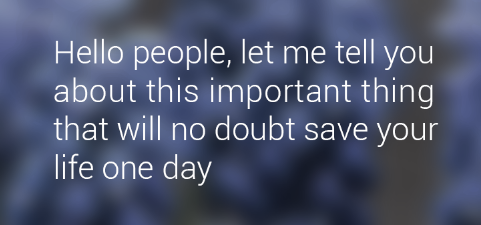
Well, in my opinion, background music should be just that: A background element that your viewers are aware of. But it shouldn’t distract them from the most important element: Your voice explaining and describing things.
Yes, but when you watch your own videos, you already know the content. So you don’t really need to pay attention to what the voice tells you. Your visitors should not have to struggle between two (or more) audio elements when they need to focus mainly on the information provided by your voice. You also need to take into account that not everyone will use headphones when watching your videos. Some may use crappy speakers at low level. Others will hear the audio through tiny smart phone speakers, etc…
To use an analogy, suppose you want to display important text on the screen. You can choose to put an image on the background to make it pretty, but that image should not make the text difficult to read. The text needs to be the center of attention.
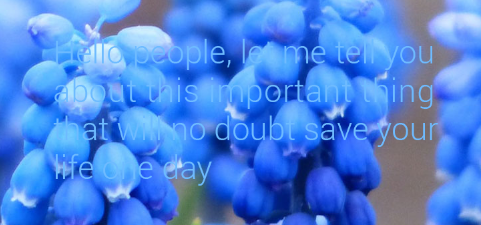
This may look like an extreme example, but it accurately represents how my listening experienced feels like in many parts of your video.
2 Likes