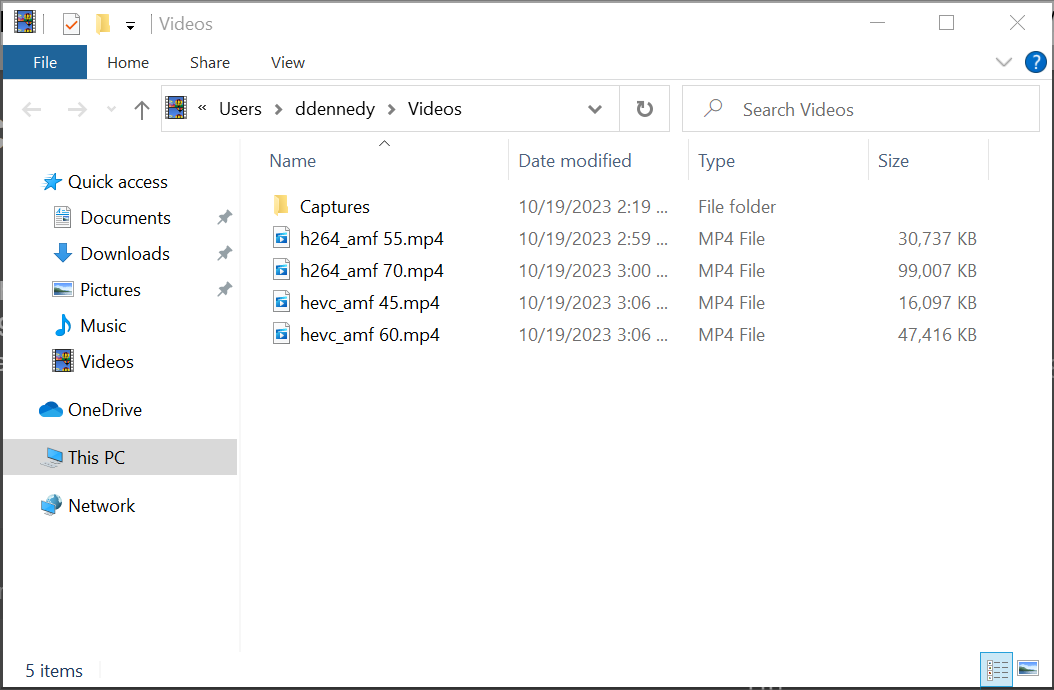
Exporting in HEVC with a quality of 55% and 71% gives the same file size… with this latest version of shocut 09.29.2023, inflation is required. On the same video, between a year of version, the export goes from 167MB to 408MB…
Hardware or software HEVC?
Hardware (same drivers)
AMD GPU
Does anyone have an explanation or an idea?
I just got a used system with AMD GPU to test this, and it works fine for me on Radeon RX 560 on Windows 10 with Shotcut 23.09
Thank you for the time you took to do these tests. I’m having mine redone on my side… I just updated my GPU drivers…
A new test, after updating the GPU drivers, still the same “problem”. The % quality does not influence the size of the file.

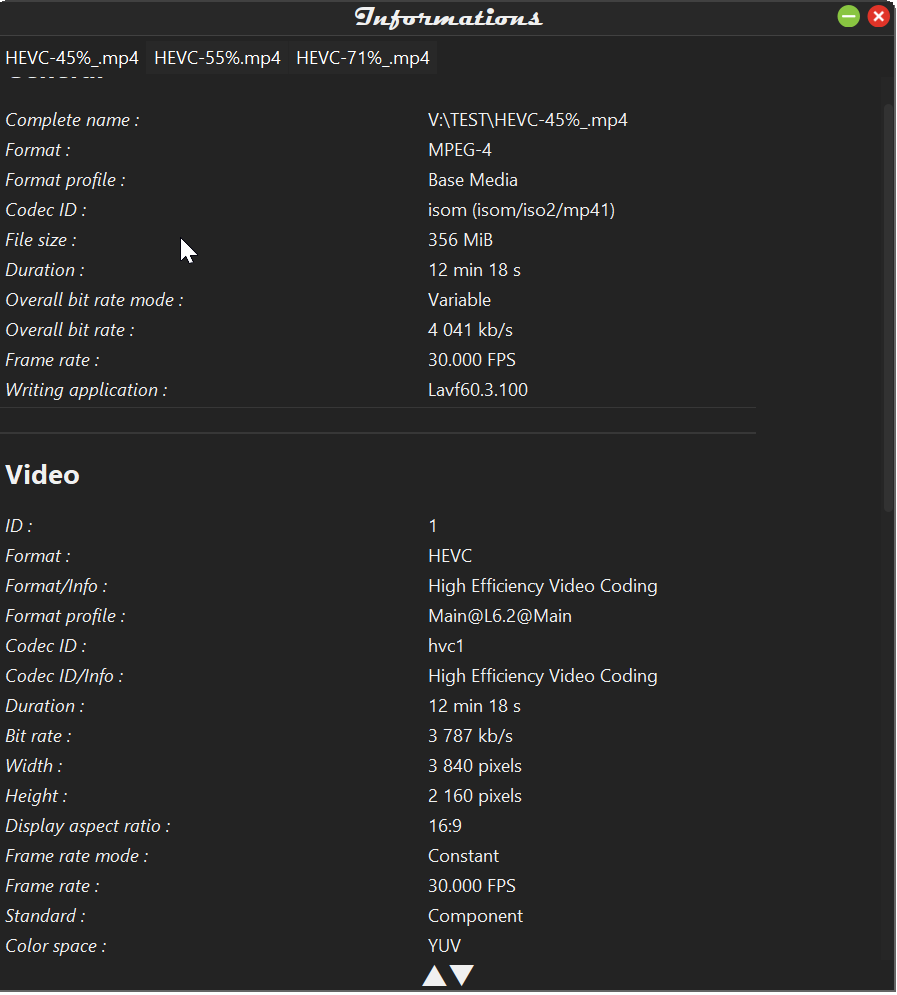
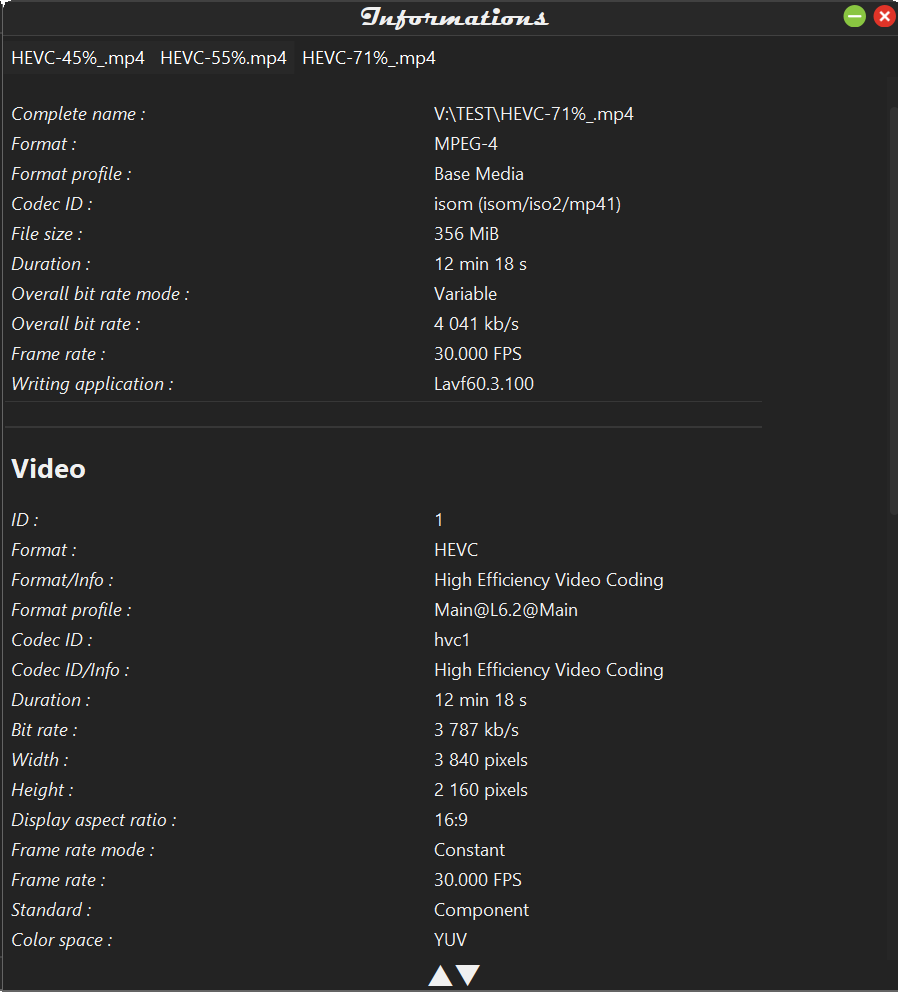
when analyzing the files, the bitrate is identical !
As if the quality % value had no effect ??
For two export profiles whose settings are identical, information in others is also in the personal profile…
I think the logs could help a bit to narrow down your problem: open your project, in the export panel make sure “Use hardware encoder” is checked, click on Default preset (in the Stock category), try to export with a filename “test1” and stop the export after a few seconds.
Go back to the codec tab and now change the quality to 71%, export as “test2”.
In the jobs panel right click → View XML (do this for test1 and test2) and copy paste here the 4th paragraph that starts with <consumer… >, mine looks like this and I can see the Quality argument is changing vqp="8" (but I have nvidia gpu, yours might look different):
<consumer target="C:/Users/Daniel/Videos/85.mp4" top_field_first="2" movflags="+faststart" real_time="-4" f="mp4" preset="fast" bf="0" g="150" acodec="aac" vcodec="h264_nvenc" deinterlacer="bwdif" channels="2" vbr="off" rc="constqp" rescale="bilinear" vq="8" vqp="8" mlt_service="avformat" threads="15" ar="48000" ab="384k"/>
TEST1 HEVC 45% (HEVC MAIN PROFIL DEFAULT SHOTCUT)
<consumer vcodec="hevc_amf" threads="11" channels="2" vtag="hvc1" deinterlacer="bwdif" top_field_first="2" vbr="off" vq="28" qp_b="28" f="mp4" preset="medium" rescale="bilinear" acodec="aac" g="150" qp_i="28" bf="0" rc="cqp" qp_p="28" mlt_service="avformat" target="V:/TEST/test1.mp4" ar="48000" real_time="-4" movflags="+faststart" ab="256k"/>
TEST2 HEVC 71% (HEVC MAIN PROFIL DEFAULT SHOTCUT TO 71%)
<consumer vcodec="hevc_amf" threads="11" channels="2" vtag="hvc1" deinterlacer="bwdif" top_field_first="2" vbr="off" vq="15" qp_b="15" f="mp4" preset="medium" rescale="bilinear" acodec="aac" g="150" qp_i="15" bf="0" rc="cqp" qp_p="15" mlt_service="avformat" target="V:/TEST/test2.mp4" ar="48000" real_time="-4" movflags="+faststart" ab="256k"/>
TEST3 HEVC 55% (personal)
<consumer vcodec="hevc_amf" threads="11" channels="2" vtag="hvc1" deinterlacer="bwdif" top_field_first="2" vbr="off" vq="23" qp_b="15" f="mp4" preset="fast" rescale="bilinear" acodec="aac" g="150" qp_i="15" bf="0" rc="cqp" qp_p="15" mlt_service="avformat" target="V:/TEST/test3.mp4" ar="48000" real_time="-4" movflags="+faststart" ab="384k"/>
Although the vq is different, the size of the exported file is constant and much too large.
For example, a latest project, 2160p 30fps, HEVC 45%, 30 min, file size: 1.32GB! data rate at 6209Kbits/s
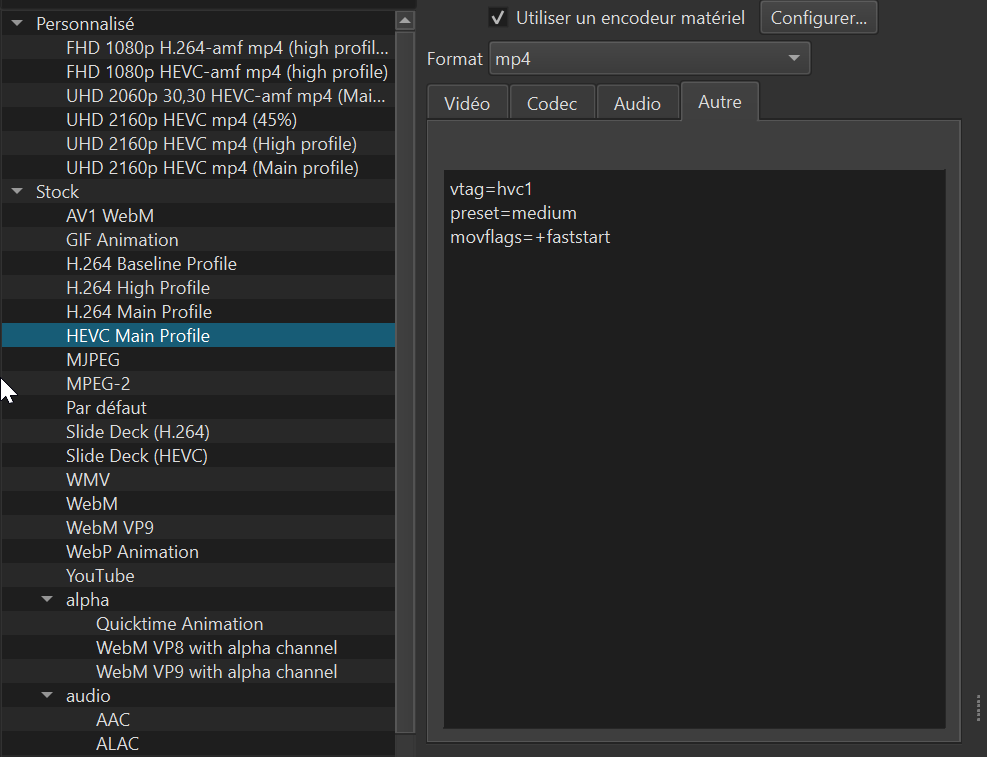
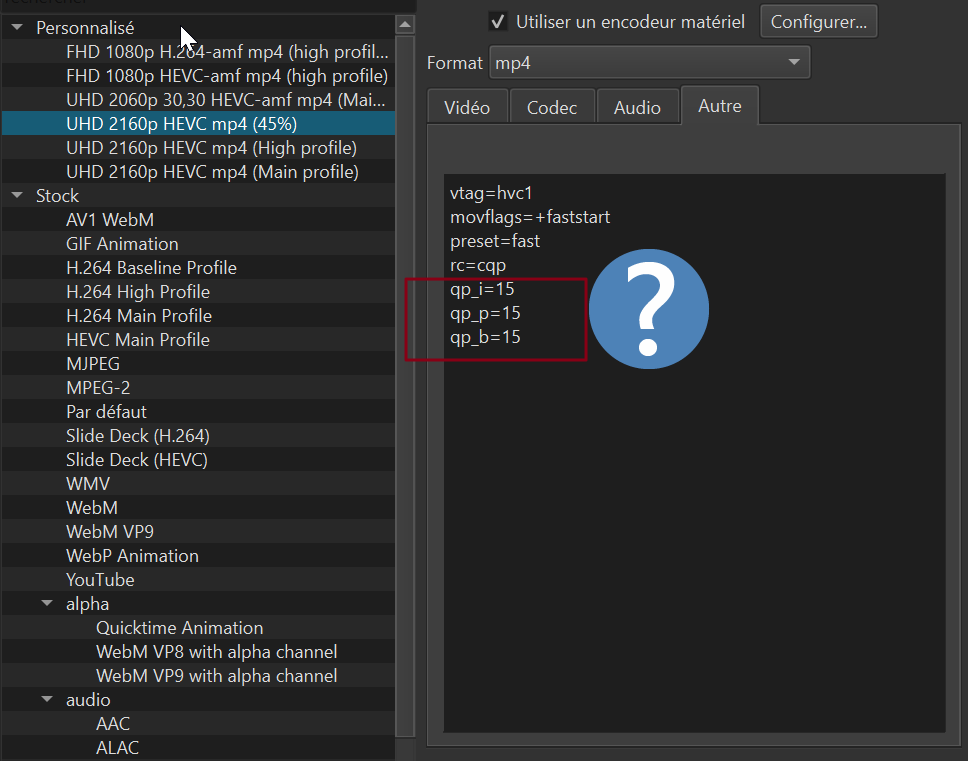
Remove the “qp_…” lines in the Autre (Other) tab. These will override whatever you do in Codec > Quality %. Anything in the Other tab is an override to give full control. “vq” is not used by the encoder, but Shotcut sets it to remember the quality % you chose. The “qp_” values are what is used as you can see when you change Codec > Quality. Maybe you should do your testing by not using your custom presets.
2 Likes
I made a fix for the next version to not put these in here when loading the preset.
1 Like
Thank you for making arrangements for the next version. Indeed I just saw that by modifying a preset delivered with Shotcut, then saving it, three “qp” lines are added.
After deleting the “qp” lines, the exported file is reduced in size!
At 45%: 274,706 KB versus 1,393,266 KB! without the “qp” lines is a file 5 times smaller.
File mlt : 2018 Ko /606 chains
Data: 15 mkv 1.62 GB for 45min / 2160p / capture OBS + webcam
(I made small sequences to see if Shotcut responded better… it’s correct but a slowdown from 30min of timeline)
PNG, SVG, filters…
Final clip: 30min
export time: 58 min
(codec hevc_amf hardware acceleration)
WIN10 - AMD Vega20 4 GB / i9 / 32 GB / SSD 10 gb/s on usb-c gen2 port
(Macbook pro late 2018 / Bootcamp WIN10; I promise that I will soon switch to MacOS to edit with Shotcut)
<consumer ab="256k" qp_p="28" rc="cqp" qp_i="28" bf="0" mlt_service="avformat" g="150" preset="fast" ar="48000" rescale="bilinear" real_time="-4" deinterlacer="bwdif" acodec="aac" vtag="hvc1" f="mp4" vbr="off" top_field_first="2" movflags="+faststart" target="V:/TEST/20231027_1-45.mp4" vcodec="hevc_amf" qp_b="28" vq="28" threads="11" channels="2"/>
I’ve also been trying to gain a better understanding of how codecs work in Shotcut and what various settings accomplish. I have seen a couple tags set in the Other tab that I did not myself type in, and so I wondered where those tags came from and hoped they weren’t working against me. I think my extra tags are inconsequential though, as best as I can tell.
Regarding testing various settings, I find it helpful to set a marker with a duration, something like 5 seconds. Then I can export just the marker instead of the full timeline. This way it’s easier to compare apples to apples. In my case I wanted to see which “Quality” percentage to set for a hevc_nvenc export, since the numbers aren’t immediately intuitive. I did an export for each 5% increment from 10% to 65%. For each of these I pixel peeped an identical frame to see how colors blobbed and details began to be lost. My findings were that for my use case, around Quality 45% (vqp=28) was a good compromise between maintaining acceptable visual fidelity and avoiding giant file sizes. Much above 45% quickly doubled or quadrupled the file size without justifiable or even noticeable quality leaps, especially at reasonable zoom levels. I think this is partially due to the fact that my source footage wasn’t shot on a camera with a giant sensor with superb clarity anyway, so high quality settings didn’t seem to make much visual difference. Maybe on a high end camera, keeping a higher percentage would be desirable to maintain what the hardware is capable of.
Interestingly enough, after conducting my curiosity test I noticed the “HEVC Main Profile” Stock preset also has 45% as the Quality setting, which made me feel confirmed in my findings. Of course “lossless” video would be great, but most consumer cameras such as mine record in quite a lossy format to begin with, so “lossless” would just mean preserving with great faithfulness whatever crappy artifacts and limitations the camera introduced at recording time anyway, so it’s better to judge based on visual experiments in my opinion.
The thing that’s most annoying to me is none of our settings choices really matter if we are uploading to streaming services. They just do their own crappy codec crunching to make the videos look like garbage anyway. For example, I’m currently uploading 5.7K 360° footage to Youtube. The videos look pretty nice on my PC with my chosen settings. As soon as Youtube downscales them to 4K and compresses them into an 8-bit clamshell compartment, they look like 82% crap (arbitrary percentage)! Even so, for my own original file storage I wanted to know where the acceptable quality threshold would be, thus the experiment. Someday 360 / VR content might get supported better, but it seems to be a niche thing right now that few people care about. Oh well, I think it’s fun.
3 Likes
This topic was automatically closed after 90 days. New replies are no longer allowed.