Introduction
Some users report that their clip looks “washed out” or “pale” in Shotcut compared to media players. This is often because the clip is encoded as High Dynamic Range (HDR). Shotcut has very limited support for editing HDR, and most users do not want to bother with HDR output. So, HDR clips can be converted to SDR that Shotcut can edit.
Identifying HDR Clips
To identify HDR clips in Shotcut, open the clip and view the Properties panel. In the properties panel, look for the “Color transfer” field in the Video tab.
The following Color transfer types are HDR:
- SMPTE ST2084 (PQ)
- SMPTE ST428
- ARIB B67 (HLG)

Transcode HDR to SDR
When opening HDR clips in Shotcut, you may be prompted to convert the file. If you are not prompted, follow these steps:
- Click Convert… in the Properties panel. A dialog window opens.
- Open the “Advanced” section of the dialog.
- Ensure that the Convert to BT.709 colorspace checkbox is checked.
- Click OK to start the conversion.
After the conversion is complete, the clip will be replaced with the converted clip.


Convert Color With a LUT
Instead of converting a HLG HDR clip, you can use it as-is with or without a proxy and use a LUT to convert it to SDR. Our Resources page has a LUTs section with some freely downloadable LUTs from NBC/Universal that can convert from HLG HDR to BT.709 SDR. “SL” in the file name means scene light, and “DL” means display light. Use either of these with the LUT (3D) video filter.
Convert Using Another Tool
There a different ways to convert HDR to SDR since the result is only an approximation of the source. Shotcut’s Convert gives a result some people do not like. A lot of people mention using the popular Free, open source, cross-platform Handbrake video transcoder.
If you are using macOS and shooting HDR video with an iPhone you can use QuickTime Player:
- Choose File > Export As
- Pick a resolution and a file dialog opens
- At the bottom of the dialog is a drop-down where you can choose:
Greater Compatibility (H.264)
How to Edit HDR Video With Shotcut
Shotcut features native support for editing, processing, and exporting High Dynamic Range (HDR) video. This workflow is optimized for HLG HDR, which is commonly used by modern devices like the iPhone, GoPro HERO13 (and newer), and various mirrorless cameras.
Limitations & Requirements
- HDR Preview Window: To actually see your video in HDR during editing, you must use a separate HDR preview window on an HDR-configured system display, or use a dedicated Blackmagic Design SDI/HDMI monitoring device.
- 10-Bit Processing: To use filters, transitions, or track blending/compositing, you must enable a 10-bit processing mode.
- Filter Constraints: For HDR projects, you must restrict yourself to video filters tagged with
#gpuor#10bit. - Format Consistency: Shotcut cannot convert between different HDR formats (e.g., HLG to PQ/HDR10) or combine multiple different HDR formats within a single project timeline.
- At this time, Shotcut only supports converting log profile video to HDR with GPU processing mode and HLG HDR video mode.
Shotcut Settings & Project Setup
Follow these steps to configure Shotcut for a proper HDR editing session:
1. Set the Processing Mode
To handle the high-fidelity color space, you need to enable 10-bit processing:
- Go to Settings > Processing Mode.
- Choose either Linear 10-bit GPU/CPU or Native 10-bit CPU. (Note: GPU Effects must be turned on to use the GPU/CPU mode).
2. Configure the Video Mode & Timeline
Instead of manually tweaking export parameters, Shotcut now natively manages HDR via Video Modes and Timeline Properties:
- Create or select a custom Video Mode.
- Set the Colorspace to ITU-R BT.2020.
- Set the newly added Dynamic range option to HLG HDR or PQ HDR.
- Note: If you have an existing timeline, you can also verify or change this setting under the Timeline Properties.
3. Import Media
- Drag and drop your HDR video clips into the playlist or timeline.
- Ignore conversion dialogs if Shotcut asks to convert them to SDR, as you want to keep them in their native HDR state.
4. Enable the HDR Preview Window (New in v26.6)
Previously, you needed expensive external hardware to preview HDR. Now, you can use any HDR-compatible system display:
- Ensure your computer monitor has HDR enabled in your operating system settings.
- In Shotcut, go to Player > External Monitor (this menu was moved to the top of the Player menu).
- Select Preview Window (HDR).
- Useful Tips:
- Press Ctrl + ` to quickly open or bring the preview window to the front.
- Drag the window by clicking and holding anywhere inside it (except the top controls bar) to move it to your HDR screen.
- Press F to toggle fullscreen mode, and Esc to exit.
- Note: This feature is incompatible with the troubleshooting setting Settings > Player > Use Old Video Output.
Editing & Filtering
- Cuts-only Editing: If you aren’t using 10-bit processing, you must limit yourself to simple cuts, trims, and sequencing.
- Filtering & Transitions: If you are using 10-bit processing, use only filters tagged with
#gpuor#10bit. You can type these tags directly into the filter search bar to filter your options. - Proxies: You can use proxies and preview scaling to improve performance. Just ensure your proxies are generated while in your 10-bit/HDR video mode so they scale down correctly without losing color mapping.
Exporting HDR
When you are ready to export your finished video, Shotcut will automatically configure the export color metadata based on your Video Mode and 10-bit processing settings:
- Open the Export panel.
- The defaults are suitable to export HDR per the current Video Mode. However, if you want to use an export preset, select one from the “ten_bit” category (such as HEVC Main 10 Profile, 10-bit AV1 WebM, or ProRes 422).
- Under the Video tab, ensure your color range matches your source (e.g., set Color range to Full (JPEG) for GoPro footage, or Limited (MPEG) for iPhone footage).
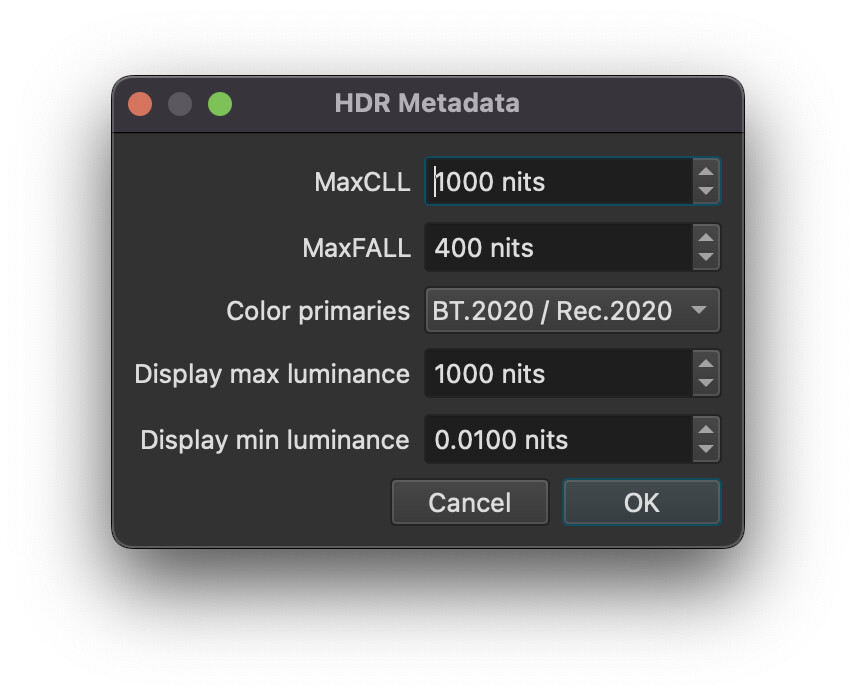
- You no longer need to manually inject custom metadata lines (like
color_trc=arib-std-b67in the Other tab) as long as your Video Mode > Dynamic range is explicitly set to HDR. - If you want to change the metadata for HDR10 (PQ) there is a HDR button next to Codec > Codec to open a dialog with several fields. This only appears when not using hardware encoder and libx265 or libstvav1 codecs.