I have a problem. I record how I play computer games and have a small area with my Facecam in the lower right corner. Yesterday I experimented a little with my light and that’s why the picture on my facecam looks terrible. Small pimples glow as if someone were holding a laser pointer in my face.
I would like to only edit the small area with the facecam for the colors and leave the rest of the video untouched. Is that possible? And how?
Hi @Chuck_Norris, Import 2 copies of your video, and stack them directly above each other - one on V1 and the other on V2. Mute the top video.
Add a Crop: rectangle filter to the top video and crop the facecam section. (select “transparent” so the bits on the outside of the facecam are transparent). Use the boundary box to select just the area you want to keep.
Change colours of your facecam by adding, say a lightness or hue or saturation filter. This will only affect your facecam. The rest of the video will show through unchanged.
Hi @Chuck_Norris
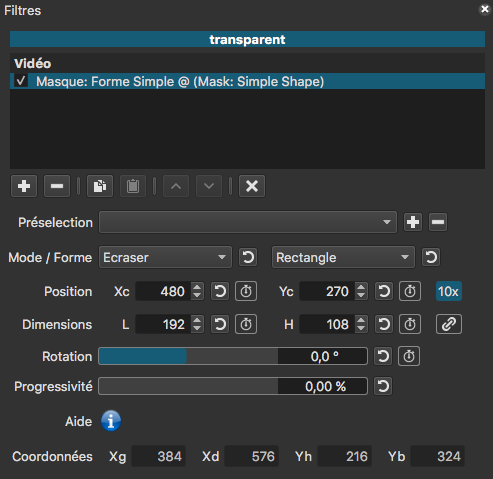
If you prefer to use only one track, there is also this solution:
But I prefer the solution proposed by @jonray, because at the moment, it is a lot easier to modify the size and shape in the Crop: Rectangle filter than it is in the Mask: Simple Shape filter
May I suggest in the future recording the Facecam separately simultaneously, without embedding the Facecam in the gaming screen during play, then synchronizing and combining the two recordings in Shotcut.
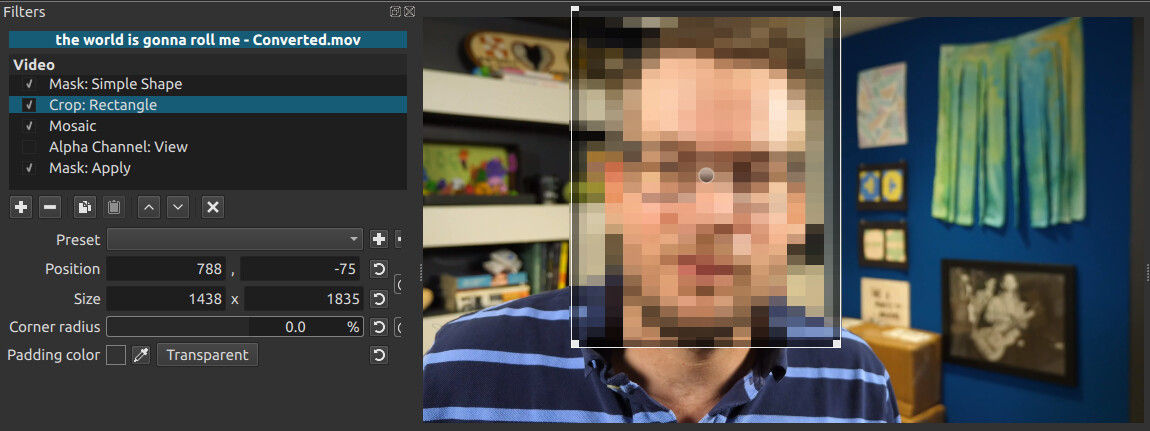
Mask: Apply is an amazing complement to Mask: Simple Shape (and Mask From File).
But I really wish the Mask: Simple Shape filter will get an upgrade one day. It deserves the same on-screen transform tools as the SP&R filter. And manual transform settings in pixels instead of percent.
Often you want to start the mask completely opaque - as in this case. From Mask: Simple Shape defaults set width and height 100%. From Mask: From File defaults, set threshold 100%.
Effectivement, cette solution de contournement fonctionne. Même si cela nécessite d’ajouter un filtre supplémentaire cela peut être plus rapide d’utiliser les coordonnées en pixels de Crop: Rectangle plutôt que de galérer avec les pourcentages de Mask: Simple shape Merci
Indeed, this workaround does work. Even if it requires an additional filter, it may be faster to use the pixel coordinates of Crop: Rectangle instead of the percentages of Mask: Simple shape.
Thanks