Wow, this is awesome! Thanks for this filter, I’ll find creative uses for it!
Honestly such a small yet nice addition, thank you!
Fantastic reactivity! Thanks @shotcut ![]()
![]()
![]()
Working great!
And if you stack multiple Drop Shadow filters, you can create 3D text ![]()
5 Likes
Great, @MusicalBox ![]() . Why not change your username to: ExperimentBoy?
. Why not change your username to: ExperimentBoy? ![]()
Génial, @MusicalBox. Pourquoi ne pas changer votre pseudo pour: ExperimentBoy?
2 Likes
That’s excellent, @musicalbox. Thanks for the demo. ![]()
![]()
1 Like
@shotcut, @MusicalBox, @SergeC, @dimadjdocent, @Tyrannocaster and others,
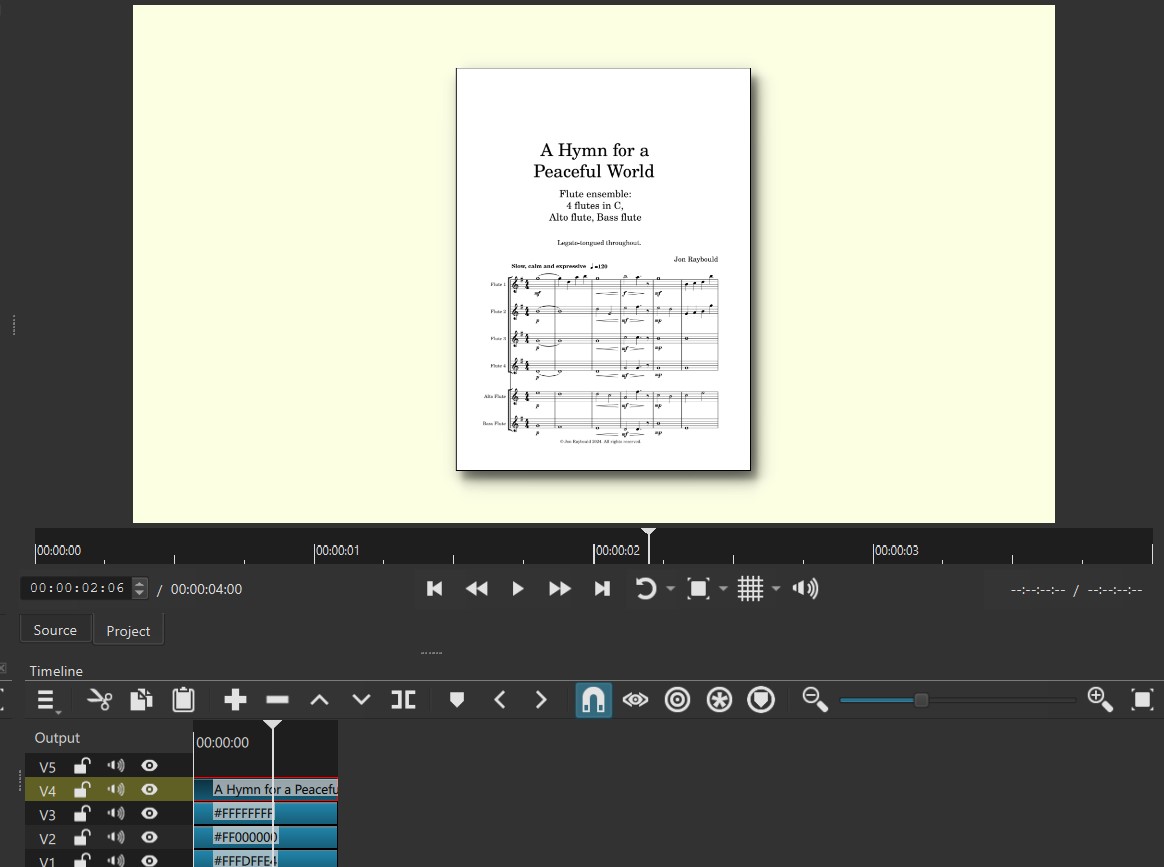
This is brilliant for me. I will use it to present my sheet music on my music videos.
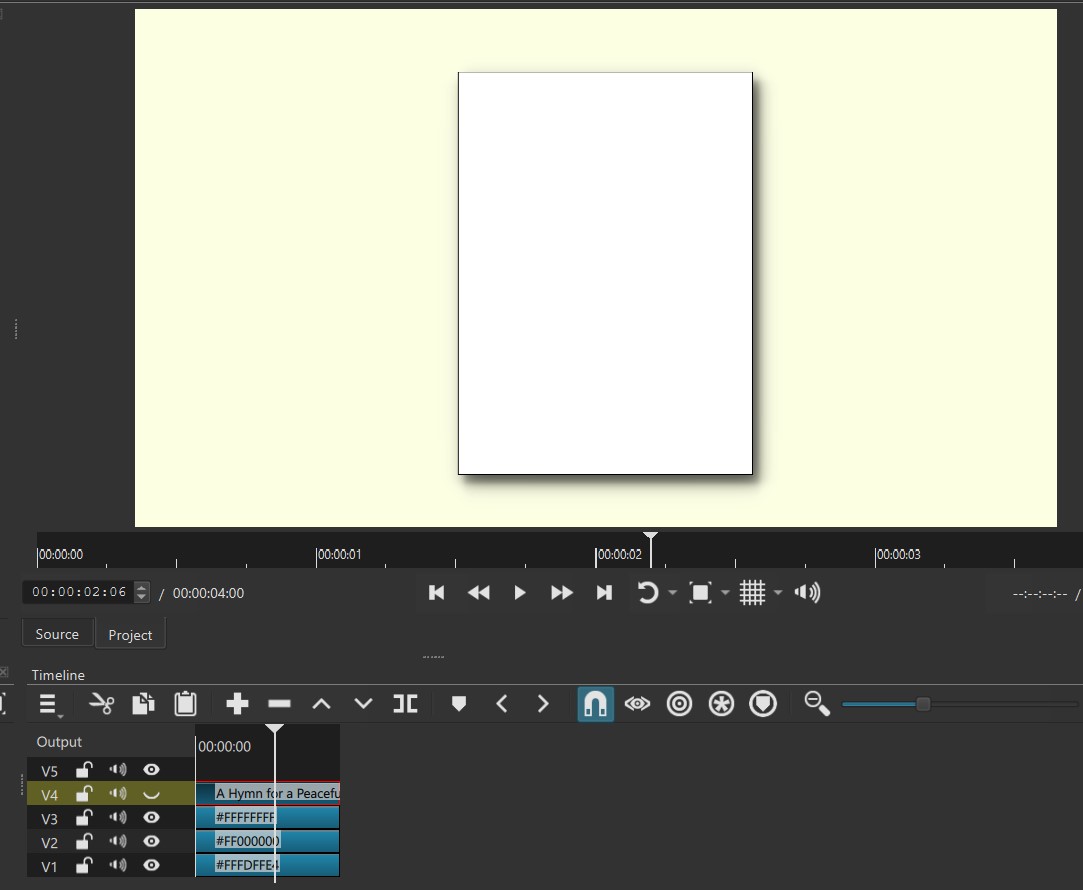
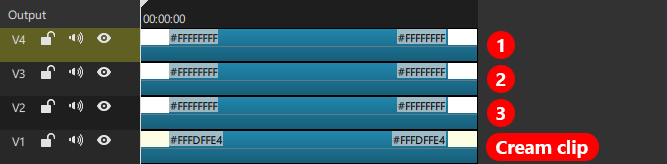
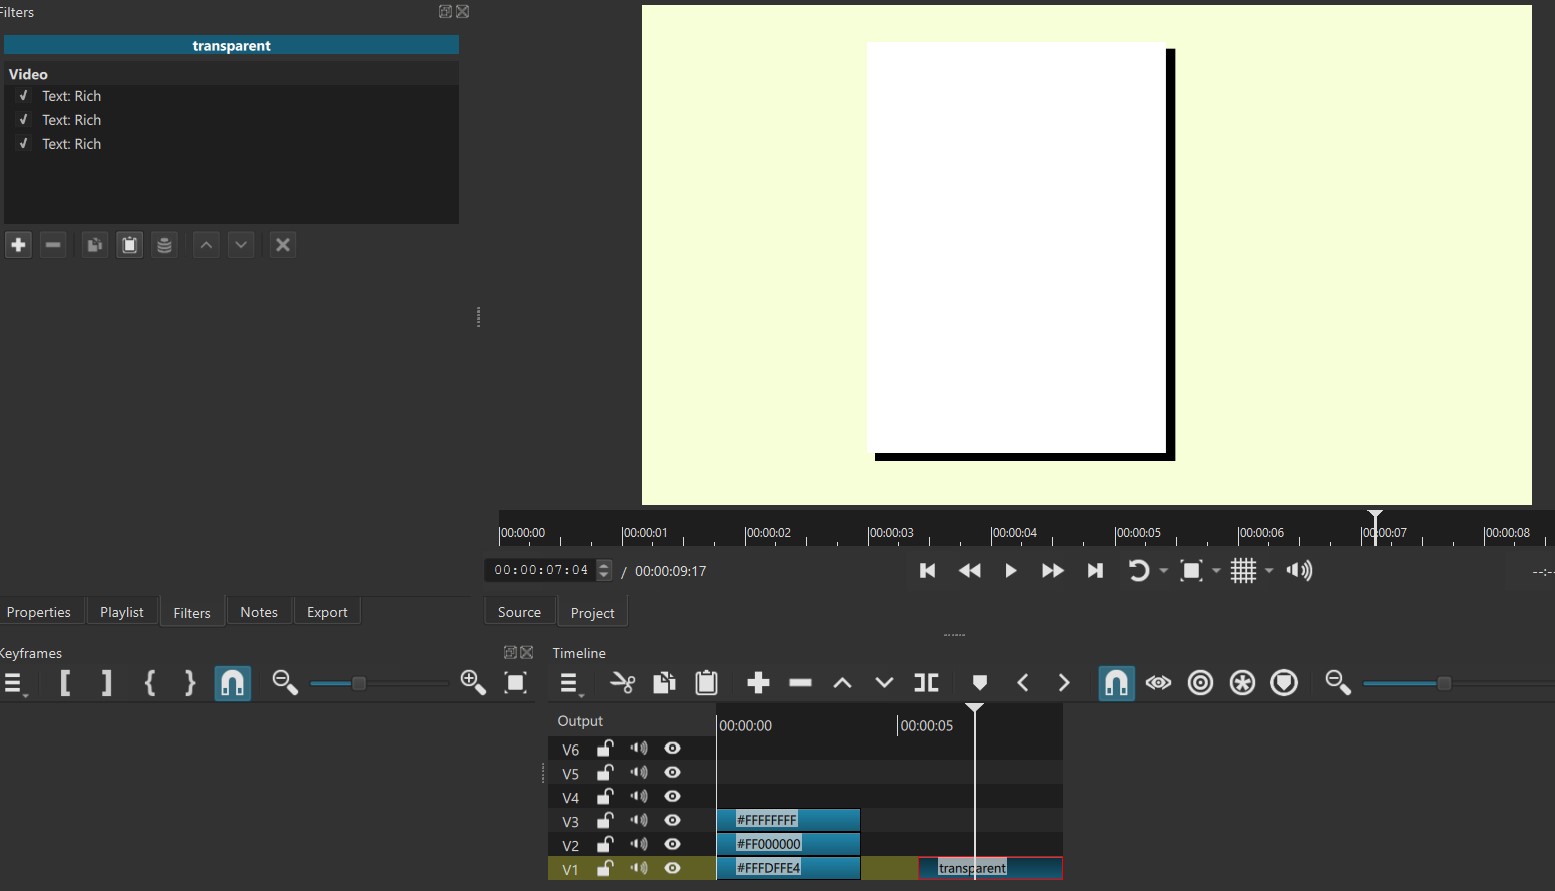
V1 - cream colour clip
V2 - black colour clip
V3 - white colour clip, 2 pixels X and Y offset, 4 pixels shorter vertically.
V4 - exported PNG from MuseScore.
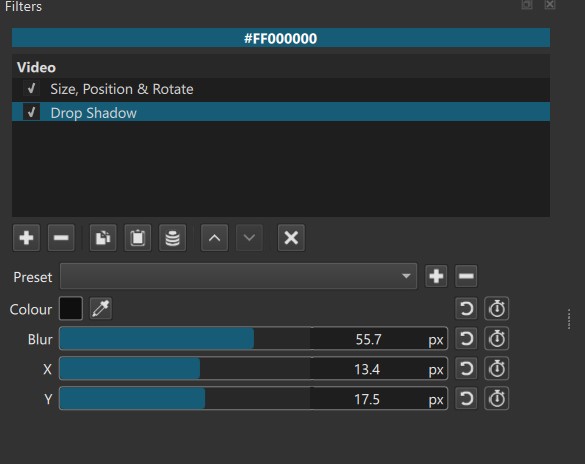
Black clip - Drop Shadow applied.
PS I tried doing it with Text:Rich colour clips (no text) on one track, so I could make a filter set, but I couldn’t get the boxes to stack one on top of the other.
@musicalbox or others, would there be a chance you could try the MLT below and see if you can get them the stack somehow? Thanks. NB the MLT file below was made with v. 24.06.01 (nightly build from GitHub) so the drop shadow is unavailable in current versions.
JonRay Border filter set for music pages with drop shadow TEST.mlt (16.4 KB)
1 Like
Is there a thread on how to get and install the new version? I find that Github can often be really confusing itself, and the sheer number of linux distros can make it hard to find a correct version nor non-experts like me. That’s one reason I use Mint; it is fairly common so sometimes it’s easier to find a version tailored for it. Normally I just install via the repository, but it always takes a while for new leleases to filter down to that. I want drop shadow! ![]()
Do you mean that you would like to make it look like a few sheets of paper are stacked on top of each other? Like this?

1 Like
By the way @jonray, if you do want a stack-of-sheets effect, here’s how I did it:
First, I noticed that you used 2 tracks (and SP&R filters) to make one white sheet of paper with a 2-pixel black border.
You can do the same on 1 track with Crop: Rectangle filters:
- Add your cream clip on V1
- Add a white clip on V2
- Enable a 2x2 grid
- Select the white clip and add a Crop: Rectangle filter
- Set Size parameters to 615 and 840 (the dimensions of the sheet)
- Leave Padding color to Transparent
- Use the moving handle in the preview panel to center the cropped area.
- Duplicate the filter
The Crop filter on the bottom of the filters list is your white sheet of paper
The Crop filter on the top will create the 2-pixel black border.
Select the Crop filter on the top and:
- Change Padding color to black (or any other color you want for the border)
- Reduce both Size parameters by 4 pixels (611 x 836)
- Add 2 pixels to each Position parameters.
You now have your sheet of paper on a single clip.

It’s easy now to duplicate that clip on additional tracks and offset each one with a SP&R filter to create the illusion of a stack of paper sheets.
- Copy the clip
- If you want a stack of 3 sheets, create 2 more tracks
- Paste the clip on each of the new tracks
- Select clip #2
- Add a Size, Position & Rotate filter
- Add 4 pixels to both of the Position parameters
You now have a stack on 2 sheets.

- Select clip #3
- Add a Size, Position & Rotate filter
- Add 8 pixels to both of the Position parameters
You now have a stack of 3 sheets.

To finish the effect, add a Drop Shadow filter to clip #3 and edit its parameters to your liking.

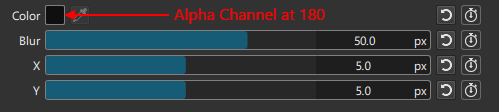
These are the Drop Shadow parameters I used in that example:
And here’s my MLT file, if you want to have a look at it:
paper-stacked.mlt (11.6 KB)
1 Like
Another 24 hours, and @MusicalBox will be drawing the Mona Lisa using only drop shadows. Rest in peace, GIMP. ![]()
3 Likes
Well, it is a very useful filter ![]()
1 Like
Oops @musicalbox, well , that was not exactly what I was asking about - my bad! I didn’t explain what I was confused abut. And now you have given me an excellent tutorial on making stacking pages! This is brilliant, and I will be using your method.
What I am actually confused about is this - I want to create three layers of colour. Cream on the bottom, black in the middle, and white on the top. Doing it with colour clips and three tracks is easy, but I wanted to do it with three Text:Rich filters on ONE track (so I can make a filter set). However, I found that the three colours do not seem to stack up correctly.
I found: selecting each Text:Rich filter in the panel brings that colour to the top, and then deselecting all the Text:Rich filters gives just the cream colour.
So I’m assuming that the Text:Rich filters don’t seem to work in layers, like having three separate tracks?
I am short of time now so can’t explain it properly, but I just made a very quick demo video to try to convey the problem.
If all this is still coming out in a confusing way, please ignore me!!
Thanks for reading!!
And thanks for your tutorial on making stacking sheets of paper!
Hi @jonray
Since the priority of filters in the list goes from bottom to top, your third Text filter (the one setting the cream background) should be located on the top of the list.
When it is on the bottom of the list, its opaque color and its dimensions covers and hides the white and black rectangles.
1 Like
Oh Lord! It’s that simple! I tried to change the order of filters but it didn’t seem to work, no matter how I tried!!
Embarrassingly it works fine now… D-Uh!!!
Thanks for the clarification…
1 Like
Well Jon, it’s not that embarrassing.
As you know, the Text: Rich filter can sometimes be a little confusing (to anybody). When selected, its interface takes priority in the preview window, and that can obscure the actions of other filters.
1 Like
Hi @musicalbox,
You are very kind! Actually I was embarrassed! I really should have been able to work that out myself!! Never mind, though, your help was appreciated.
Thank you also for that amazing tutorial! I never knew about the “padding colour” feature. A brilliant way of adding a border. Woo hoo. ![]()
![]()
1 Like
You can create very interesting animations using this filter ![]()
4 Likes
Cool! How the … did you do it though? ![]()
![]()
![]()
Several copies of this effect and some keyframes)
Test DropShadow.mlt (9.5 KB)
1 Like