Filters in Shotcut are the primary way to apply effects, color grading, and audio adjustments to your media. The Filters panel allows you to manage these effects for individual clips, entire tracks, or the whole project.
Adding a Filter
To add a filter, first select a clip on the Timeline or open (double-click) an item in the Playlist.
- Click the Plus (+) button at the bottom left of the panel or simply press
F. - A menu will appear with several tabs:
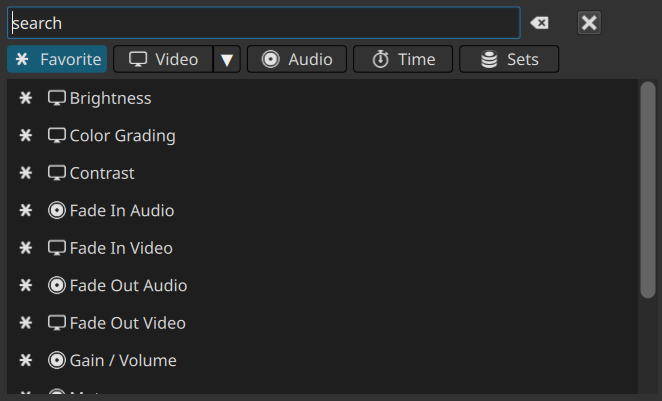
- Favorites (Star icon): Your most frequently used filters.
- Video (Monitor icon): All available video effects and color tools.
- Audio (Speaker icon): All available audio processing tools.
- Time (Stopwatch icon): All available time and speed tools.
- Sets: Builtin and custom groups of filters you have saved.
- Click a filter name to apply it to the selected item.
Searching for Filters
Instead of browsing through the long Video and Audio lists, you can use the search bar at the top of the “Add Filter” menu.
- Simply start typing the name of the filter (e.g., “Size” for Size, Position & Rotate).
- You can also enter a keyword for a filter such as “transform” because many effects are known by other names in other tools. Keywords contain synonyms and categories.
- You can also enter a “tag” such as
#10bitfor filters compatible with a 10-bit video processing pipeline or#gpufor filters that run on a GPU. - The list will filter in real-time. Use the arrow keys and Enter to quickly select and apply a filter without using your mouse. Simply pressing
Enteror theDownkey moves focus to the results.
Favoriting Filters
If you use certain filters regularly, you can add them to your Favorites tab for quicker access.
- Click the Star icon next to the filter name.
- Once starred, the filter will appear in the first tab (the Star tab) every time you click the Plus (+) button.
Removing a Filter
To remove an effect you no longer need:
- Select the clip on the Timeline.
- In the Filters panel, click on the name of the filter you wish to delete.
- Click the Minus (-) button at the bottom of the panel.
- Note: This will permanently remove the filter and all its current settings/keyframes.
Reordering Filters
The order of filters in the list is the order in which Shotcut processes them. This is known as the “Filter Stack.” For example, a “Blur” filter placed above a “Mask” filter will behave differently than one placed below it.
- To Reorder: Click a filter in the list to highlight it, then use the Up Arrow and Down Arrow buttons at the bottom of the panel to move it.
- You can also drag-n-drop to reorder.
- General Rule: Usually, you want corrective filters (like White Balance) at the top and creative effects (like Vignette) near the bottom.
Disabling vs. Removing
You do not have to remove a filter to see how your video looks without it.
- Uncheck the checkbox next to the filter name in the list to temporarily disable it.
- Double-click the name of the filter in the list also toggles whether a filter is active.
- This allows you to toggle an effect on and off to compare the “Before” and “After” without losing your settings.