Hello, at first I want to say a big Thank You for this powerful and great software :-)))
Now I work a couple of weeks with ShortCut and all my questions could be answered by reading this forum or watching many of the YouTube tutorials - many thanks to all.
But in this case i have a fundamental question which I didn’t find answered in the forum (or I didn’t used the right keywords).
For example:
I start with a project setting of 1080p 30fps
I open a clip file 1080p 60fps - every second frame will be dropped! (???)
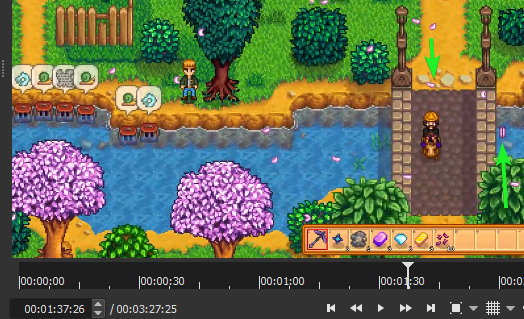
I drag this “30fps” clip into the timeline
I open the properties of the clip in the timeline and set the speed to 0,50000 x -> so the clip duration doubles (OK) Normaly doubled frames should be seen stepping frame to frame.
But it is not. My conclusion is, that ShotCut (always) works with the original source clip!
Next example:
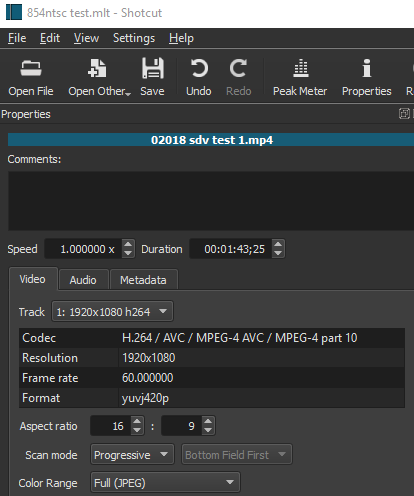
I start with a project setting 854x480 NTSC
I open a clip file 1080p 30fps
I drag this clip into the timeline
I export the project with 1080p 30fps
If Shotcut (always) works with the original source clip, the result should similar to the original clip. But it isn’t, its much more blury.
I think I have any faults in my conclusion - can someone help me to correct them?
The timeline resolution (“project setting”) is always the final target. Any filters you apply that require coordinates (such as Size and Position, or the position of Text) will be relative to the dimensions of the timeline/project, which in your case is 480i. If it didn’t work this way, your coordinates would shift all over the place every time you exported to a different resolution.
With that in mind, the export pipeline works like this:
1080p source clip -> downscaled to 480i timeline resolution -> 480i upscaled back to requested 1080p export dimensions
So yes, a lot of quality will be lost because it passed through 480i before encoding.
Generally speaking, the purpose of changing export dimensions is to make a smaller video than the timeline resolution dictates (i.e., creating a second export at 640x360 for mobile devices). If you want higher resolution, the real answer is to start with a higher native timeline resolution rather than upscaling a low-res timeline during the export.
Your first example is also a case of the timeline resolution being king.
But first, the fundamentals. If you crack open a .MLT file in a text editor, you’ll find that the majority of clip location pointers are measured in “units of time” rather than “count of frames”, with the unit of time being milliseconds.
So, let’s say you have a 30fps timeline and a 60fps source. When the export engine is 15 frames into the export of a 30fps timeline, that’s the same thing as saying it is 0.5 seconds into the export. So the export engine needs to find the frame in the source video that corresponds to 0.5 seconds from the start. If the source is 60fps, then 0.5 seconds into the clip is 30 frames into the clip. Since the timeline is 30fps, the implicit result is that only every other frame in a 60fps source will get looked up for inclusion in the 30fps final output. So yes, it looks like every other frame is dropped. That’s the simplest way to compress 60fps of video into a 30fps output… something has to give.
Now we get to the half-speed example. The same process happens as before. If the timeline is 30fps and the export engine is 15 frames into the export, that translates to 0.5 seconds from the start. The export engine looks to the source video, but because it is set to half speed, it looks up the frame at the 0.25-second position rather than the 0.5-second position. Voila, there actually is a non-doubled frame at the 0.25-second position. That’s because 60fps at half speed can still provide 30 unique frames per second, meaning we just created a one-to-one correlation between the timeline and the source video now that it is half speed. Your 60fps video in essence becomes “native 30fps” if played back at half speed, and lookups by time offset rather than frame index will bring back unique non-doubled frames.
Long way of saying that Shotcut does not explicitly frame drop or duplicate. That is merely a by-product of looking up frames in a source video relative to time rather than frame index. And time is always determined by the frames-per-second of the project setting / timeline resolution.
@ Hudson55x
For example 1 - ein checked frame for frame and there were no double frame.
@Austin
Before I did some tries with OpenShot. With OpenShot the final export will be done with the souce files (not with the projekt setting).
In ShotCut I saw it’s different (also according to my 2. example).
But why I’m wondering:
I set up a Project “1080P 30fps” - then I open a Clip with 1080P 60fps - the duration is the same - so every 2. frame must be dropped - I can see this in the frame counter of the player.
Now I drag the clip into the timeline and lower the speed with “0.5000x” (duration doubles).
Now I was awaiting that the clip is filled with doubled frames - but it isn’t.
Viewing frame for frame every frame is different - so Shotcut is using all frames of the original source file.
So I would say - openening a 60fps clip in a 30fps project doesn’t drop every 2. frame, but hide them