Important: This article describes a feature that is in an alpha/unstable state. Bugs are expected and the feature is subject to change. This feature is currently only suitable for testing.
You can still get this alpha version and see its release notes here, but the developers will not be responding any further to feedback from this older alpha version.
Road Map / Versioning Details
There will still be a version 21.02 stabilization release. There will only be a version 21.03 stabilization release if there are major regressions in version 21.02.
This version also includes all fixes made thus far for the next stable release 21.02.
There will be at least two more unstable builds released before v21.04 is released in April: a beta and a release candidate.
Time Remap requires a change in the engine that breaks its API backwards compatibility and requires a major new version. So, there is a lot of work under-the-hood required to stabilize the engine API before its next major release (MLT v7.0) simultaneous with Shotcut 21.04.
Known Issues/Limitations
(Many of these will not be addressed.)
If a clip has an in point set it might give an unexpected result.
There is no Pitch Compensation.
It only works on clips with NO B-frames. If you try to add it to such a clip, it will be blocked by a dialog instructing you to use Properties > Convert.
A proxy clip can mask the above check for B-frames and then export may be very slow, fail, or give bad results.
The About dialog says the version is UNSTABLE-21.02.09. That is intentional. Builds are primarily versioned on date, and we do not want to nail things down too specific here.
This filter cannot be disabled.
This filter does not support simple keyframes or filter trimming.
This filter can not be applied to tracks or the main output.
Usage
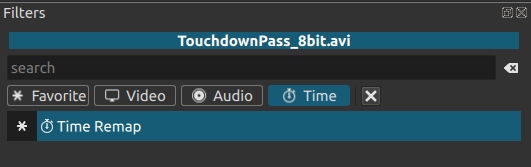
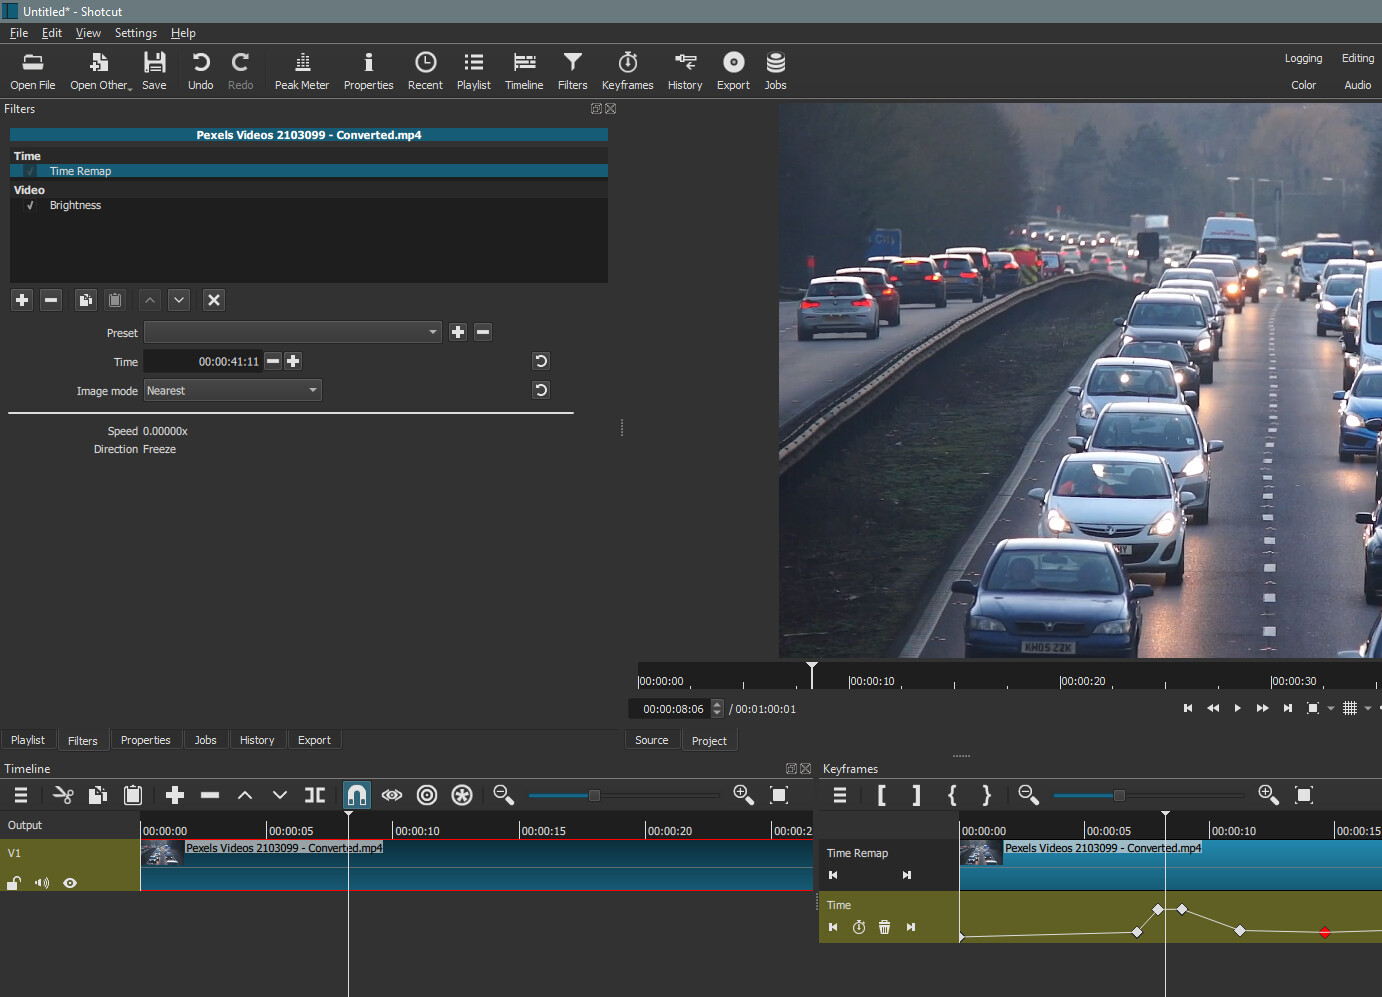
TL;DR : Filters > Time > Time Remap > Keyframes
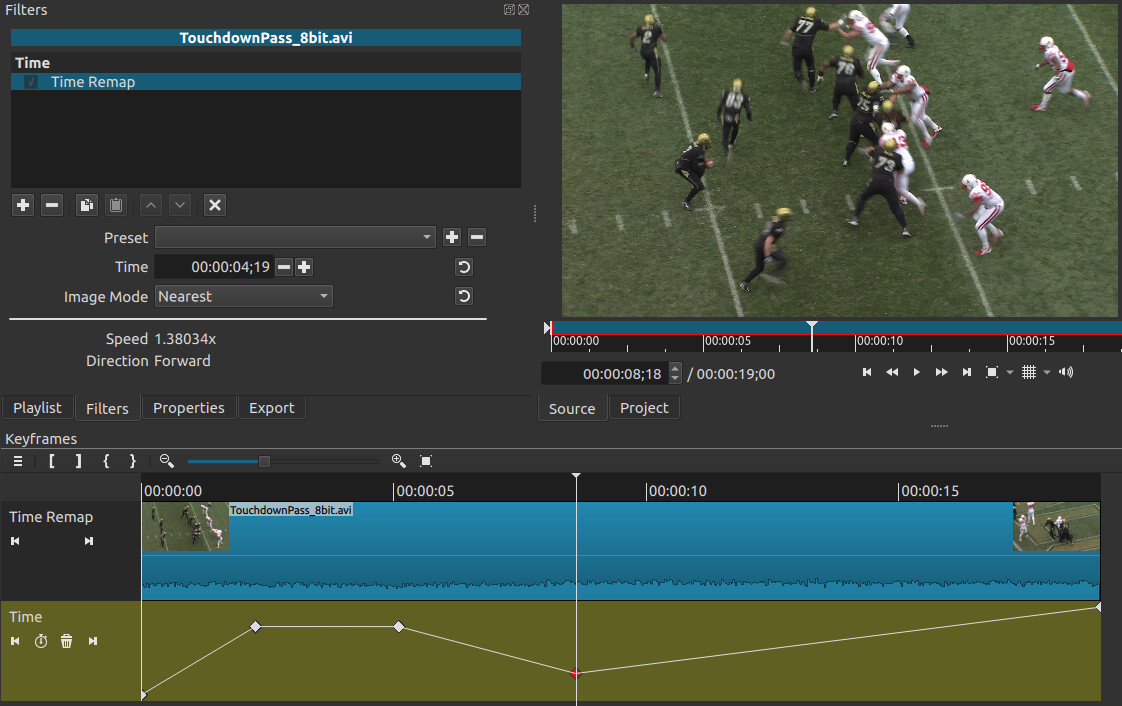
The Time Remap filter is the first filter that allows altering the timing of the underlying source clip.
The Time Remap filter allows the user to map clip time to output time.
The default setting for the Time Remap filter sets the output time equal to the clip time which results in no change to the clip. The user can interact with the keyframes to change the time mapping. When the slope of the line is up, time is moving forward. When the line is flat, time is frozen (freeze frame). When the slope of the line is down, time is moving backwards (reverse). A steeper slope moves time faster.
When the speed is faster than 1.0, multiple clip frames can map to the same output time. The Image Mode allows the user to choose between selecting the nearest frame, or blending frames frames.
Very good. What is the expected usage pattern? To remap individual clips in their own projects outside of a main project, export as intermediate, and import the result into a main project? Or is time remap expected to be used potentially multiple times on multiple clips directly in a main project file?
Said more simply, is remap intended to be a pre-processing step, or is remap intended to be fully usable as a clip in a main project?
The goal is to support use in a main project on multiple clips. But one of the main purposes of this alpha is to discover these usage patterns. For example, you can not put a timer filter before the remap filter. So if you want the timer to move with the remapping, you would have to export a video with the timer and perform remapping on the resulting file.
Shotcut does allow time remapping on mlt files. So it would be good to do some experimenting with that.
I have disabled allowing multiple time remap filters on a single clip because I can not think of a use case for that.
I hope that people will try many things and report what they were able to do and what they were not able to do. Some limitations we may be able to improve. Other limitations we may have to accept and limit the user to improve their experience.
If someone can make it work, let me know
That alpha version doesn’t like my computers. Or vice-versa.
OS: Windows 10
First minor thing: In my version, the filter is located in the Video filters list (not in a Time list like in your capture above). Maybe not worth mentioning… but look at me, I do it anyway
After I select the Time Remap filter in the list, I can’t use it. The selection box is grayed and clicking in it does nothing. Plus the area where the parameters should be is empty.
I need to add another filter to make the parameters of Time Remap appear. The other filter is blocked, I can’t switch to it.
Then, the only things I can do is click the + once. That opens the Keyframe timeline.
I can move the cursor manually or play the video, but as soon as I touch something again in the filter’s parameters, Shotcut crashes.
The only way I found to be able to use the Time Remap filter, is to add any other filter first, then add Time Remap.
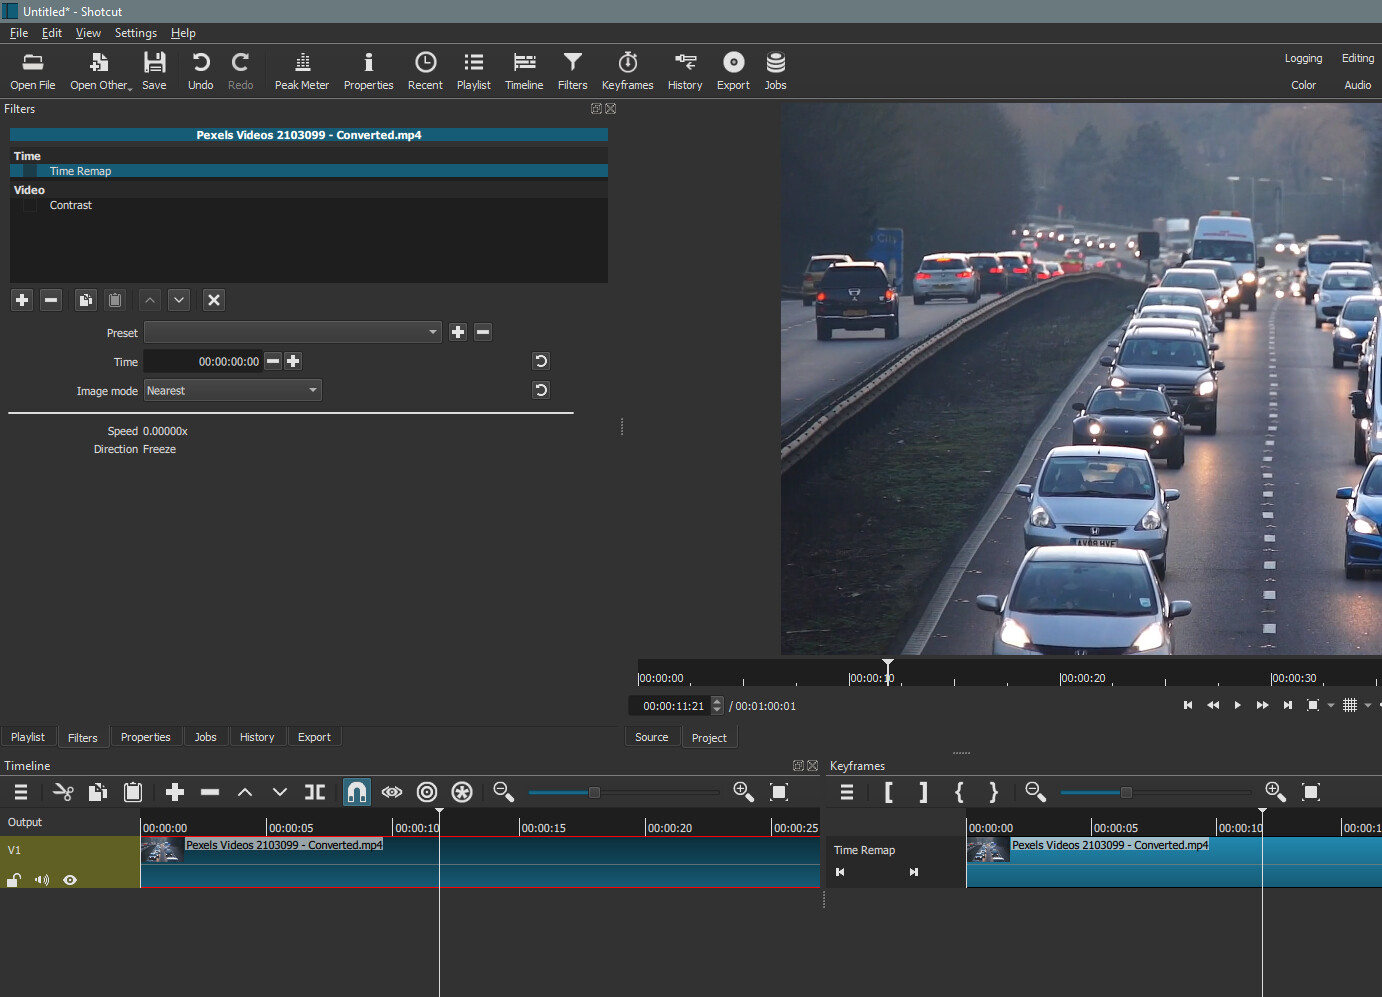
Then I can add/remove/move keyframes in the timeline. But that doesn’t seem to do anything. No matter what form I give to the keyframe line, the video plays back at a constant speed.
The only noticeable result is the displayed time in the filter’s timer is different from the one in the Viewer’s (output?) timer.
Maybe I don’t understand what the filter is suppose to do and I’m using it wrong. I thought it was for changing the playing speed of a video without having to cut it and go to Properties. But maybe it’s used for something else
This happened because Shotcut is not properly reloading the clip after it was converted. If you close Shotcut and start over - using the converted file first - then it will not prompt you to convert and the Time Remap filter will work.
Hmm. Well while I was trying to make the filter work, Shotcut closed by itself many times. And I’m about 70% sure I also closed it intentionally one time and that did not fix the problem.
I’m not near my computer right now, but I’ll test again later and let you know.
I don’t understand what that means. What is “an in point set” here mean? “Set point” as in cutting a clip down in the timeline or setting the start point in the Source tab?
Is the whole stipulation that the file has to be a video with no B-frames in order for this filter to work set in stone? This is not an early stage thing? This is how the filter will have to work?
Issues so far:
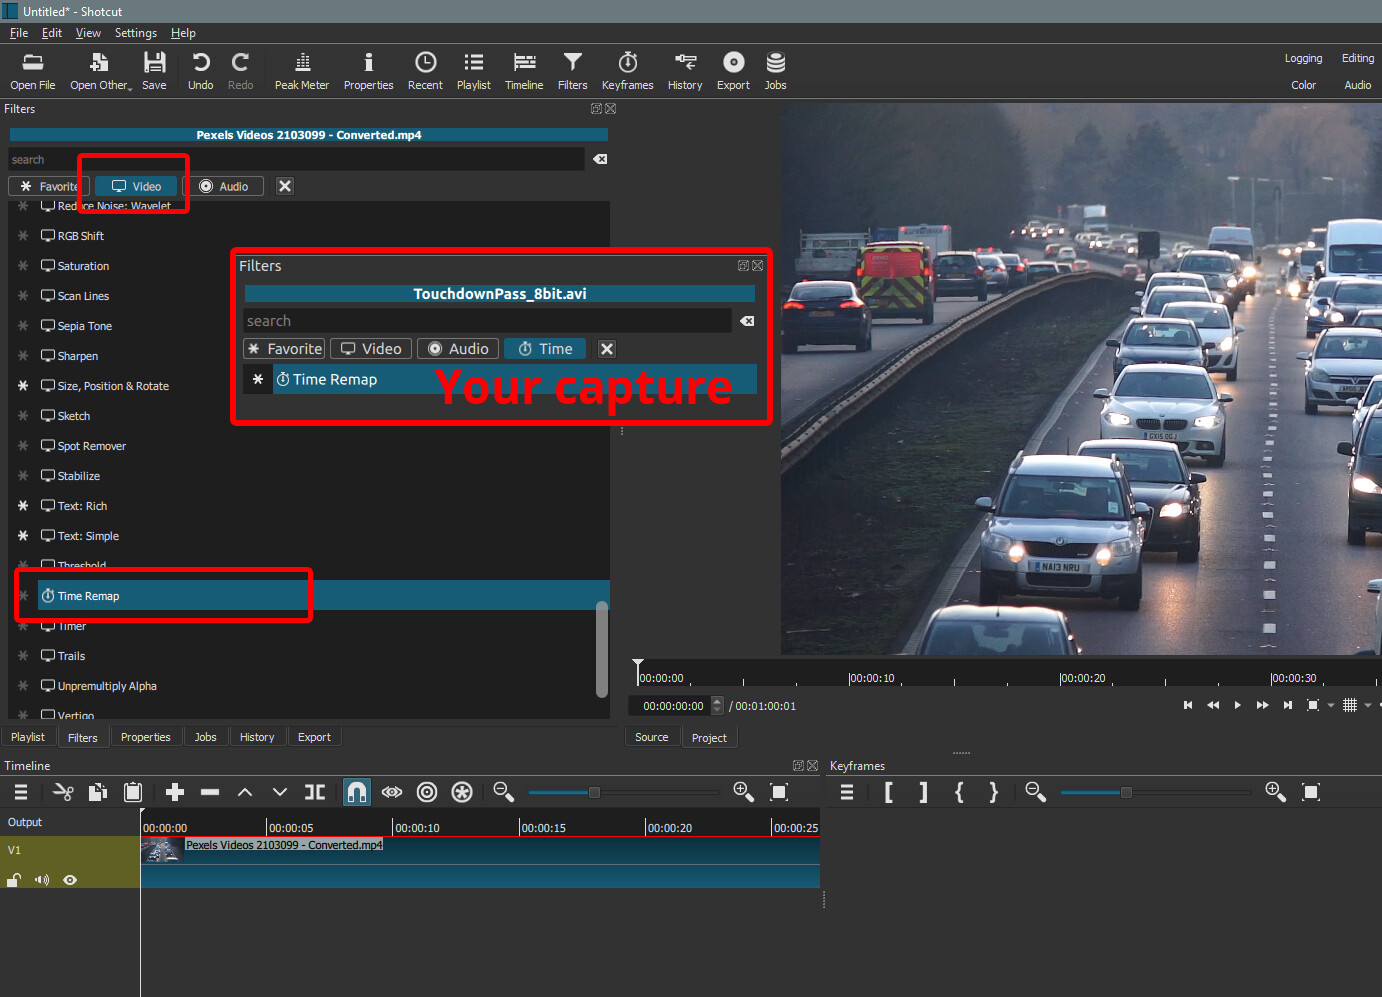
1) Dragging directly from the file manager to the timeline makes the Time Remap filter behave strange even if the file has been converted to edit friendly. If after dragging directly to the timeline you select that video and go to Filters, the Time category does not appear.
You’d have to find it in the Video category. Then when you select it, Time Remap on the filters menu is grayed out. You can’t do anything with it and you can’t remove it.
So it only works by dragging the file to either the playlist or the player first before bringing it to the timeline.
2) It seems the only way to change to speed is moving the keyframes manually. Can the speed counter be made into a parameter where you can dial in the numbers to be precise? It would help save time in many cases. It would also help to revert a keyframe back to normal speed exactly (i.e. 1.00000x)
3) The speed counter doesn’t update when moving a keyframe while holding Alt. It does update when moving a keyframe while holding Ctrl.
4) In this demo, I press the right arrow button in the keyframe timeline where it says Time Remap then press the left arrow key on my keyboard to move back one frame. I try to do the same under it where it says Time and instead of moving back one frame after pressing the right arrow to go to the last default keyframe it goes all the way back to the start.
5) Pick a clip in the timeline that is from the middle of the source clip so that there is enough footage at the start and at the end to stretch out for more footage. Add the Time Remap filter to that clip. Then grab the start or the end of the clip and stretch it out to add several seconds/minutes. Now press the reset button that is next to the counter for the clip time. Shotcut will crash.
Ok, I’ve started a new project, saved it, imported the converted video and nothing as changed @Brian.
Still have to add a random filter before the Time Remap filter.
I created this line in the keyframe timeline and this is how the video runs.
Based on the shape of the line, can you give me an idea of what should have happened ?
Either, but this issue might be something we can improve upon.
Is the whole stipulation that the file has to be a video with no B-frames in order for this filter to work set in stone?
I think this is set in stone due to performance when trying to play in reverse. It might be possible in the presence of B frames, but the user experience is too bad to expose.
Frankly speaking, if that is how it’s going to be then it’s going to kill any excitement for this feature when officially released. You really should put on the top of the priorities list removing the no B frames limitation. If that means going past the scheduled April release then so be it.
The grand majority of the time I have done speed ramping, it’s been on the fly. I didn’t plan on it ahead of time. I was experimenting in my project. I would do speed ramping in one part then maybe later on decide to change it or even decide on applying speed ramping to another clip. All of that will be stunted severely by having to convert every single clip I want to do speed ramping on to an edit friendly file. All that work of having to go Source > trim > Export > intermediate or lossless preset > Export File > double-click completed job, is not intuitive and just slows down the workflow.
Then there is the issue that you noted in your announcement of how Proxy will mask the B frames issue. There really is no workaround for that. And that leads to another issue that hasn’t been brought up: 4K videos are becoming more and more common. So if the user is doing a 4K project and wants to do speed ramping then after doing Export > intermediate or lossless preset the file may have issues playing because when making a DNXHR or Ut video of a 4K clip, the bitrate ends up being so high that it doesn’t even play well. So then what? Make a proxy out of that? That is a lot of hoops to have to jump through just to do speed ramping.
Speed ramping in every editor that has it is a quick process. You go in, add the speed ramping and you move on. The whole no B frames limitation just adds way too many rules, steps and processes that makes the whole business too time consuming and eats up unnecessary space on your hard drive by having to make bigger files with no B frames just to make the effect happen. It goes against the whole philosophy that you have for Shotcut which is to cut down as much as possible on the amount of steps in order to do anything so that it’s simple and intuitive. In order to workaround the no B frames limitation, you have to explain it to someone and that in and of itself makes it counter intuitive. Releasing it that way would be a big mistake. If other things have to be worked on in order for the no B frames limitation to be lifted and that means it won’t come out in April then that’s more than fine because in the end it would be worth it.
The new Convert to Edit Friendly tool has the option to blend frames when the speed is slower than 1x. Time Remap apparently does not. So, there may be value in doing Convert to Edit Friendly to pre-blend the frames, by overriding the frame rate from 30fps to 60fps (for an immediate example).
Now, if this 60fps-overridden video was brought onto a 30fps timeline, then only the “real” frames (not the blended frames) are selected from the input file due to standard drop rules, and everything looks the same. But if the speed is slowed down, Shotcut has the option of looking up blended frames which could potentially make the slow-motion parts look smoother.
I would assume that Neighbor mode would be chosen for Time Remap if the video is pre-blended. Otherwise, it would try to blend blended frames. But who knows, maybe that looks okay. In theory, Neighbor mode on pre-blended video might offer higher preview performance while setting up the time curve.
You use the term “Speed Ramping”. But we do not call it that. Maybe you are assuming this feature is something else based on a different editor you have used. The keyframe graph in Shotcut for Time Remapping represents a mapping of input time to output time. It does not represent speed.
The time remap filter allows creating mappings that result in playing the source file in reverse (any time the slope of the line is negative). For clips that have b-frames, this would create a poor user experience due to poor seeking in reverse. Maybe someday in the future we can implement a “forward only” time remapping filter that would not reverse playback and we could remove the b-frame stipulation. But we have to start somewhere and this is where we are.
This was a very good clue for me. In order for the time remap filter to work, we have to open clips in a special way. I think I have all the places that we open a clip fixed now to use the new open method.
I also fixed this. The time remap should never appear in the video category.
Unfortunately no, even though some people may wish that the filter operated on speed rather than time. The speed parameter is only a status that is calculated in real time.
I do not reproduce this. It changes with both for me. But maybe in one test you were not making a change that affected the playhead. Remember, the speed status is a real-time status that is reporting the speed of the currently viewed frame.
Unfortunately, you keep running into the opening bugs. From my testing, the only reliable way to get the time remap to work in this alpha build is to use the File->Open method to open an already converted file. I have fixed that problem for the next build.
For the shape of your keyframes, you would have seen the clip go forward quickly, then reverse quickly, and then forward at approximately normal speed for the rest of the clip.


