An adjustment clip is a dummy video clip that contributes no video. Its video filters apply to the composite of all video tracks below it. Its audio filters apply to the mixture of ALL tracks—not only the tracks below it. Also known as an adjustment layer.
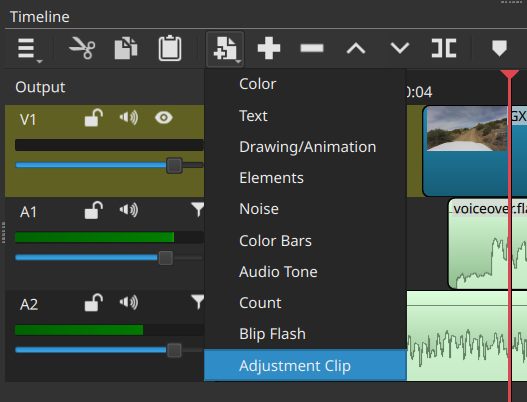
To access this feature, click the Generate button on the Timeline toolbar. It adds a new video track if needed and places the new clip at the playhead:
This was added in version 26.9.27.
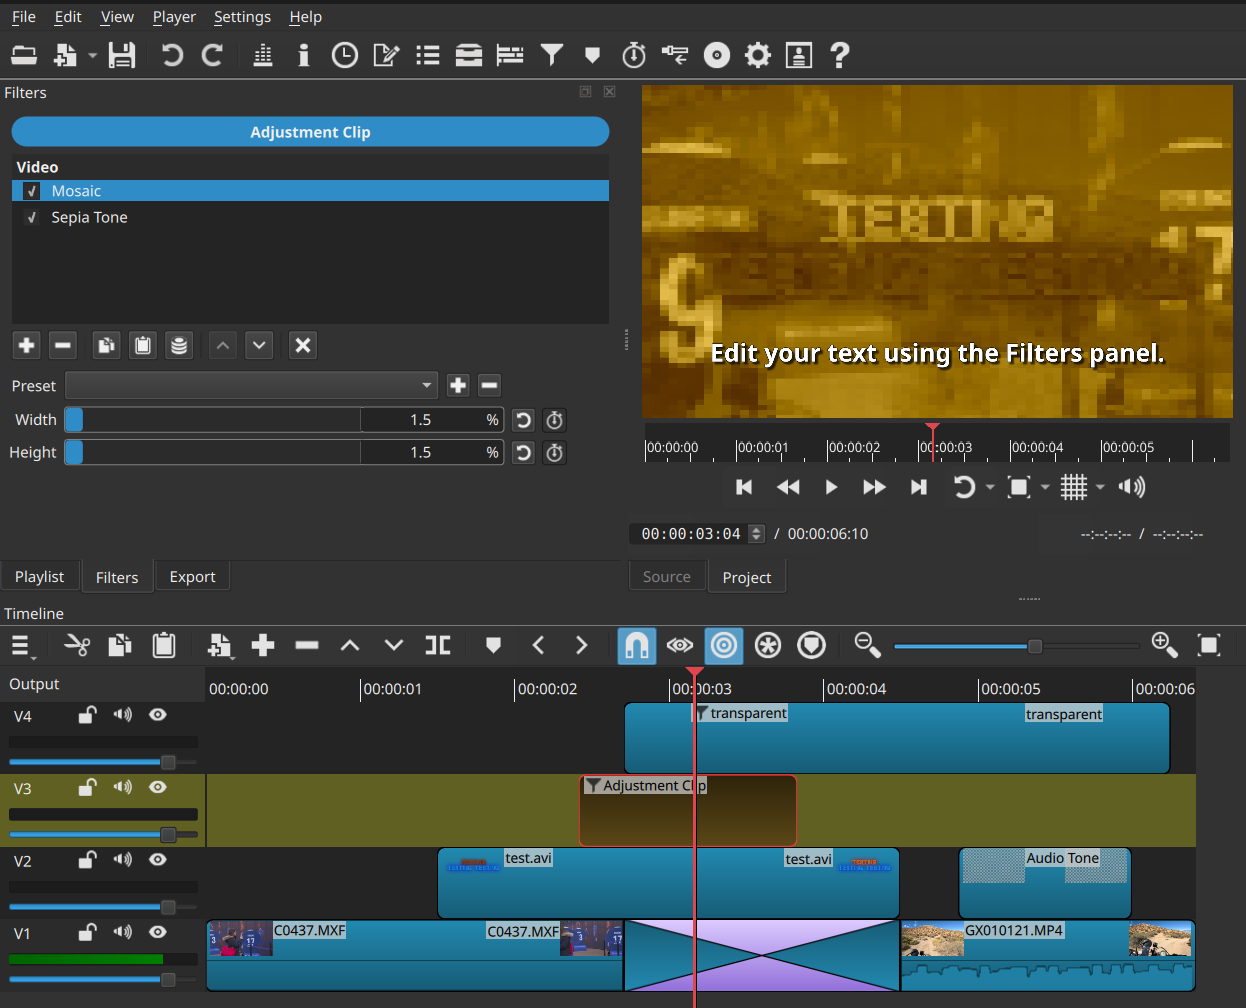
See the screenshot above. Adjustment clips have a copper color. You can see that the Mosaic and Sepia video filters on the adjustment clip are affecting all the video directly below it, including the transition. However, the text clip on the top video track is not affected. Adjustment clips produce no audio or video of their own.
As a clip, you might more easily control the start and end of filters that span multiple clips and tracks than using filter trimming on track filters.
Key Benefits
- Time Saver: Instead of copy-pasting the exact same effect or color grade onto dozens of individual clips, you apply it once to a single adjustment clip stretched across your timeline.
- Consistency: It guarantees that look-based elements—like a specific color scheme or sharpness—are completely identical across multiple scenes, keeping your project looking cohesive.
- Organizational Cleanliness: It keeps your main video tracks clean. Your primary timeline remains dedicated to cuts and pacing, while your styling choices live safely on a track above.
Common Usages
- Color Grading & LUTs: This is the most common use case. You can apply a Look-Up Table (LUT) or make exposure, contrast, and saturation adjustments across an entire sequence or scene at once.
- Adding Cinematic Bars (letter-boxing): If you want to add a crop effect (like a 2.40:1 anamorphic widescreen look), you can drop it onto an adjustment clip so it perfectly frames all the underlying footage.
- Global Visual Effects: You can apply effects like film grain, sharpening, stylized blurs, or vignettes over multiple clips seamlessly.
- Custom Transitions: By splitting an adjustment clip right above a cut line and keyframing effects like a directional blur, you can create smooth, seamless transitions between two underlying videos.