https://shotcut.org/FAQ/#can-i-have-multiple-versions-installed-at-the-same-time
To learn about every release read this: https://shotcut.org/blog/
Use this link to download current version: https://shotcut.org/download/
Use this link to download older versions from GitHub: https://github.com/mltframework/shotcut/releases/
Note: The GitHub link is located at the bottom of the current version download link.
There maybe situations to where you wish to have multiple installations of Shotcut.
Here are a few possible reasons.
- Multiple versions (Current & older versions).
- Current version, GPU Effects dedicated version.
- Current version, multiple install for various users.
Get it installed.
- Open up File Explorer (Windows 10), Click the View tab. Check “
File name extensions” - Locate the version you wish to install on your computer. If you’re unsure where you downloaded the version, try looking in your Downloads folder.
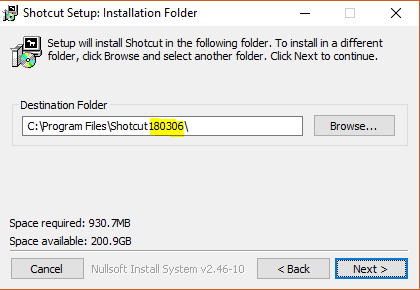
- When you open the installer, change the directory name like shown below. I’m installing version 18.03.06, so I just inserted 180306 into the Destination Folder address, which will create the new folder automatically. Note: Installer Default Folder location is C:\Program Files\Shotcut
3a. Example: If you’re installing just for another User : C:\Program Files\ShotcutGeorge\
Installation is now complete.
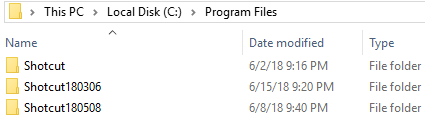
Where do I find this installation at?
Renaming files & creating shortcuts.
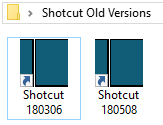
The rest of this tutorial is about renaming files and creating shortcuts. This will aid in finding Shotcut versions quickly on the desktop. While the Shotcut folder itself has been named to “Shotcut180306” the folder still contains shotcut.exe. Just personal preference here, but I’d rather rename the program name to the version number to know what I’m clicking on.
Rename Shotcut’s executable file.
Note: Completely optional, not essential.
- Locate
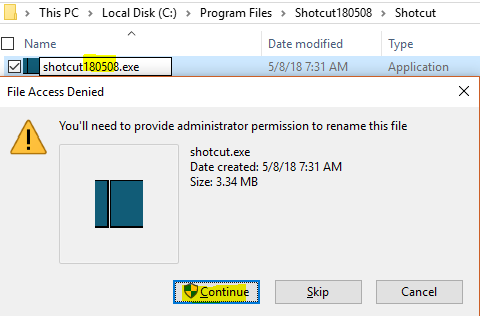
shotcut.exein the folder you renamed, in this example the “Shotcut180508” folder, then another Shotcut folder is present. Note: Important, leave.exe, do not delete!! - Rename filename by adding version number, or user name. Hit Enter.
- You’ll get a File Access Denied popup. I’m using an Administrator account, so I just click “Continue”.
Creating a shortcut.
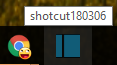
- Example: Right click on shotcut180306.exe (The exe file we just renamed)
- Sent to

- Desktop

- Rename the shortcuts, this example I’ve just renamed them Shotcut with Version number.
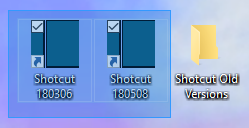
Shortcuts can be safely renamed to anything you desire.
I like to be a bit tidy, so I created a folder just for Shotcut versions.
Optional: Pinning to taskbar.
Going back to the actual exe file that got renamed.
Right Click, Pin to Start
Windows Start Menu, Right click, more, Pin to Taskbar.
Installations with different users
- Open the installation, go to Settings, App Data Directory, Set
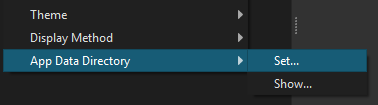
Default Location
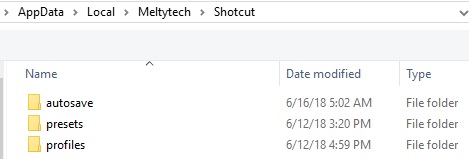
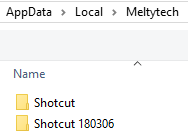
- Click on Meltytech
- Create new folder (Example: Shotcut 180306)
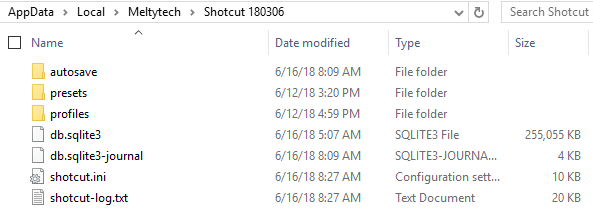
- Select actual folder (Example: Shotcut 180306), then click on “Select Folder”. Shotcut will restart.
- Verify. Settings, App Data Directory, Show
I hope this has been helpful. I’m sure I made a few mistakes in explaining along the way, please feel free to message me directly, as a reply in here so I can edit the corrections.