The colorwheel is only intended for course adjustment. For fine adjustment, click in the number box and use your scroll wheel to take small steps.
Perfect, thank you.
Tried the “spot remover” filter with some success.
Depending on how big one makes the block, it tends to create smear lines.
These can be corrected with yet another spot remover block, slightly offset from the first, or even applying a mask with some brightness and contrast.
Depending on how bad and where the spots in the film are, different combinations (or multiples of) spots and mask filters will clean some of them up.
A bit tedious but not impossible.
BEFORE FILTERS:
FILTERS APPLIED:
The second spot filter outside the mask was to get rid of the black spot in the sky.

RESULT:
The slightly blurred area is visible but it’s less obvious or jarring as big black spots.
Reds and blues are more accentuated in the restoration with Shotcut.
The stabilization is noticeably worse in SC, perhaps it needs a different adjustment.
The lantern mast is sharper in Film9 and at 0:07 I also see a mark in the upper left corner that does not fix SC.
Yes, it seems that Film9 gets better results with the tuned scripts.
However, SC will surely achieve something similar, only that it takes experimentation and a lot of testing time to get a valid fit. Perhaps a combination of filters (putting the color correction filter or the white balance through the eyedropper first).
Anyway, congratulations on these tests.
One should note that this is only a small snippet and not in full size. The quality difference is more prominent in full screen. The Restoration with Film9 did need very little user interaction: Spots and Dirt is removed automatically - no masks needed at least for the most damages. White balance is automatically corrected for each frame (as far as I know) and therefor consistent througout the movie (you can better see this in the comparison on Youtube further up). But perhaps that could also be achieved in Shotcut. In not accustomed to Shotcut enough to judge that right now.
I compiled a testvideo of 3 Minutes with some different scenes.
H264, CRF 15, Tune Grain, 800 MB
Syncing should be good in a few minutes. I don’t have enough space on my dropbox - at least not to have it stay there. You do not happen to have some space store it perhaps also as a resource for other users?
Thanks for that.
You can also use https://streamable.com to make the clips available on this forum.
No log in required, simply upload.
Then copy the url and paste it here.
Limits are 10 minutes max clip duration or 1GB in size.
1 Like
@mcconnor both your sample videos are available here.
https://drive.google.com/open?id=144i5uYJ3uZxC1CX86rF1iNFegKRvc3IQ
Users who might want to experiment with the denoising filters can download the videos.
1 Like
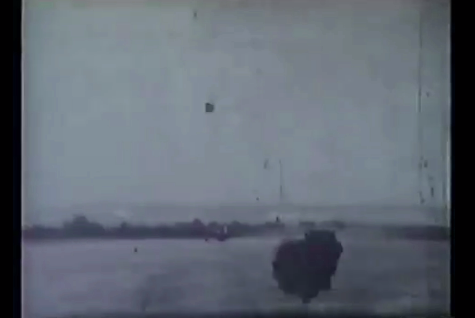
Although you are dealing with the restoration of old movies, I looked for utility for videos in nocturnal conditions with zoom. this video is from the year 2016 (it is not even analogical).
In this first example, I compare the original video with the Film9 restoration.
Later on, I will compare using SC with different filters and settings.
Try the combination of some filters to reduce background noise.
I used the filters:
Stabilize, brightness, contrast, hqdn3d, and white balance.
I also tried color correction, levels, and noise reduction, HSL, but due to my inexperience I didn’t get a better result, so I discarded these settings.
Still, I managed to improve the video a bit (at least according to my appreciation).
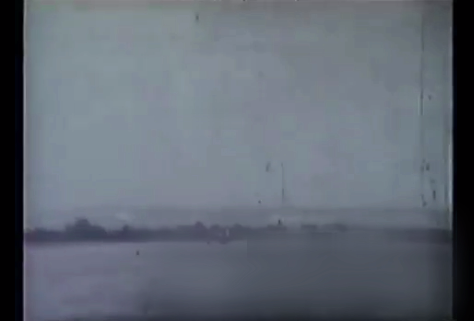
I finally put SC and Film9 face-to-face.
Film9 took less time (use the default settings and color analysis) and it seems that the result is better than my edition in SC, which I was working on for 30 minutes.
This test is not conclusive because on the one hand I don’t know how to take advantage of the SC filters that I dispose of (above) and possibly this will influence more than it seems in the final result.
It’s just an idle test.
They certainly don’t look miles apart but in both cases, some colour correction would improve the final result.
The real test will be the files that @mcconnor posted links to and @sauron mirrored on his google drive.
I didn’t download those files. I will take a look. I only saw this nightly video and thought of applying noise reduction as another application other than restoring old movies.
Thanks for the streamable suggestion - I will use that now. It won’t work for the lossless file with 2,5 GB but thanks to courtesy of @sauron this also will be available some time to mess around with. The H264 Video has been uploaded to Streamable now:
Super 8mm Film Raw Scan Sample without postprocessing (Kodak, filmed 1984), H264, CRF 15, Tune Grain
Yet another grain reduction attempt I did with Film9 when restoring an even older video in worse condition can be compared to the raw scan here:
Automated Super 8mm Film Restoration (Grau du Roi) with Film9, Avisynth and Virtualdub
@ejmillan - the Shotcut Edit is definitly an improvement over the original - the division line between the two videos was a bit far to the right so comparison on the main motive - the face of the singer - is hard. But I am with you - the Film9 version seems better.
The scans I uploaded are high enough resolution and bitrate and should provide some difficult scenes. I am eager to see what better experienced people than me can do with Shotcut to substantially improve on quality. As @ejmillan pointed out the effort that has to be put into the edit has to be taken into consideration…
Might the Spot Remove Filter be applied automagically? In principle I guess a comparison of three adjoining frames would have to be made. Objects bigger than only single pixels that appear only in one frame but not before or after would probably be spots, cracks or dust. They could be copied over by the corresponding region the frame before or after (whichever fits better) with some adjusting to compensate for movement and a bit blur to the edges… Like a combination of the Noise and the Spot filter… I guess there is nothing like that yet or you would have known.
The result is good. We just need to know how long you have been editing or restoring these clips.
You commented that you used Film9, I know it has some presets (basi, soft, medium and hard). I used these presets but the result was not brilliant (compared to your restorations).
Not long ago, I found this news by chance. I found it interesting and I think it is related to all this.
For the restoration of static images, I use the free Nik Collection filters for Gimp, as well as the G’mic filter collection.
https://nikcollection.dxo.com/ (This is the current version of paid, although there is the previous version that Google released that was free.)
In short, it has been a surprise of the good results you get in Film9 . Color, sharpness, stability, removal of granules and noise. These films have just been reborn.
Most of the time I spent establishing the workflow (especially realizing - with help from the Film9 authors - that the video from the scan service had doubled frames which is a real killer for restoration; finally removing them was easy with avisynth) and mastering the software. This was my first attempt in doing film restoration. I was completely new to this till last November - all that was to be a Christmas present.
I spent countless hours on getting to know the effect e.g. of grain in films and the like - at first I tended to remove too much at the beginning…
Now the workflow is established (like laid out in the YouTube description) most of the time is spent on
A) processing for motion compensation by Virtualdub2 plugin DeShaker - easily 10h for both passes for my 1h Canada film
B) cutting in Shotcut
The rest is more or less a bit tweaking the options in film9 here and there, judging the preview by the eye and then letting it process for some time…
Had to use color correction in Virtualdub2 because the one on Film9 was not doing what I needed but it’s auto white was a really mighty tool as I realized.
I still have some more films which I want to take on and I think it will be going pretty fast now to achieve the same or even better results.
Workflow:
I didn’t read the description. I just saw the video and was surprised.
About the workflow described below:
- Scan by medienrettung.de (24 fps)
- Removal of duplicates (to restore the 18 fps Super 8 frame by frame)
- First Processing with Film9 to remove grain and many scratches. At the same time Auto-White-Balance and interpolate to 25 fps for smoothness
- Color correction with Virtualdub2 (Color Mill Plugin). At the same time Stabilize with Deshaker Plugin (2-Pass)
- Second run with Film9 for a slight additional touch of sharpness (lowest possible setting)
- Cutting with shotcut
Apparently, it’s not such an automatic process. You have to jump from one software to another and surely this will not be applicable to other video scenarios.
The scanning of the analog film also has a big influence. In my case, family videos already have the defect of low-quality AD conversion.
Thank you for sharing this information.
You are right, it is not completely fire and forget. But nearly. It is “Automated” as in “not every scene has to be treated separately”. You set the options for the whole 1h film and click “render”. Afterwards you cut and get this result.
E.g. for the France video I took the settings from the Canada restoration and it worked out good. Manual intervention time for this second project (Canada was my first try) was probably under an hour (not counting cutting the movie). Atm I have no other raw material to test…
If the color correction of film9 had the possibility to seperatly influence the darks and midtones the switching of software wouldn’t have been necessary for me. 1 pass motion compensation of film9 is quite good but not as good as the DeShaker of Virtualdub2.
1 Like